

The free Neve theme is fast and clean and gives away more than most paid themes. Neve Pro is the part that turns it into a site-building tool.
That single sentence is the whole story, and it’s the thing most reviews get muddy about. Neve is two products stacked on top of each other, and you need both to follow this article. So before we touch a single setting, here’s the split that matters: the free Neve theme is the lightweight base, and Neve Pro is the paid plugin that bolts 16 toggleable modules onto it. Get the layers wrong and you’ll credit the wrong half for the features you’re paying for.
This post is a long, honest walk through what Neve Pro actually adds, module by module, how the two builders work, where the free theme already covers you, and a full developer reference with the hooks, the CLI command, and the shortcode worth knowing. Whether you run a one-page brochure site or an agency churning out client builds, by the end you’ll know exactly which half of Neve is doing the work.
Table of Contents
- What is Neve Pro?
- Free Neve vs Neve Pro: where the wall is
- The 16 modules, and what each one does
- The builders: header/footer grid and Custom Layouts
- Installation and setup
- Who Neve Pro is worth it for (and who can stay on free Neve)
- Don’t switch on every module
- Developer reference: hooks, CLI, shortcode, REST
- Performance: does Pro slow Neve down?
- Neve Pro vs Astra Pro vs GeneratePress Premium
- FAQ
- Final thoughts
What is Neve Pro?
Neve Pro is a premium WordPress plugin from ThemeIsle, the same shop behind Orbit Fox and a stack of other WordPress products. Its plugin header describes it plainly as "an add-on to Neve WordPress theme which offers exclusive premium features." That word "add-on" is doing a lot of work. Neve Pro is not a theme. It’s a plugin that needs the free Neve theme installed and active to do anything.
The free Neve theme is what people usually mean when they say "Neve." It’s on the WordPress.org repository, licensed GPL v2 or later, and it’s genuinely fast: a small CSS footprint, no jQuery dependency for the front-end, and a layout system built on WordPress hooks rather than a heavy page-builder runtime. You can ship a perfectly good site on free Neve and never pay a cent.
Neve Pro is the upsell, and it’s an honest one. Instead of a single monolithic feature dump, it ships as 16 separate modules you toggle on and off from the Neve dashboard. A header and footer builder booster. A theme builder called Custom Layouts. Advanced blog layouts. Boosters for WooCommerce, Easy Digital Downloads, Elementor, and LifterLMS. White label. Access restriction. A dashboard customizer that lets you rebrand the whole WP admin. The pitch is that you switch on only the modules a given site needs and leave the rest dormant.
You’ll find the GPL version of Neve Pro on GPL Times, and pairing it with the free theme from the WordPress repository is the quickest route to a working install you can poke at while you read.
One thing to set straight up front. ThemeIsle markets Neve heavily around its Starter Sites, the ready-made designed demos like "Marketing Agency" you import in a click. Those are real and they’re good. But importing one needs external fetch and file uploads, both of which were disabled on the locked-down host I tested against, so I couldn’t import one. The screenshots in this article are the admin side, the two builders, and the clean default Neve front-end. That’s deliberate, and it’s actually the more useful view, because the admin is where Neve Pro’s value lives. I’ll flag the Starter Sites reality again when it’s relevant.
Free Neve vs Neve Pro: where the wall is
Here’s the question everyone actually wants answered: what do I get for free, and what makes me reach for Pro?
What free Neve gives you. A complete, fast theme. You get the global layout controls, a Customizer with panels for Global, Blog, Header, Footer, Page Header, Typography, Colors, and Background Image. You get a basic header and footer builder. You get blog layout options, sidebar controls, and a per-page layout meta box. You get the full developer surface too: free Neve exposes 111 unique neve_ filter hooks plus a rich set of neve_ action hooks for injecting markup at layout positions. For a brochure site, a small blog, or a portfolio, free Neve is frequently enough on its own.
Where the wall is. The free header and footer builder is real but basic. Pro’s header_footer_grid module extends it with extra components like a mega menu and an advanced search. The free theme has no theme builder, so you can’t design a custom header for one post type and a different one for another without code. There’s no white label, no access restriction, no WooCommerce quick view or product comparison, no advanced blog layouts with reading time and related posts. Those all live in Pro modules.
The honest way to think about it: free Neve is the engine and chassis, Neve Pro is the toolkit you bolt on when you outgrow the defaults. A solo blogger who wants three header rows and a different footer on the contact page hits the wall fast. A developer comfortable in functions.php can push free Neve a long way before paying, because the hook system is generous.
| Capability | Free Neve | Neve Pro |
|---|---|---|
| Cost | $0 (GPL, wp.org) | Paid plugin, requires a license |
| Header/footer builder | Basic builder | Booster module: mega menu, advanced search, more components |
| Theme builder (custom templates) | No | Custom Layouts module |
| Blog layouts (reading time, related posts) | Basic | Blog Pro module |
| WooCommerce quick view / comparison / wishlist | No | WooCommerce Booster module |
| White label admin and theme | No | Dashboard Customizer + White Label modules |
| Developer hooks | 111 neve_ filters + action hooks |
Adds hfg_* and neve_admin_page_* |
| WP-CLI control | No | wp neve module |
Note: you need both halves installed. Activating Neve Pro without the free Neve theme present gets you nothing, because Pro has no front-end of its own. It’s a passenger on the theme.
The 16 modules, and what each one does
The module list is the heart of Neve Pro, so let’s go through all of them. Each one is a toggle in the Neve dashboard. On means its code and assets load; off means it sits dormant. Treat this as your shopping list: read down it and switch on only the rows that describe a site you’re actually building.
Header/Footer Booster (header_footer_grid). This is the booster for the header and footer builder. Free Neve has a builder; this module adds the premium components on top, including a mega menu, an advanced search component, a contact component, and the extra building blocks that make a multi-row navigation bar possible. If you want a logo on the left, a search and a phone number on a top bar, and a menu with a full-width mega dropdown, this is the module that makes it happen without custom code.
Blog Pro (blog_pro). Advanced blog layouts and post meta. It adds reading time, post sharing buttons, related posts, and richer control over how the archive and single post render. Switch it on if your blog is a real part of the site rather than an afterthought. Skip it on a store or a brochure site that barely blogs.
Custom Layouts (custom_layouts). The theme builder, and the single most powerful module here. It registers a custom post type and lets you design custom headers, footers, hooks, 404 pages, archive templates, and individual templates in the block editor, then assign each to a location with display conditions. There’s a [nv-custom-layout] shortcode to drop a layout anywhere too. We cover this in depth in the builders section below.
Custom Sidebars (custom_sidebars). Create extra widget areas beyond the theme defaults, each with its own display conditions. Useful when the blog needs one sidebar, the shop needs another, and a landing page needs none. Without this you’re stuck with the single sidebar the theme registers.
Access Restriction (access_restriction). Gate content by user role or login state. It’s a lightweight membership-style restriction baked into the theme layer, not a full membership platform, but it’s enough to hide a page from logged-out visitors or limit a section to a specific role. Handy, and also a footgun, which I’ll come back to.
Block Editor Booster (block_editor_booster). Block-editor enhancements built around ThemeIsle’s Otter Blocks. The module wires Neve Pro into Otter Blocks (and Otter Pro if you have it), so if you build content in the native editor rather than Elementor, you get Otter’s extra blocks and patterns working alongside Neve. (The raw-HTML and PHP custom-code editor is a separate feature that lives in Custom Layouts, covered below.)
Dashboard Customizer (dashboard_customizer). This is where Neve rebrands the WordPress admin itself. It bundles three editors: Admin Pages (build custom admin screens, backed by the neve_admin_page post type), an Admin Menu Editor (reorder and rename the admin menu), and an Admin Bar Editor (control the top toolbar). For agencies handing a site to a non-technical client, this turns a busy WP admin into something calmer.
Easy Digital Downloads Booster (easy_digital_downloads). Styling and options tuned for EDD stores. Only worth switching on if you actually run EDD. If you don’t sell digital downloads, leave it off.
Elementor Booster (elementor_booster). Adds Neve-specific widgets and options inside Elementor. If you build with Elementor Pro, this module hands you Neve’s header and footer controls and a few extra widgets right in the Elementor canvas. Pointless if you don’t use Elementor.
LifterLMS Booster (lifterlms_booster). Styling and layout options for LifterLMS course sites, so your lessons and course archives inherit Neve’s design controls. Course site? On. Anything else? Off.
Performance (performance). Performance-related options that complement Neve’s already-light base. The irony of a performance module living inside an addon that can add weight is not lost on me, and it’s exactly why the "don’t switch on everything" advice exists.
Post Type Enhancements (post_type_enhancements). This one is quietly clever. It applies Neve’s layout controls (sidebar, container width, header position, the per-entry meta box) to any custom post type, not just posts and pages. If a plugin registers a "Portfolio" or "Event" post type, this module gives those entries the same layout knobs everything else has.
Typekit Fonts (typekit_fonts). Adobe Fonts (formerly Typekit) integration, so you can use your Adobe font library in the theme’s typography settings. Niche, but if your brand lives on Adobe Fonts it saves a manual enqueue.
White Label (white_label). Rebrands the theme and the Pro plugin for clients: change the name, the author, the description, and hide ThemeIsle’s branding in the admin. Pair it with Dashboard Customizer and a client never has to know the site runs Neve.
WooCommerce Booster (woocommerce_booster). The big one for stores. It adds a product comparison table, a quick view modal, a wishlist, a sticky add-to-cart bar, and extra product gallery options. These are the features people install separate plugins for, so folding them into the theme is a real saving. We dig into the WooCommerce side more below; the official WooCommerce documentation is worth a read alongside it if you’re new to the platform.
That’s the user-facing set. The grep-verified count of module directories is 16, which includes an internal debug module used during development, so the practical set you’ll toggle is the 15 above. The point stands either way: it’s a menu, not a monolith.
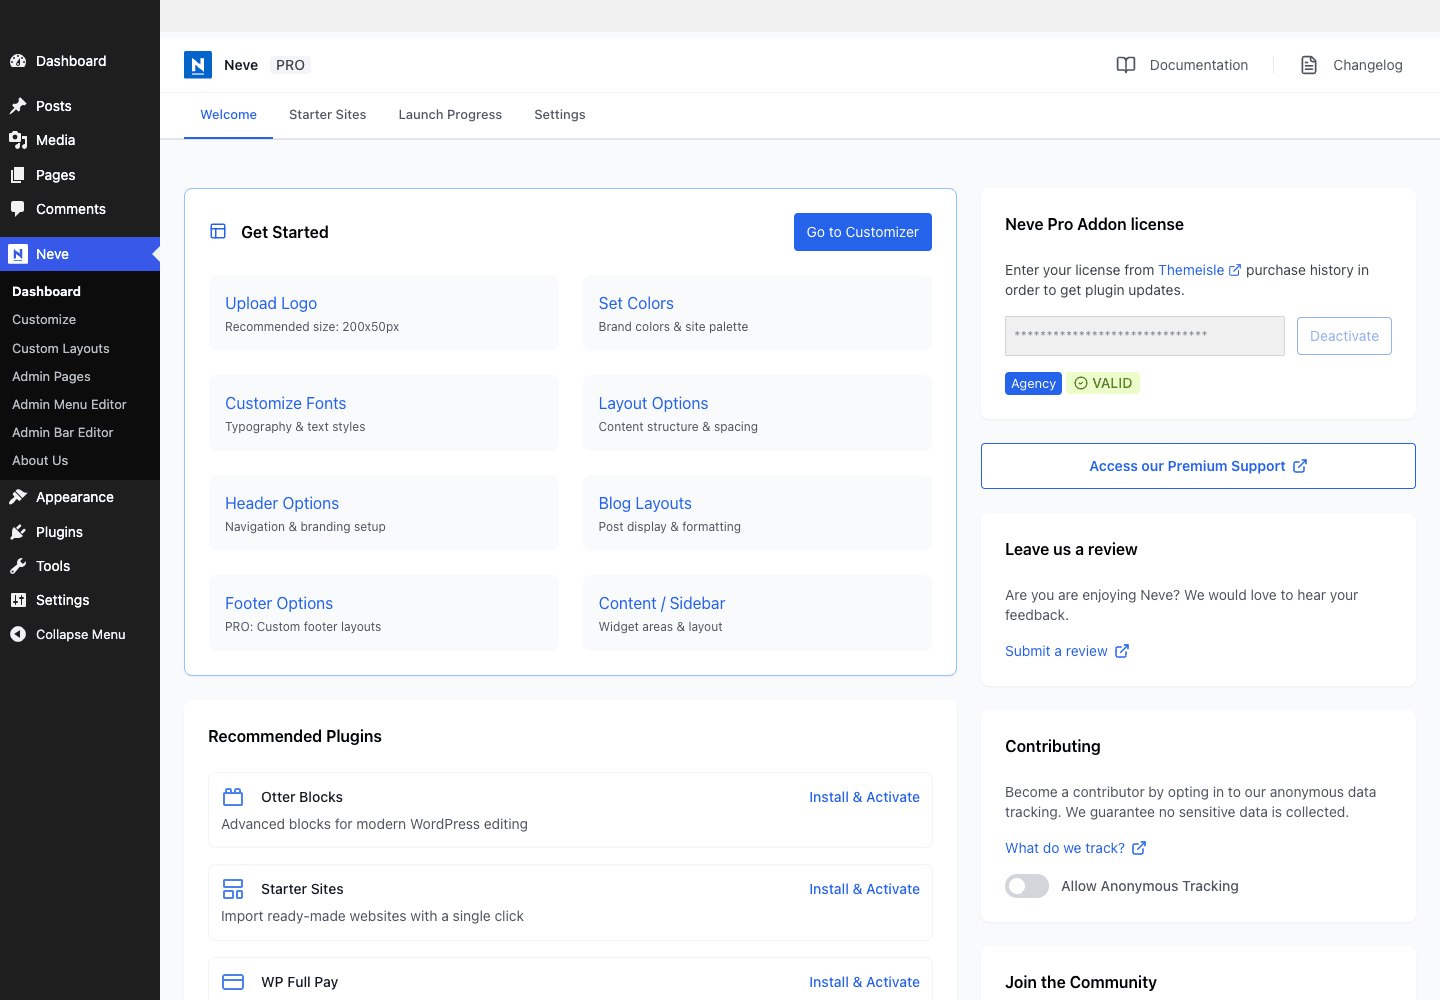
The dashboard above is where the toggles live, along with the Neve submenu (Dashboard, Custom Layouts, Admin Pages, Admin Menu Editor, Admin Bar Editor, About Us) and the license status. On my test install the license read "Agency VALID," which is the tier that unlocks white label and the unlimited-site count.
The builders: header/footer grid and Custom Layouts
Two modules carry most of Neve Pro’s day-to-day value, and they’re both builders. They work in completely different places, so it’s worth understanding which is which.
The header and footer builder
The header builder is the one you’ll use first, and it’s the strongest feature in the whole product. It lives inside the Customizer, not on a separate admin page. Open the Customizer and a builder bar docks at the bottom of the live preview.
That bar has a Desktop/Mobile toggle so you can design each breakpoint separately, three rows (Top, Main, Bottom), and a palette of components you drag into the rows. The free theme gives you the core components. The header_footer_grid Pro module adds the premium ones: Logo and Site Identity, Primary Menu, Advanced Search, Button, Contact, HTML, and the mega menu options.

The flow goes like this. You want to build a header with a thin top bar carrying a phone number and a search box, then a main row with the logo and the menu. So you drop the Contact component and the Advanced Search component into the Top row, drop Logo and Primary Menu into the Main row, and watch the preview redraw live. Each component has its own settings panel (alignment, spacing, color) that opens when you click it. The whole thing takes about two minutes once you’ve done it once, which is the bit that sounds fiddly but really isn’t.
Tip: design the Mobile layout separately. The Desktop/Mobile toggle isn’t cosmetic. A mega menu that looks great on desktop becomes a usability problem on a phone, so the builder lets you swap it for a hamburger and a simpler row on mobile.
The footer builder works the same way, in the same Customizer bar, with footer-appropriate components. Between the two, you rarely need to touch a header or footer PHP template by hand.
Custom Layouts: the theme builder
The header builder handles the site-wide chrome. Custom Layouts handles everything else, and it’s a proper theme builder. It’s the module that registers the neve_custom_layouts post type and gives you a block-editor canvas plus a "Custom Layout Settings" sidebar panel.
The key control in that panel is the Location selector. It decides where your layout renders, and the options are wide:
- Individual: render this layout on specific pages or posts you pick.
- Header and Footer: replace the builder-made header or footer with a fully custom one.
- Inside content: inject the layout into the middle of post or page content.
- Hooks: attach the layout to a specific theme action hook (this is the developer power-user option, and it maps directly to the
neve_action hooks listed below). - 404 Page: design a custom not-found page.
- Single Post and Single Page: template overrides for those view types.
- Search: a custom search-results layout.
- Archives: category, tag, and other archive templates.
- Maintenance Mode and Coming Soon Mode: full-screen takeover pages.
- Global: render the layout site-wide, on every page.
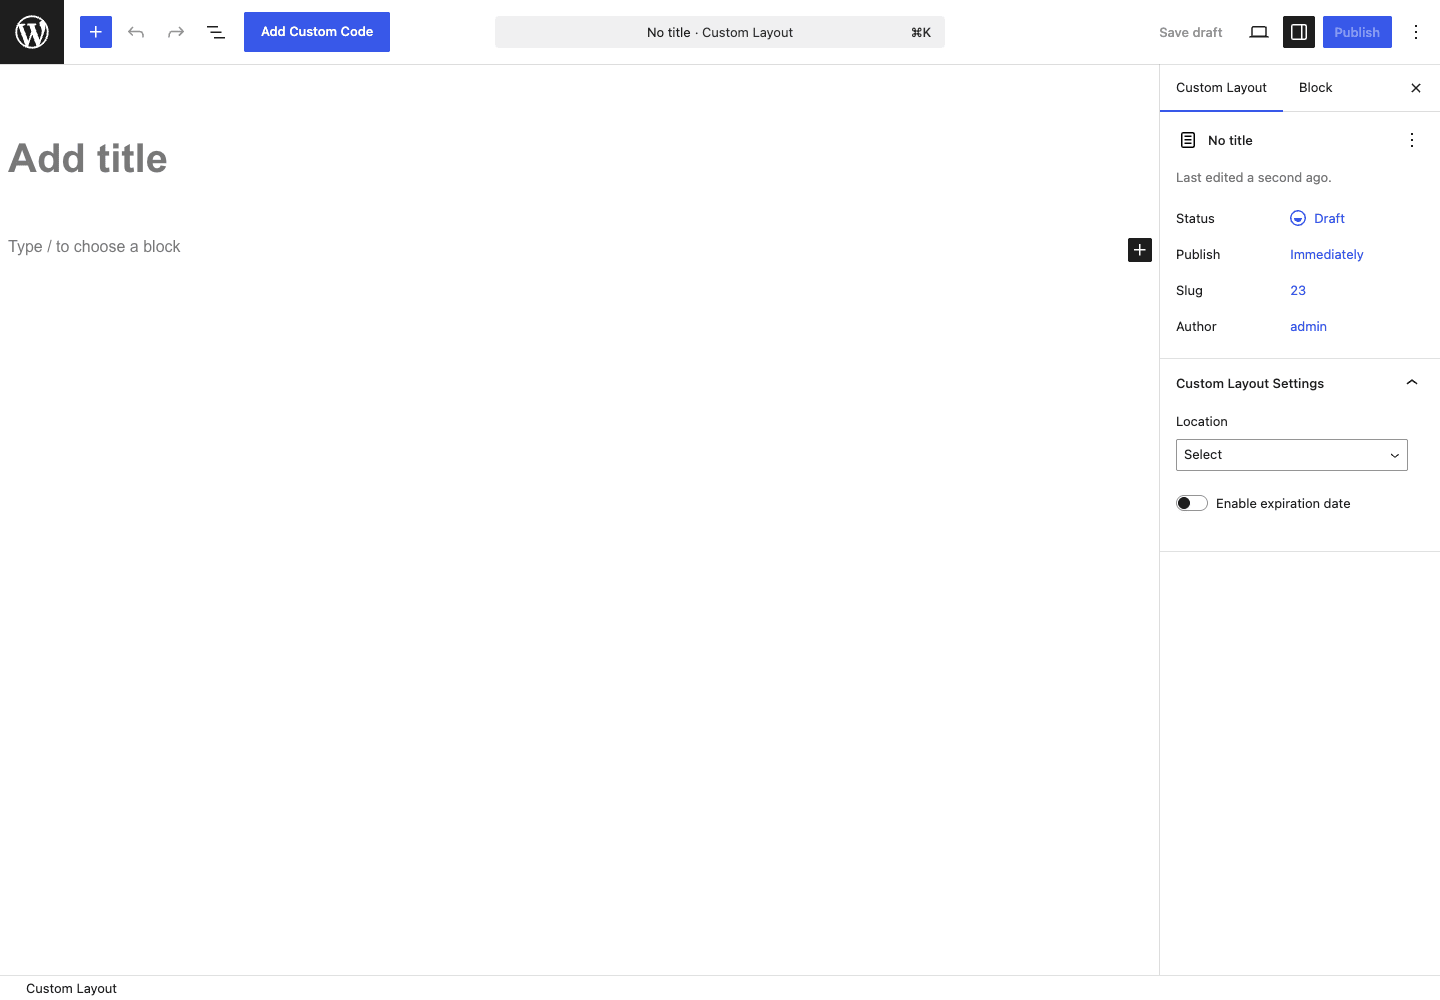
Alongside the Location selector you get an "Enable expiration date" option (the layout switches off automatically after a date you set, which is perfect for a seasonal banner) and an "Add Custom Code" button for layouts where blocks alone won’t cut it. There’s also the [nv-custom-layout] shortcode if you’d rather render a saved layout from inside other content.
Where this shines: the Hooks location. WordPress themes are full of action hooks, and free Neve exposes a generous set of them. Custom Layouts lets a non-developer attach a designed block layout to, say, neve_after_header_hook without writing a line of PHP. A developer can do the same thing in functions.php, but for a client who needs to drop a promo bar under the header next quarter, the Hooks location is the difference between a support ticket and a self-serve edit.
Installation and setup
Getting Neve Pro running is a three-step job, and the order matters.
- Install the free Neve theme. Go to Appearance » Themes » Add New, search for Neve, install and activate it. This is the base, and without it Pro does nothing. (You can also upload the theme zip from the WordPress repository if your host blocks the theme directory.)
- Install and activate the Neve Pro Addon plugin. Upload it under Plugins » Add New » Upload Plugin, then activate. It’ll appear as a plugin, separate from the theme.
- Add your license. Open the Neve dashboard at Neve » Dashboard and enter your license key. The license is what flips the modules from "available" to usable. With a valid key the dashboard shows your tier (Personal, Business, or Agency).
Once the license is valid, head to the modules area of the Neve dashboard and switch on the modules you need. The toggle is instant; there’s no separate "install" step per module because the code already ships in the plugin. Turning a module on tells Neve to load it; turning it off tells Neve to skip it.
Heads-up: the Get Started onboarding in the dashboard offers cards for Upload Logo, Set Colors, Customize Fonts, Layout Options, Header Options, Blog Layouts, Footer Options (marked PRO), and Content/Sidebar. Walk through these once on a new site. They’re shortcuts into the relevant Customizer panels, not a separate wizard, so you can also ignore them and go straight to the Customizer if you know where you’re headed.
About Starter Sites. The dashboard has a Starter Sites tab with the ready-made designs. Importing one needs external fetch (Neve pulls the demo content and any required plugins from ThemeIsle’s servers) and file upload permissions on your host. On a locked-down sandbox, that import won’t complete, which is exactly what happened on my test host. The Customizer can live-preview a starter site design without importing it, so you can see the look, but the content won’t land until you’re on a host that allows the fetch. If you’re on standard shared or managed hosting, the import works fine; just know it’s the one step that can fail on a restricted environment.
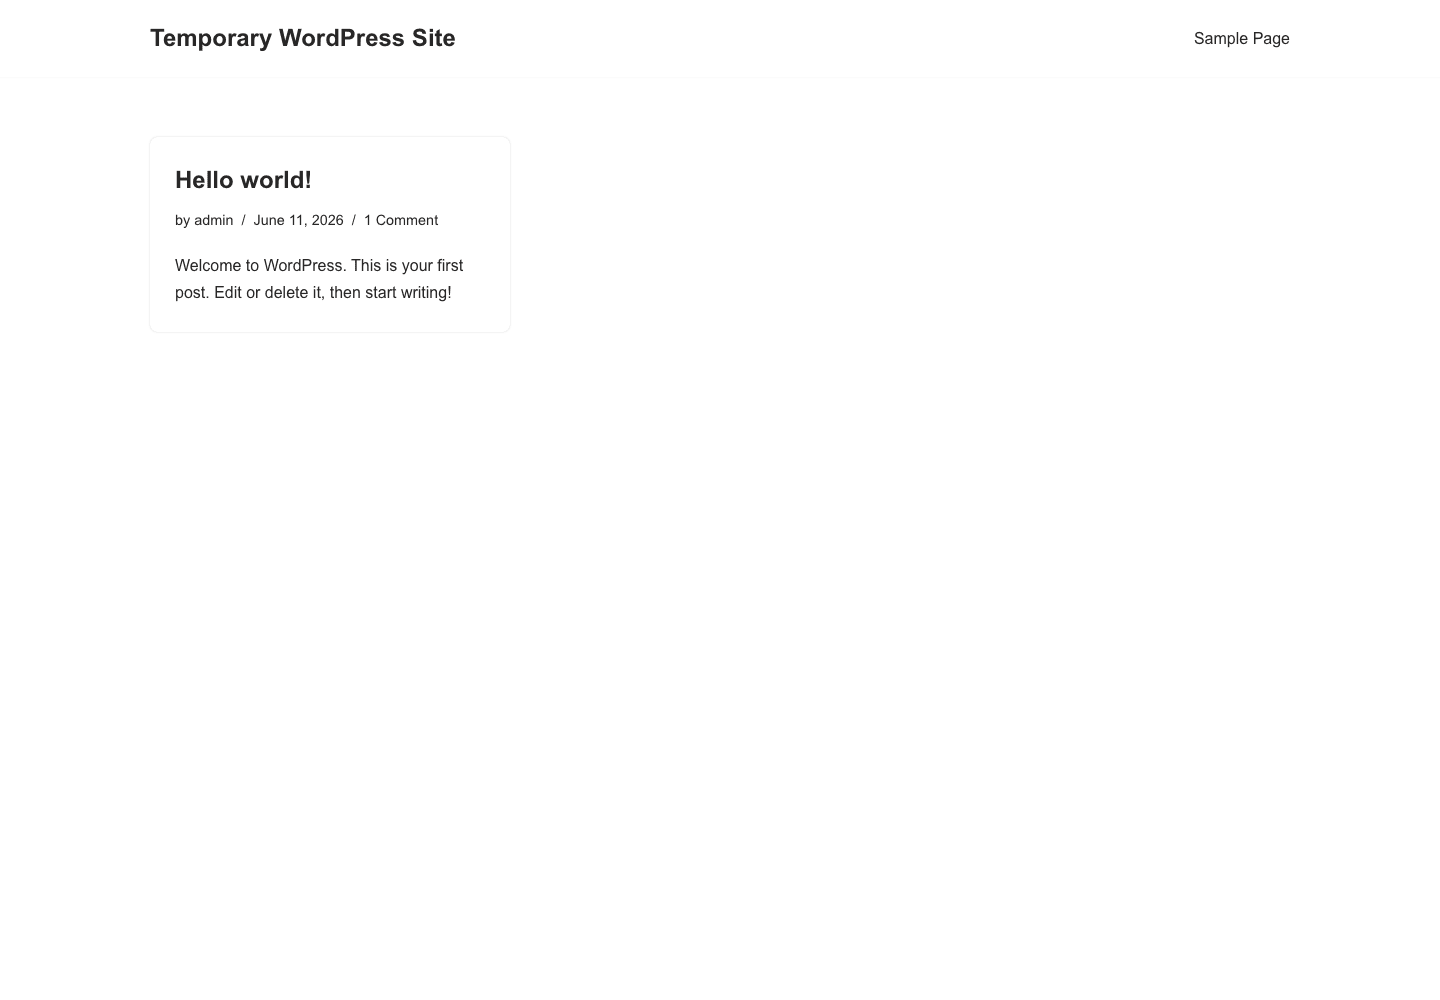
The front-end above is the clean default Neve blog, not an imported Starter Site. I’m showing it on purpose: it’s a fair picture of how light the base is before you add any design. The polished agency and shop demos you’ve seen in ThemeIsle’s marketing are Starter Sites layered on top of exactly this.
Who Neve Pro is worth it for (and who can stay on free Neve)
Not every site needs Pro. Here’s how I’d sort it, by the kind of site you’re running.
The agency building client sites. This is the clearest yes. The White Label and Dashboard Customizer modules let you hand over a site with no ThemeIsle branding and a tidied-up admin, and the Agency license tier covers unlimited installs. If you ship more than a handful of sites a year, the per-site math favors Pro quickly, and white-labeled handoffs look more professional than a client googling "what is Neve."
The WooCommerce store. Another strong yes. The WooCommerce Booster module folds quick view, a product comparison table, a wishlist, and a sticky add-to-cart bar into the theme. Those are four features people routinely install four separate plugins for, each adding its own assets. Consolidating them under one module you can tune is genuinely worth the license on a store of any size.
The serious blogger. A maybe leaning yes. Blog Pro adds reading time, related posts, sharing, and richer archive layouts. If the blog is the business, that polish matters and Pro pays off. If you publish once a month, free Neve’s blog options are probably enough.
The course creator. Yes if you’re on LifterLMS. The LifterLMS Booster gives your courses and lessons Neve’s layout controls instead of LifterLMS’s default styling. Without LifterLMS, this reason evaporates.
The one-page brochure or portfolio site. This is the honest "stay on free." A single landing page, a contact form, maybe an about page. Free Neve’s basic header builder and layout controls cover that completely. Paying for 16 modules to use zero of them makes no sense, and I’d rather tell you that than pretend everyone needs Pro.
The developer hand-coding a bespoke site. It depends on how much you want to write yourself. Free Neve’s 111 filter hooks and its action hooks give you a lot of room to extend in functions.php. If you’d rather hand non-technical edits to a client through the Custom Layouts builder, Pro earns the license. If you’re comfortable owning every template in code, you may not need it.
Don’t switch on every module
Here’s the mistake I see people make, and it’s the one that quietly undoes the reason they chose Neve in the first place.
Neve’s entire reputation is built on being fast and light. The free theme ships a small CSS footprint and skips the heavy runtime that bloats a lot of multipurpose themes. Then someone buys Pro, opens the dashboard, sees 16 modules, and flips every single one on "just in case." That’s the trap.
Each module loads its own code and its own assets. Switch on the WooCommerce Booster, the EDD Booster, the LifterLMS Booster, and the Elementor Booster on a site that runs none of those plugins, and you’ve added weight for features with nothing to act on. You’ve made the fast theme you chose for speed slower, for zero benefit. The module toggles exist precisely so you don’t do this. They’re an opt-in list, not a checklist to complete.
There’s a second, sharper version of the same mistake with the white-label and access modules. Misconfigure Access Restriction and you can lock yourself, or worse, your customers, out of content you meant to keep open. Test every restriction rule while logged out in a private window before you trust it. And White Label hides ThemeIsle’s branding and update notices, which is great for a client handoff and terrible if it means you forget the theme and plugin even have updates pending. A site running on hidden, stale code is a security problem waiting to happen.
The fix is simple discipline. Enable only the modules a given site actually uses. Leave the rest off. Run a speed test after launch and after any module change, so you catch when something you switched on starts costing load time. Treat the dashboard like a dimmer, not a switch you leave on.
Developer reference: hooks, CLI, shortcode, REST
Neve’s developer surface is split across the two layers, and it’s deeper than most themes. Here’s what’s worth knowing, all verified against the source.
Reading theme options with Mods::get()
The free theme stores its settings as theme mods with a neve_ prefix, and the canonical way to read one in a child theme is the Mods::get() helper. It takes the key and a default:
use Neve\Core\Settings\Mods;

// Read a Neve theme mod, falling back to a default if it's unset.
$container_width = Mods::get( 'neve_container_width', 1170 );

if ( $container_width > 1400 ) {
    // Do something for very wide layouts.
}
This is preferable to calling get_theme_mod() directly, because Neve’s helper handles the prefixing and the responsive-value structure some mods use. There are neve_get_* helper functions too for specific values.
Injecting markup with the layout action hooks
The free theme’s layout is a chain of action hooks, and this is the system the Custom Layouts "Hooks" location targets under the hood. The most useful ones are neve_before_header_hook, neve_after_header_hook, neve_before_content, neve_after_content, neve_after_primary, neve_after_post_content, neve_after_posts_loop, neve_before_footer_hook, and neve_after_footer_hook.
Dropping a promo bar right under the header is a few lines:
add_action( 'neve_after_header_hook', function () {
    if ( is_front_page() ) {
        echo '<div class="site-promo-bar">Free shipping on orders over $50.</div>';
    }
} );
That’s the same outcome a non-developer gets by building a block layout and assigning it to the Hooks location with neve_after_header_hook selected. Same hook, two ways in.
Pro hooks: hfg_* and neve_admin_page_*
Neve Pro adds its own filters. The header-footer-grid module exposes hfg_* filters such as hfg_logo_image_size, hfg_page_header_row_classes, and hfg_page_header_wrapper_class for adjusting the builder output. So if you need to tweak the logo’s rendered size globally:
add_filter( 'hfg_logo_image_size', function ( $size ) {
    return 'full'; // Serve the full-size logo instead of the default.
} );
The Dashboard Customizer module exposes neve_admin_page_* hooks for its Admin Pages feature: filters such as neve_admin_page_icons, neve_admin_pages_capability, neve_admin_page_title, and neve_admin_page_post_type_args, plus a neve_admin_page_content_output action that fires as a custom admin page renders. To change which capability is required to view a custom admin page:
add_filter( 'neve_admin_pages_capability', function () {
    return 'edit_pages'; // Let editors, not just admins, see the page.
} );
There’s also a neve_after_custom_layout action that fires after a Custom Layout renders, useful for appending tracking or related-content markup to a built layout.
The WP-CLI command
Here’s a genuinely distinctive feature: Neve Pro ships a WP-CLI command. Most theme addons have none. Neve Pro registers wp neve module (and a wp neve module setting subcommand) so you can enable or disable modules and manage their settings from the command line. That’s a real win for anyone scripting site setups or managing modules across many sites.
# Enable the WooCommerce Booster module
wp neve module enable woocommerce_booster

# Manage a module setting
wp neve module setting ...
If you provision client sites from a script, being able to flip the exact module set per site without clicking through the dashboard is the kind of thing that saves hours over a year. It puts Neve Pro in rare company alongside the few theme frameworks that bothered with a CLI at all.
The shortcode and the custom post types
There’s one Pro shortcode, [nv-custom-layout], which renders a saved Custom Layout wherever you place it. Pass it the layout you want and you can drop a designed block layout inside post content, a widget, or another template.
Neve Pro registers two custom post types: neve_custom_layouts (the Custom Layouts theme-builder templates) and neve_admin_page (the custom admin screens from the Dashboard Customizer’s Admin Pages feature). Both are admin-facing rather than public content types.
REST endpoints
Neve Pro does register REST routes, under its own NEVE_PRO_REST_NAMESPACE constant. You’ll find register_rest_route calls across the Custom Layouts, Access Restriction, Dashboard Customizer (admin bar and admin menu editors), LifterLMS Booster, and mega menu code. To be clear about what these are: they’re internal endpoints that power the plugin’s React-based admin interfaces and module features. They are not a public content API you’d build a headless front-end against. If you’re looking for documented WordPress REST patterns to build your own integrations, the WordPress developer reference is the place to start; Neve Pro’s routes are for its own admin, not for you to consume.
Performance: does Pro slow Neve down?
The short answer is that it can, and whether it does is entirely up to you.
Free Neve is fast because it’s disciplined about what it loads. Neve Pro is a plugin, and every active module adds some code and, in many cases, front-end assets. The Performance module aside, none of the modules make the theme faster; they add features, and features have a cost. So the question isn’t really "does Pro slow Neve down," it’s "how many modules have you switched on, and do you use them all?"
This is why the module-toggle design matters so much. A store that runs only the WooCommerce Booster and the header builder carries roughly the weight of those two features. A site with all 16 modules on, half of which have no matching plugin to act on, carries dead weight for nothing. The architecture is set up to let you keep Pro lean; the failure mode is purely user-created.
A few practical notes on compatibility. Neve Pro needs a current PHP release as its floor, and the WooCommerce Booster expects a reasonably current WooCommerce install rather than an ancient one. On the conflict front, the most common issues come from running the Elementor Booster without Elementor, or the LifterLMS Booster without LifterLMS; those modules expect their partner plugin and won’t do useful work alone, so leave them off if the partner isn’t installed.
The realistic verdict: a sensibly configured Neve Pro site stays close to free Neve’s speed because you’ve only switched on what you use. A kitchen-sink config loses that advantage. If you bought Neve for speed, the responsibility to keep it fast moves to you the moment you activate Pro, and the dashboard gives you every toggle you need to honor that.
Neve Pro vs Astra Pro vs GeneratePress Premium
Neve Pro plays in the fast-theme-framework space, and its two obvious rivals are Astra Pro and GeneratePress Premium. All three follow the same broad model: a free, lightweight base theme on wordpress.org, plus a paid addon that adds modules. The differences are in the details and the approach.
The free base. All three start from a free theme that costs $0 under the GPL. That’s worth saying plainly, because it means you can evaluate the base of any of the three before paying. Free Neve, free Astra, and free GeneratePress are all genuinely usable on their own; the paid tier is the modules.
The addon model. Astra Pro is a single addon plugin that unlocks modules you toggle, much like Neve. GeneratePress Premium takes a similar module approach, with a famously small footprint and a developer-leaning reputation. Blocksy Companion Premium is the newer challenger with a content-block-driven feel. Neve Pro’s distinguishing structure is its 16 modules plus two builders.
The numbers that actually differ. Neve Pro adds 16 modules. The free Neve theme exposes 111 unique neve_ filter hooks plus its action hooks, which is a deep developer surface for a free theme. Neve Pro registers 2 custom post types, an internal REST surface, and crucially a wp neve module WP-CLI command, all bolted onto a base theme that stays $0. That CLI is the one spec where Neve genuinely stands apart: neither Astra Pro nor GeneratePress Premium ships a comparable command for toggling modules from the terminal, so if you script site provisioning, that’s a concrete, measurable edge.
I’m not going to quote exact subscription prices for the rivals, because vendor pricing shifts and a number I print today goes stale. What I’ll say is that all three sit in the same general bracket and all three start from a $0 free base, so price is rarely the deciding factor. The deciding factors are the WooCommerce feature depth (Neve’s WooCommerce Booster is strong), the white-label story (Neve’s Agency tier is generous here), and whether the CLI matters to your workflow. If you want a deeper look at the rivals, our Astra Pro customization guide, GeneratePress Premium review, and Blocksy Companion Premium review each go module by module.
My honest take: for a developer who scripts setups or an agency that white-labels, Neve Pro’s CLI and Agency tier tip it. For a single hand-built site where you live in code anyway, GeneratePress’s smaller footprint is appealing. For a store, Neve’s WooCommerce Booster is the feature I’d weigh heaviest. They’re close enough that the right answer is "whichever module set matches your sites."
FAQ
Do I need the free Neve theme to use Neve Pro?
Yes, and this trips people up constantly. Neve Pro is a plugin add-on with no front-end of its own. Install and activate the free Neve theme first, then activate Neve Pro. Without the theme, the plugin has nothing to extend and you’ll see no features.
Is the free Neve theme actually usable, or is it crippled to push the upsell?
It’s genuinely usable, and that’s the surprising part. Free Neve gives you the full layout system, a basic header and footer builder, the Customizer panels, blog layout options, and 111 filter hooks. Plenty of small sites ship on free Neve and never need Pro. The wall is real (no theme builder, no white label, no WooCommerce quick view), but the free side isn’t a crippled trial.
Can Neve Pro replace WooCommerce extension plugins?
Partly, and this is one of its better arguments. The WooCommerce Booster module covers quick view, a product comparison table, a wishlist, and a sticky add-to-cart bar, which are four features people often install as separate plugins. It won’t replace a subscriptions or bookings plugin, but for the common store-polish features, yes, it consolidates several plugins into one module.
Will switching on all 16 modules slow my site down?
It can, and it’s the most common mistake. Each active module loads its own code and assets. Turning on modules you don’t use (an EDD booster on a site with no EDD, say) adds weight for nothing and undermines Neve’s whole speed advantage. Enable only what you use, and re-test your speed after any change.
Is the Access Restriction module a real membership system?
No, and you should size your expectations accordingly. It gates content by role or login state, which is enough to hide a page from logged-out visitors. It is not a full membership platform with billing, drip content, or tiered plans. If you need real memberships, use a dedicated plugin and treat Access Restriction as a lightweight gate.
What does White Label actually hide, and is it risky?
It rebrands the theme and plugin (name, author, description) and hides ThemeIsle’s branding in the admin, which is great for client handoffs. The risk is that it can also obscure update notices, so a white-labeled site can drift onto stale code without anyone noticing. If you white-label, put update checks on a calendar.
Does Neve Pro work with Elementor?
Yes, through the Elementor Booster module, which adds Neve widgets and the theme’s header/footer controls inside the Elementor canvas. It only makes sense if you actually build with Elementor; switching it on without Elementor installed does nothing useful. Pairing it with Elementor Pro gives you both the page builder and Neve’s layout controls in one place.
Can I manage Neve Pro from the command line?
Yes, and it’s a standout feature. Neve Pro registers a wp neve module WP-CLI command (with a wp neve module setting subcommand) so you can enable, disable, and configure modules from the terminal. That’s rare for a theme addon and a real time-saver if you provision sites from scripts.
Will my Custom Layouts break if I switch themes?
The Custom Layouts you build live in the neve_custom_layouts post type, which Neve Pro registers. Switching away from Neve means the Pro plugin’s templates no longer render on the front-end, because the rendering depends on Neve’s layout hooks. The layout records stay in your database, so if you return to Neve they come back, but plan a theme switch as a real migration, not a flip.
Does the Starter Sites import always work?
Usually, but not on locked-down hosts. Importing a Starter Site needs external fetch (Neve pulls demo content and required plugins from ThemeIsle’s servers) and file upload permissions. On a restricted sandbox the import can stall, which is why the screenshots here are the admin and builders rather than an imported demo. On standard hosting it works fine.
Final thoughts
After a week of poking at every module and both builders, my read on Neve Pro is that it’s an honest add-on done well. The free theme is fast and complete enough that I’d happily ship a small site on it alone. Neve Pro is what you reach for when a site outgrows the defaults, and the module-toggle design means you can grow into it one feature at a time instead of swallowing a monolith.
The header builder is the highlight, the Custom Layouts theme builder is the feature that turns Neve from a theme into a site-building tool, and the WooCommerce Booster is a real money-saver for stores. The CLI is the quiet surprise that developers will appreciate. The footguns are equally honest: it’s easy to over-enable modules and slow down the very theme you bought for speed, and White Label can hide updates you need to see.
On pricing and where to get it: Neve Pro is sold by ThemeIsle in tiers (Personal, Business, and Agency), with the Agency tier unlocking white label and covering unlimited sites. The free Neve theme is genuinely free on the WordPress repository, so you can run the base at no cost forever and only pay when you need the modules. If you want the full module set to test against a real install, the GPL version of Neve Pro on GPL Times is the fastest way to get every module switched on and see which ones your site actually needs.
Buy it if you run a store, an agency, a serious blog, or a LifterLMS course site. Stay on free Neve if you’re shipping a brochure page and want to keep things lean. Either way, the rare and good thing about Neve is that both halves are worth respecting on their own terms.