

Every WooCommerce store eventually arrives at the same question: how do we actually take money? You can hand a customer a bank wire form and hope for the best, or you can install a payment gateway and let customers pay with whatever’s already in their wallet. For most stores, that answer ends up being the official WooCommerce Stripe Payment Gateway, because Stripe is the most-supported processor in the world and the WooCommerce plugin is maintained jointly by Stripe and Automattic, which means it gets fixed when something breaks.
This review walks through what the plugin does, what it doesn’t do, how to connect it, what each settings panel actually controls, every supported payment method (there are over twenty), how the webhook flow works, the developer hooks worth knowing, and the gotchas that bite real stores. By the end you should know whether this is the right gateway for your store and how to get it running without booking a developer.
Table of contents
- What the WooCommerce Stripe Gateway actually is
- Why Stripe over PayPal, Authorize.Net, or other gateways
- Who this plugin is for
- Every payment method supported
- Installation and connection
- The settings panels, one by one
- How a payment actually flows through the plugin
- The webhook setup that everyone gets wrong
- Apple Pay and Google Pay specifically
- Subscriptions and saved cards
- Optimized Checkout Suite and Adaptive Pricing
- Developer reference
- Logging and debugging
- Performance and security
- Common gotchas
- Pricing
- FAQ
- Final thoughts
What the WooCommerce Stripe Gateway actually is
The plugin is a bridge. On one side is WooCommerce, which owns the order, the customer, and the cart. On the other side is Stripe, which actually moves the money. The Stripe Gateway plugin turns "customer hit Place Order" into "Stripe charged $49.99 against this card and credited your bank account," then writes the result back into the WooCommerce order.
It is the official integration. Stripe maintains it directly. Automattic (which owns WooCommerce) co-maintains it. There are no third-party freelancers in the maintenance chain, which matters because payment bugs are a much higher class of bug than a broken contact form, and you want them fixed quickly.
The plugin is free on the WordPress.org repository. Stripe charges per transaction (typically 2.9% + $0.30 in the US, varies by country and method). There are no monthly plugin fees and no separate license cost.
Why Stripe over PayPal, Authorize.Net, or other gateways
The honest comparison.
Stripe vs. PayPal
PayPal is older and has higher recognition with end-customers, especially older demographics. PayPal also has stronger buyer protection that customers know about. On the other hand, PayPal’s WooCommerce integration historically had a more frustrating developer story (multiple gateways, naming confusion, deprecations) and PayPal redirects customers off your site for the actual checkout, which kills conversion on mobile. Stripe keeps the payment flow on your site (or in an embedded element), which converts noticeably better.
Most stores end up running both gateways. Stripe for the cards (the dominant flow), PayPal as a secondary option for customers who prefer it.
Stripe vs. Authorize.Net
Authorize.Net is the traditional US gateway, often bundled with merchant accounts from local banks. It works but its WooCommerce integration is creakier than Stripe’s, the fees are usually higher once you account for gateway + merchant account, and you cannot offer modern wallet payments (Apple Pay, Google Pay) without significant extra work. Stripe is the better default in 2026.
Stripe vs. WooPayments
WooPayments is Automattic’s own gateway, white-labeled on top of Stripe. So when you use WooPayments, you are actually using Stripe with an extra layer of WooCommerce branding (and an extra slice of the transaction fee going to Automattic). The WooCommerce Stripe Gateway gives you direct access to Stripe without that middle layer. For most stores, the direct Stripe integration is the cleaner choice; WooPayments makes sense only if you specifically want Automattic to handle support disputes for you.
Stripe vs. Square
Square is excellent for in-person retail (their card readers are the cleanest hardware on the market) and adequate for e-commerce. If you also run a physical store, Square’s integrated POS + online story is compelling. If you are e-commerce only, Stripe has more payment methods, more developer hooks, and a more responsive plugin.
Who this plugin is for
The audience splits roughly into three groups.
New store owners just launching
You set up the plugin once. You connect Stripe via OAuth (one button, no copy-pasting API keys), enable cards plus whichever wallets your audience uses, and forget it exists. Everything else in this article is for when you grow into needing it.
Established stores scaling up
You probably already have Stripe configured. The plugin gives you knobs for things you’ll start to care about: enabling buy-now-pay-later methods like Klarna, accepting ACH for high-value B2B orders, turning on Apple Pay and Google Pay properly (which requires domain verification), and wiring up webhooks so refunds, disputes, and subscription renewals reflect correctly in WooCommerce.
Developers integrating with custom flows
The plugin exposes over thirty filters and a dozen actions. You can intercept payment intents, modify the Stripe customer object, change webhook handling, route specific products through different Stripe accounts, and a lot more. This is the surface that makes Stripe Gateway worth using even for highly custom stores.
Every payment method supported
This is one of the headline reasons people pick Stripe. The plugin natively supports every payment method Stripe offers, with no separate add-on plugins required.
Card payments
The default. Visa, Mastercard, American Express, Discover, JCB, Diners Club. The card form is rendered as a Stripe Element (a Stripe-hosted iframe), which keeps you out of PCI-DSS scope. You never see the actual card number; Stripe does.
Wallets
- Apple Pay (Safari + iOS)
- Google Pay (Chrome + Android)
- Stripe Link (one-tap reuse of payment details across any Stripe-powered store)
- Amazon Pay (Amazon account checkout)
- Cash App Pay (US, via Cash App QR code or balance)
Buy Now, Pay Later
- Klarna
- Affirm
- Afterpay / Clearpay (Afterpay in US/AU/NZ, Clearpay in UK)
Bank debits
- ACH Direct Debit (US)
- Bacs Direct Debit (UK)
- BECS Direct Debit (Australia)
- SEPA Direct Debit (EU)
- ACSS Debit / Pre-Authorized Debit (Canada)
Local European payment methods
- Bancontact (Belgium)
- EPS (Austria)
- giropay (Germany)
- iDEAL (Netherlands)
- Multibanco (Portugal)
- Przelewy 24 / P24 (Poland)
- Sofort (multiple, deprecated path)
- BLIK (Poland)
Latin American methods
- Boleto (Brazil)
- OXXO (Mexico)
Asian methods
- Alipay (China)
- WeChat Pay (China)
That’s twenty-six distinct payment methods, all routed through a single Stripe account, all rendered as a unified checkout (the Optimized Checkout Suite, see below). You enable them per-method in the Payment Methods panel, depending on which countries you sell to.
The thing competitors can’t match is the breadth of buy-now-pay-later. Klarna, Affirm, and Afterpay alone can lift average order value by 30-50% on stores with higher-priced products because customers who can’t pay $400 today will happily commit to $100/month for four months.
Installation and connection
There are two ways to install the plugin: from inside WordPress (the gpltimes.com download) or from the WordPress.org repository. The result is the same plugin code.
Install
Plugins -> Add New -> Upload Plugin -> Install Now -> Activate. The plugin requires WooCommerce to be already active. If it’s not, the activation will fail and tell you to install WooCommerce first.
After activation, the plugin appears in the Plugins page like any other:
WooCommerce Stripe Gateway
Accept debit and credit card payments in 135+ currencies,
as well as Apple Pay, Google Pay, Klarna, Affirm, P24, ACH, and more.
Connect to Stripe
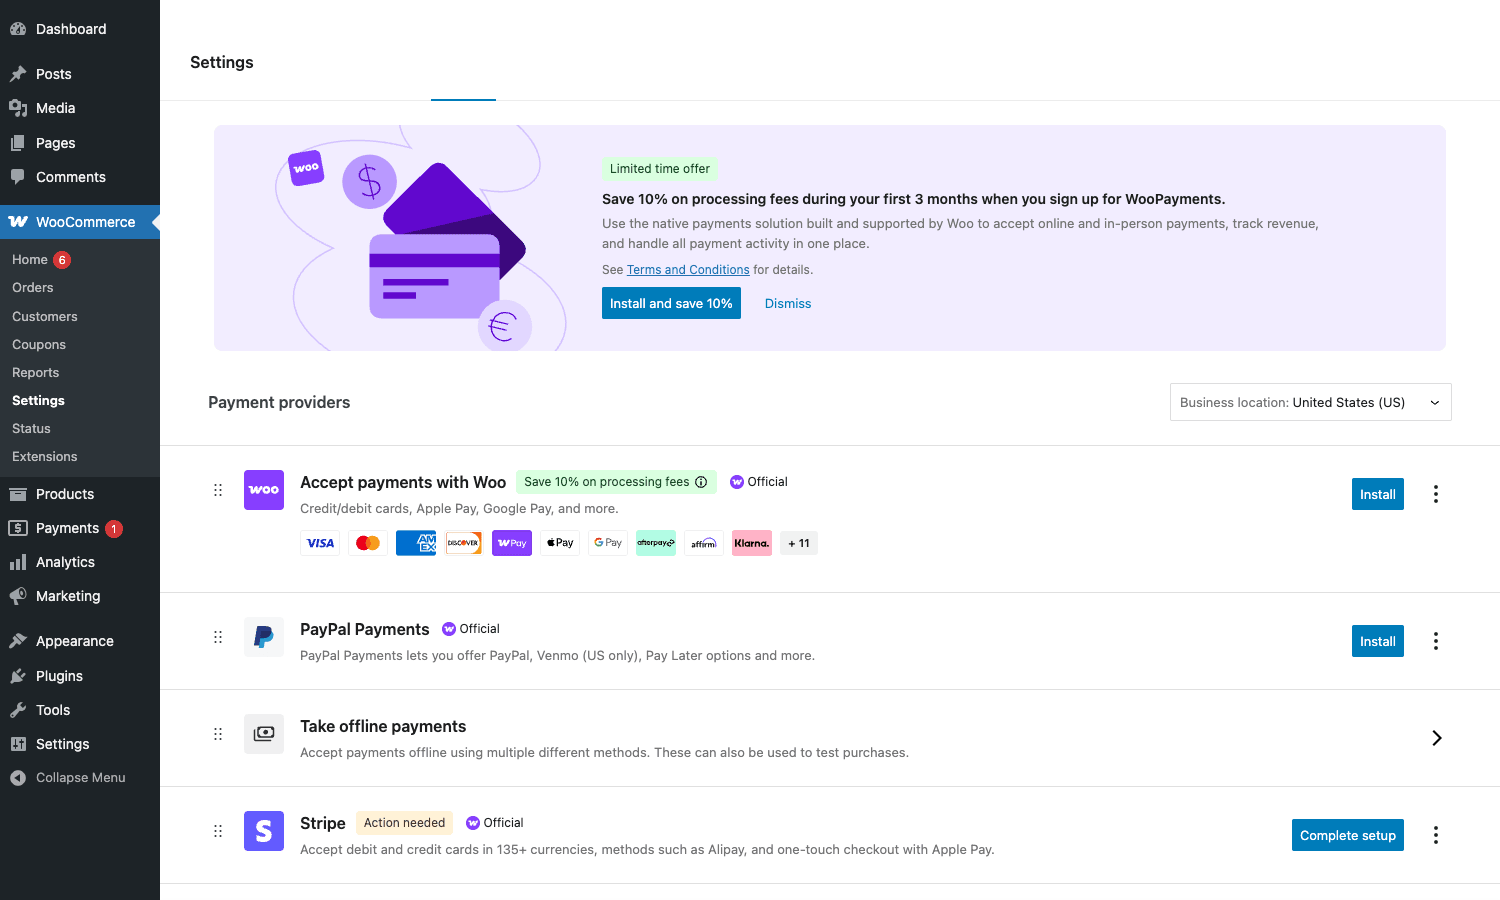
Go to WooCommerce -> Settings -> Payments. You’ll see a list of payment providers; Stripe will be in the list with a "Complete setup" button. Click it.
The next screen is the Stripe Get Started panel:
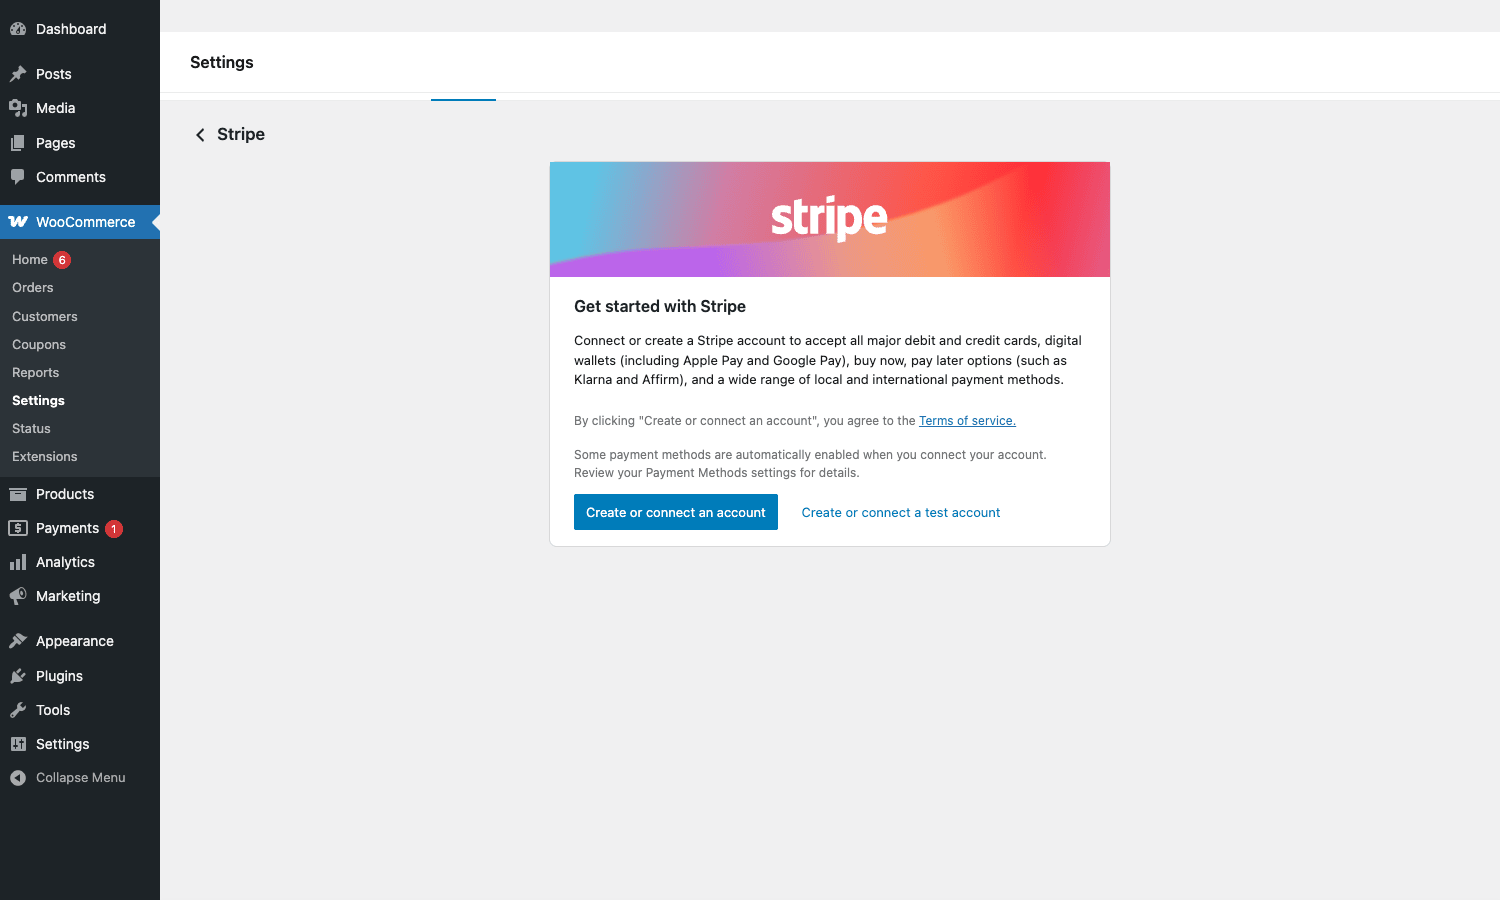
Two buttons. Create or connect an account is the live mode flow (real money). Create or connect a test account is for testing (Stripe test keys, no real charges). Use the test account first. You can always swap to live keys later.
Either button kicks off Stripe’s OAuth flow. You’re redirected to stripe.com, authorize the app, and redirected back. After the redirect, WooCommerce has your API keys (it never asks you to paste them manually if you use the OAuth flow) and the rest of the settings panels become functional.
Manual key entry (alternative)
If you want to paste keys directly instead of using OAuth, click the "Use legacy form" link in the corner of the Get Started screen. This shows you the old-style settings form with text fields for publishable_key, secret_key, webhook_secret, and the test-mode equivalents. You can find these keys in your Stripe dashboard under Developers -> API keys. Save and you’re connected.
The legacy form is useful in two scenarios: (a) you can’t complete the OAuth redirect (firewall, restrictive host) and (b) you want to use a Stripe Restricted Key with only specific permissions instead of the full account access OAuth grants.
The settings panels, one by one
Once connected, the Stripe section becomes a multi-panel React app with five tabs. Here’s what each one does.
Settings panel
The main configuration. Toggles for:
- Enable / disable Stripe (master switch).
- Test mode toggle (switch between live and test Stripe accounts).
- Title shown at checkout (what customers see; defaults to "Credit Card (Stripe)").
- Statement descriptor (what shows up on the customer’s bank statement; 5-22 characters, no special chars).
- Capture mode (immediate capture vs. authorize-only, then capture on order completion).
- Save payment information (allow customers to save cards for future purchases).
- Inline credit card form vs. Payment Element (legacy vs. new unified UI).
- Debug log toggle (writes verbose API request/response info to WC logs).
Payment Methods panel
A grid of toggle-on/off cards for every payment method described above. Each method shows: the icon, the supported countries, the supported currencies, and a toggle. For methods that need additional configuration (Bank Debits need a mandate URL, Bancontact needs business info), an inline "Set up" button takes you to the required form.
Some methods are mutually exclusive with others (you can’t run both the legacy card form and the unified Payment Element at the same time). The UI greys out conflicting toggles when one is on.
Webhooks panel
Stripe needs to tell your site when things happen asynchronously. Payment completed. Customer disputed a charge. Subscription renewed. Refund processed. The mechanism is webhooks: Stripe POSTs JSON to a URL on your site whenever an event happens.
This panel shows you:
- Your webhook URL (something like
https://your-store.com/?wc-api=wc_stripe). - Webhook signing secret (cryptographic key to verify incoming webhooks really come from Stripe).
- Last received webhook timestamp (so you can see whether webhooks are flowing).
If you used the OAuth connect flow, the webhook is registered automatically and you do nothing. If you entered keys manually, you have to register the webhook URL in your Stripe dashboard and paste the signing secret back into this panel.
Payments / Account panel
Read-only info about the connected Stripe account: business name, country, currency, account status. Plus links to manage your Stripe account directly. Useful for confirming you connected the right account (not your personal Stripe by mistake) and for checking which currencies your account is enabled to accept.
Customizations panel
CSS-level appearance controls. Color of the Pay button. Border radius. Font. Padding. These all flow into Stripe’s Payment Element so the embedded checkout matches your theme. You set them once; they apply across every payment method that uses the Payment Element.
There’s also a Branding section where you upload a logo (used in Stripe-hosted pages like the receipt email) and an icon (used in the Express Checkout button stack on mobile).
How a payment actually flows through the plugin
For a working mental model, here’s the end-to-end flow of a successful card payment.
- Customer lands on the checkout page. WooCommerce renders the cart total. The plugin enqueues Stripe.js (Stripe’s frontend SDK) and creates a Stripe Payment Element (an iframe-embedded card form).
- Customer fills in the card number. The actual card data is sent directly from the customer’s browser to Stripe’s servers. Your WooCommerce server never sees the card number. Stripe returns a payment method ID (a token like
pm_abc123) that represents this card. - Customer clicks Place Order. WooCommerce submits the form. The plugin intercepts the submission and tells Stripe "create a PaymentIntent for this amount, in this currency, using this payment method ID."
- Stripe processes the payment. Depending on the method, this might be instant (cards), require 3D Secure authentication (European cards), or take days (bank debits).
- Stripe returns a response. Either "succeeded" (charge complete), "requires_action" (3DS needs to happen), or "failed" (card declined).
- The plugin writes the order status. Success becomes a completed/processing WooCommerce order. Failure shows an error to the customer. Pending stays as "On hold" until a webhook resolves it.
- Webhook fires (for async methods). When the bank debit completes 3 days later, Stripe POSTs to your webhook URL. The plugin verifies the signature, finds the matching WC order, and updates the order status.
The plugin handles all of this without your involvement once configured. But knowing the flow helps you debug when something stalls: you can tell which step is failing by where the order is stuck in WooCommerce (sitting in "Pending payment"? Step 3 failed. Sitting in "On hold" indefinitely? Webhook isn’t firing).
The webhook setup that everyone gets wrong
Webhooks are the single most-misconfigured part of any Stripe + WooCommerce setup. Here’s the rule that prevents 90% of webhook problems:
If you use the OAuth connect flow, the webhook is created and signed for you. Don’t touch it.
If you entered API keys manually, you must:
- Go to your Stripe dashboard,
Developers -> Webhooks. - Create a new endpoint with the URL shown in the plugin’s Webhooks panel.
- Subscribe to at minimum these events:
payment_intent.succeeded,payment_intent.payment_failed,charge.refunded,charge.dispute.created,charge.dispute.closed. - Copy the Signing Secret (starts with
whsec_) and paste it into the plugin’s Webhooks panel.
If the signing secret is wrong or missing, the plugin rejects every incoming webhook as untrusted, and orders silently never update. Symptom: orders stay in "Pending payment" forever even though Stripe shows them as successful charges.
The plugin’s logs (next section) will tell you if webhooks are being rejected, but only if you have debug logging on. Turn it on the first day. You can turn it off once everything works.
Apple Pay and Google Pay specifically
These two get their own section because they require a setup step beyond just toggling a switch.
For Apple Pay to actually appear on iOS/Safari, your domain must be verified with Apple. The plugin handles this automatically by serving a verification file at https://your-store.com/.well-known/apple-developer-merchantid-domain-association. Apple’s servers fetch that file when you toggle Apple Pay on; if the file is served correctly (most hosts are fine), domain verification succeeds and the Apple Pay button appears at checkout.
Two things break this:
- Aggressive caching. If your CDN or page cache returns a 404 for the
.well-known/path, verification fails. Test withcurl https://your-store.com/.well-known/apple-developer-merchantid-domain-associationand confirm it returns content, not an error page. - Subdomains. Apple verifies the exact domain. If you’re on
shop.example.combut registered Apple Pay forexample.com, it won’t work. Re-register for the exact subdomain.
Google Pay has no domain verification step, but it does require HTTPS (no exceptions, even on staging) and the browser must support the Payment Request API (all modern Chrome/Edge do; older Safari does not).
The plugin renders both as Express Checkout buttons. They appear above the regular Place Order button on the cart page, the checkout page, and the product page (the last one is optional via wc_stripe_hide_payment_request_on_product_page filter, see Developer Reference).
Subscriptions and saved cards
If you also run WooCommerce Subscriptions, the Stripe Gateway plugin includes first-class subscriptions support. Recurring billing works for cards, SEPA, ACH, and most other methods. The plugin uses Stripe’s customer and saved payment method objects to bill the same card on each renewal.
For one-time orders, the "Save payment information to my account for future purchases" checkbox at checkout (toggleable in Settings) stores the card on the customer’s Stripe Customer object. Next checkout, the saved card appears as a "Use a previously saved card" option, and the customer doesn’t re-enter card details.
Saved cards are stored as Stripe payment method IDs, not as actual card data. Your WooCommerce database holds the ID; the actual card lives on Stripe. This is exactly what you want from a PCI compliance standpoint.
Optimized Checkout Suite and Adaptive Pricing
Two newer features worth understanding.
Optimized Checkout Suite (OCS)
The traditional flow had each Stripe payment method as a separate WooCommerce gateway in the checkout list ("Credit card", "Apple Pay", "Klarna" all shown as separate radio buttons). This works but it makes the checkout look cluttered if you’ve enabled five wallets and three BNPL providers.
The Optimized Checkout Suite consolidates this into a single Payment Element. The customer sees one "How would you like to pay?" panel that dynamically shows whichever methods are available for their region, device, and cart contents. iPhone user with Apple Pay? They see Apple Pay at the top. European customer with a high-value cart? Klarna appears. Cleaner, smarter, and converts better.
OCS is enabled by default for new installs. If you have an old install, the plugin shows a banner offering to enable it. There’s no downside to switching unless you have heavily customized your checkout CSS for the legacy individual gateways, in which case test on staging first.
Adaptive Pricing
Stripe can automatically convert prices into the customer’s local currency. A customer in Germany sees prices in EUR; a customer in Japan sees JPY. You configure your prices in your home currency once, and Stripe handles the FX conversion at the time of charge.
This is genuinely useful for international stores but has two caveats. First, the FX rate comes from Stripe’s mid-market rate with a small markup (you can configure the markup). Second, refunds happen in the home currency, so if a customer pays €100 and the rate moves before you refund, the customer may receive a slightly different amount back. Document this in your refund policy.
Adaptive Pricing is enabled by default for new installs in the Settings panel.
Developer reference
This is where the plugin." The hooks surface is extensive. Here are the ones you’re most likely to need.
Modifying the Stripe API request
wc_stripe_request_headers lets you add custom HTTP headers to every outbound Stripe request. Useful for telemetry, multi-tenant tracking, or sending a custom user-agent for compliance logging.
add_filter( 'wc_stripe_request_headers', function( $headers ) {
 $headers['X-Tenant-ID'] = get_option( 'my_tenant_id' );
 return $headers;
} );
wc_stripe_request_body filters the full request payload right before it’s sent. You can inject extra metadata, custom statement descriptors, or per-product Stripe Connect routing here.
add_filter( 'wc_stripe_request_body', function( $request, $api ) {
 if ( $api === 'payment_intents' && isset( $request['metadata'] ) ) {
 $request['metadata']['source'] = 'wordpress_site_42';
 }
 return $request;
}, 10, 2 );
wc_stripe_idempotency_key overrides how idempotency keys are generated. Stripe requires these to safely retry failed requests. The default is fine for almost everyone; override only if you have a specific tracing requirement.
Modifying the Stripe Customer object
wc_stripe_customer_metadata adds custom fields to the Stripe Customer object when WooCommerce creates one. Useful for storing your internal customer ID, segment, lifetime value, or other CRM data so it appears in the Stripe dashboard alongside payments.
add_filter( 'wc_stripe_customer_metadata', function( $metadata, $user ) {
 if ( $user ) {
 $metadata['wc_user_id'] = (string) $user->ID;
 $metadata['user_role'] = implode( ',', $user->roles );
 $metadata['signup_date'] = $user->user_registered;
 }
 return $metadata;
}, 10, 2 );
wc_stripe_owner_details filters the billing details (name, email, address) sent with each payment. Useful if you store the billing name differently from WooCommerce defaults, or want to use a different email address for Stripe receipts than the customer’s WooCommerce email.
add_filter( 'wc_stripe_owner_details', function( $details, $order ) {
 $details->email = $order->get_meta( '_billing_email_for_receipts' )?: $details->email;
 return $details;
}, 10, 2 );
Webhook handling
wc_stripe_webhook_received is fired for every incoming webhook, after the plugin has verified the signature and parsed the event. Hook into this to add custom side effects.
add_action( 'wc_stripe_webhook_received', function( $webhook_type, $notification, $order ) {
 if ( $webhook_type === 'review.opened' && $order ) {
 // Notify your fraud team via Slack
 wp_remote_post( get_option( 'slack_webhook_url' ), [
 'body' => json_encode( [
 'text' => "Stripe Radar flagged order #{$order->get_id()}",
 ] ),
 ] );
 }
}, 10, 3 );
wc_stripe_webhook_dispute_change_order_status controls whether a dispute (chargeback) webhook automatically changes the order’s WooCommerce status. Some stores prefer to handle disputes manually rather than letting orders auto-transition.
add_filter( 'wc_stripe_webhook_dispute_change_order_status', '__return_false' );
Saved cards and payment methods
wc_stripe_display_save_payment_method_checkbox toggles the "save card for next time" checkbox at checkout. Default is true if the gateway is configured to allow saved cards. You can override per-cart (e.g., always force save for subscription orders).
add_filter( 'wc_stripe_display_save_payment_method_checkbox', function( $show ) {
 if ( WC()->cart && WC()->cart->cart_contents_count > 0 ) {
 foreach ( WC()->cart->get_cart() as $item ) {
 if ( get_post_meta( $item['product_id'], '_force_save_card', true ) ) {
 return true; // force-show for products that need recurring billing later
 }
 }
 }
 return $show;
} );
wc_stripe_force_save_payment_method forces saving for a specific order regardless of the customer’s choice. Useful for products that require future re-charge.
Express Checkout (Apple Pay, Google Pay)
wc_stripe_hide_payment_request_on_product_page hides the Apple Pay / Google Pay button on product pages (it shows by default).
add_filter( 'wc_stripe_hide_payment_request_on_product_page', '__return_true' );
wc_stripe_show_payment_request_on_cart toggles it on the cart page (default true).
wc_stripe_show_payment_request_on_checkout toggles it on the checkout page (default false because the regular form is usually preferred).
Processing status
wc_stripe_allowed_payment_processing_statuses defines which WooCommerce order statuses are considered "still processable" by Stripe. Default is pending and failed. If you have a custom status like quote_accepted that should also be chargeable, add it here.
add_filter( 'wc_stripe_allowed_payment_processing_statuses', function( $statuses ) {
 $statuses[] = 'quote-accepted';
 return $statuses;
} );
REST API endpoints
The plugin exposes a small REST surface under /wp-json/wc/v3/wc_stripe/:
GET /accountreturns connection status + account info.GET/POST /account_keysto read or write the API keys (admin only).GET/POST /settingsto read or write the plugin settings.POST /connection_tokensto mint Stripe Terminal tokens for in-person card readers.GET /locationsto list Stripe Terminal locations.GET /orders/<id>for order-specific Stripe operations.GET/DELETE /tokensto manage saved cards.
These are guarded by WP REST nonces and capability checks. Use them when building admin dashboards or custom reports.
Logging and debugging
WooCommerce -> Status -> Logs is where Stripe issues show up.
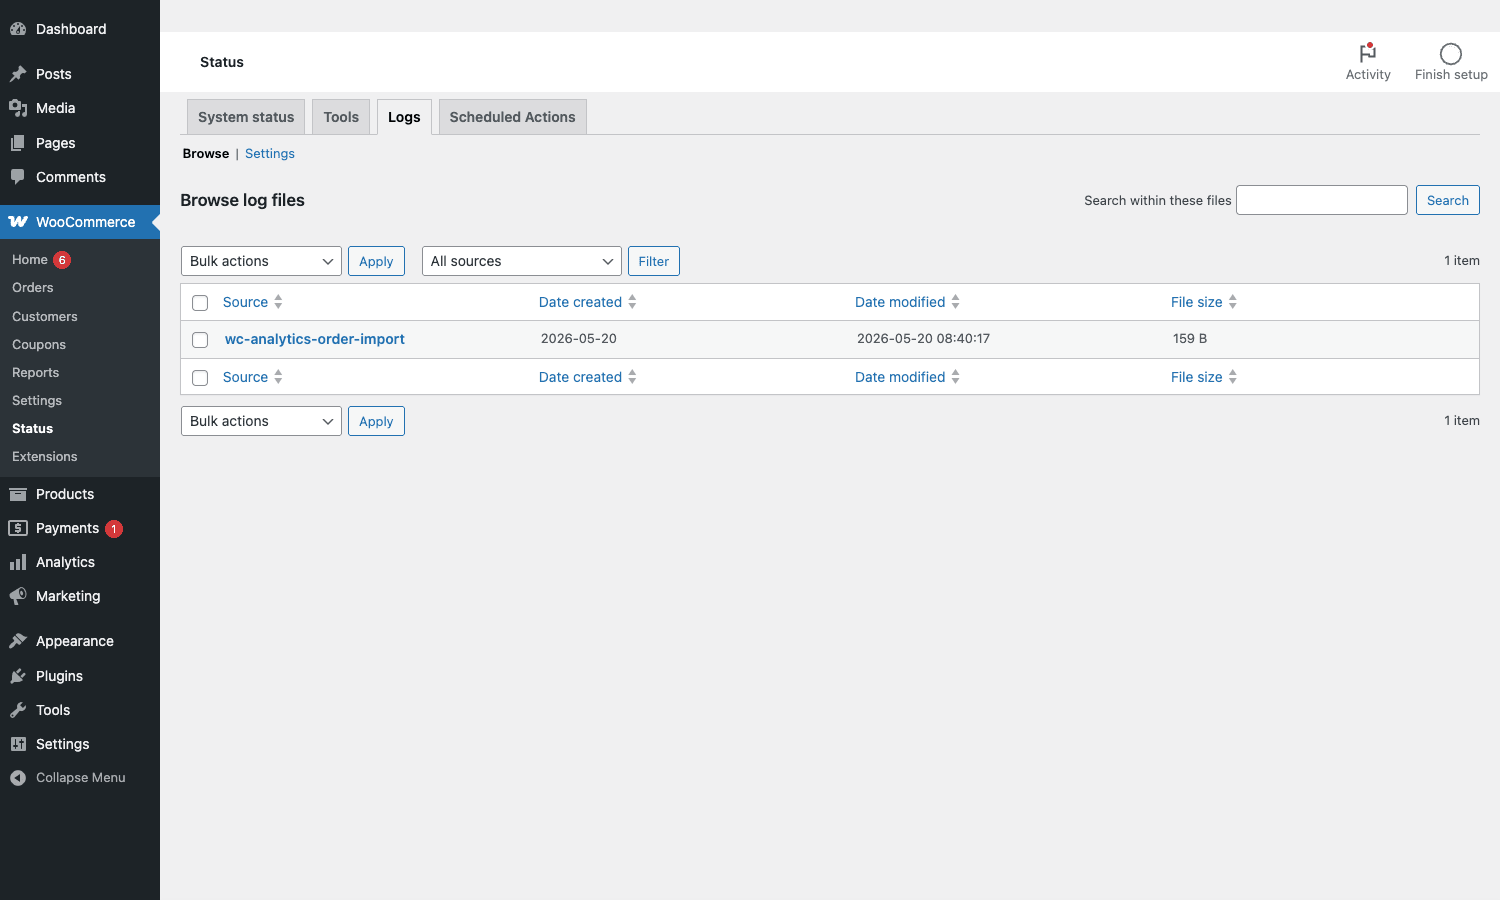
When debug mode is on (Settings panel), the plugin writes verbose request/response data to a log named woocommerce-gateway-stripe-<date>.log. Every API call, every webhook, every payment intent state change.
For triage, the patterns to look for:
"error":{"code":"card_declined"...}: card failed, customer needs to retry."error":{"code":"authentication_required"...}: 3D Secure didn’t complete; usually a frontend JS issue.Webhook signature verification failed: your webhook secret is wrong or the URL is being proxied through something that strips headers."error":{"type":"api_connection_error"...}: your server can’t reach Stripe; usually a firewall or DNS issue.
Each log entry is timestamped, so you can correlate against the customer’s "I clicked Place Order at 2:47 PM" report.
Turn debug logging OFF in production once everything is stable. The logs contain customer email addresses and full request payloads. They’re not catastrophically sensitive (no card numbers, no secret keys) but they take up disk space and shouldn’t be left on indefinitely.
Performance and security
A few notes on running this well at scale.
Frontend script loading
Stripe.js is loaded on the cart, checkout, and (by default) product pages. If you don’t use Apple Pay / Google Pay on product pages, the wc_stripe_hide_payment_request_on_product_page filter saves you ~50KB of JS on every product view.
If you also run WP Rocket, exclude the Stripe.js URL from minification and combine. Combining third-party scripts breaks them; you want Stripe.js loaded as-is from js.stripe.com.
PCI compliance
Because card data goes directly from the browser to Stripe (via the Payment Element iframe), you fall into PCI-DSS SAQ-A scope, which is the minimal compliance burden. You don’t need a PCI audit, you don’t need network segmentation, you fill in a short self-assessment questionnaire annually.
This is only true if you use the hosted Payment Element (the default). If you switch to the legacy inline card form, you may move into SAQ-A-EP scope, which is more burdensome. For 95% of stores, leave the default Payment Element on.
Webhook reliability
WordPress’s wp_remote_post / cron / hook stack is not the most reliable channel for real-time events. The Stripe plugin uses WordPress’s Action Scheduler library to enqueue webhook processing as background jobs, which makes the actual webhook receipt a simple "queue it, return 200", which is much less likely to timeout.
The wc_stripe_process_payment_intent_webhook_async filter controls whether intent webhooks process async or inline. Default is async (true), which is what you want for production.
High-volume stores
For stores doing thousands of orders per day, the default WP-Cron-driven Action Scheduler can fall behind. Switch to a server cron job (run wp-cron.php every 1-2 minutes from your server’s crontab), and monitor wp action-scheduler queue:size to confirm the queue is being drained.
Common gotchas
The five mistakes that cost real stores money.
"Pending payment" forever
Order shows up in WooCommerce, never transitions to "Processing" or "Completed." Usually a webhook misconfiguration. Check the Webhooks panel: is the "last received" timestamp recent? If not, your webhook URL is unreachable from Stripe’s servers. Common causes: a firewall blocking outbound traffic from Stripe IP ranges, a maintenance-mode plugin that returns 503, or a CDN that intercepts the webhook URL.
Apple Pay button doesn’t show up
Most likely the domain verification file isn’t being served. Check curl https://your-store.com/.well-known/apple-developer-merchantid-domain-association and confirm a long alphanumeric string comes back. If it returns 404, your .htaccess or page cache is blocking the /.well-known/ path. Add an exception.
Card declined but Stripe shows success
You’re looking at different orders. The plugin and Stripe both use sequential IDs, but they don’t match (WooCommerce order #1234 might be Stripe PaymentIntent pi_xyz123). Always match by the Stripe payment intent ID stored on the WC order, not by the order number.
Webhook signing secret out of date
If you regenerated your Stripe webhook endpoint, the signing secret changed. The plugin still has the old one. Symptom: webhooks log "Signature verification failed." Fix: copy the new signing secret from your Stripe dashboard into the Webhooks panel.
Test mode vs. live mode confusion
You enabled test mode, made some test orders, then switched to live mode. Your test orders are now invisible (different API keys). This is expected, not a bug. Test orders never become live charges. If you actually want to clean up, delete the test orders manually.
Pricing
The plugin itself is free. Stripe charges per transaction:
- US cards: 2.9% + $0.30
- US debit cards: 1% lower (regulated rate)
- International cards: +1% for currency conversion, +1.5% for international card surcharge
- ACH: 0.8%, capped at $5
- SEPA: €0.35 per transaction
- Apple Pay / Google Pay: same as card rate (no extra charge)
- Klarna / Affirm / Afterpay: variable per region, typically 3-6% + fixed fee
Refunds are free. Chargebacks cost $15 (refundable if you win the dispute).
No subscription. Transaction fees are between you and Stripe; the plugin is a free GPL-licensed integration.
FAQ
Do I need a Stripe account before installing?
No, but you need one before you can accept payments. The OAuth flow during plugin setup will create a Stripe account for you if you don’t have one. You provide the same info you’d provide on stripe.com directly.
Does this work for stores outside the US?
Yes, in 46 countries. Stripe’s full list is on their website. The most-used countries for this plugin are the US, UK, Canada, Australia, Germany, France, India, and Singapore. Currency support is broader: you can charge in 135+ currencies even if you’re based in only one country.
Can I use this plugin with other gateways at the same time?
Yes. Many stores run Stripe for cards + PayPal for PayPal-loyal customers + Cash on Delivery for local pickup. WooCommerce treats each gateway independently. The customer picks at checkout.
Does the plugin support 3D Secure (SCA)?
Yes, automatically. European cards trigger 3D Secure 2 when needed; non-European cards bypass it. Stripe makes the decision; the plugin handles the UX. There is no setup step required.
What about subscriptions?
WooCommerce Subscriptions integration is built in. Cards, SEPA, ACH, BECS, and Bacs support recurring renewals. Other methods (Klarna, Bancontact, etc.) typically don’t support recurring billing because the underlying payment rail doesn’t.
Can I refund through WooCommerce, or do I need to use the Stripe dashboard?
Both work. The WooCommerce order page has a Refund button that calls Stripe’s refund API directly. Refunds you process in the Stripe dashboard also fire a webhook back to WooCommerce, which updates the order status. Pick whichever workflow your team prefers.
Is this plugin GDPR-compliant?
Yes, in the sense that data flows to Stripe only when the customer initiates a payment, and Stripe is a documented data processor with appropriate DPA documentation. You should still disclose Stripe in your privacy policy and have a DPA on file with Stripe.
Will this slow down my checkout?
Marginally. Stripe.js is ~50KB and loads from js.stripe.com on cart and checkout pages. Modern browsers cache it across stores, so the second time a visitor encounters Stripe (on any site) the load is from cache. Net impact on checkout speed is small.
Can I use Stripe Terminal (in-person card readers) with this plugin?
The plugin includes the REST endpoints for Stripe Terminal (connection tokens, locations) but the actual checkout-on-counter UX is a separate WooCommerce Mobile App or custom POS integration. Most stores using this for in-person sales pair it with a WooCommerce Point of Sale extension or build a custom register interface using the REST endpoints.
What happens if I deactivate the plugin?
Existing orders stay; they were already paid. Future checkouts can no longer use Stripe. Saved cards stay in your database and are still valid Stripe payment method IDs, so reactivating the plugin restores everything. Nothing destructive happens on deactivation.
What happens on uninstall (not just deactivate)?
The plugin offers an "Also delete settings" toggle on uninstall. If you toggle it, the woocommerce_stripe_settings option is deleted. Saved customer payment method tokens are also cleared. Stripe-side data (Customer objects, PaymentIntents) is unaffected; uninstalling the plugin doesn’t talk to Stripe.
Does Stripe support recurring payments for non-card methods?
For ACH, Bacs, BECS, SEPA, ACSS, and Stripe Link, yes. For Klarna, Affirm, Afterpay, wallet methods (Apple/Google Pay), and one-time-only local methods (Bancontact, iDEAL, Sofort), no, because these are one-time payment rails by design.
Can I run the plugin on a staging site for testing?
Yes. Use Stripe’s test API keys, which give you a full test environment (test cards, test webhooks, no real money). The plugin’s test mode toggle in the Settings panel makes this safe. Test orders and live orders never mix.
Does it work with the WooCommerce block-based checkout?
Yes. The plugin has first-class block checkout support; the Stripe Payment Element is rendered inside the Checkout block automatically. Same applies to the Cart block.
Will this conflict with other plugins?
The plugin is well-isolated. The main conflict surface is other payment gateways trying to enqueue Stripe.js with a different version. If you run WooCommerce Stripe alongside another Stripe-based plugin (rare), one of them needs to defer to the other’s Stripe.js load. The official plugin always loads the version Stripe is actively supporting.
Final thoughts
If you’re running WooCommerce and you need to accept money, the official Stripe Payment Gateway is the closest thing to a default choice the WooCommerce ecosystem has. The plugin is free, the integration is maintained directly by Stripe (not a third-party shop), the supported payment method list is the widest of any gateway, and the hook surface gives developers enough flexibility to handle even unusual flows.
The two things to watch out for are webhook misconfiguration (which silently breaks order updates) and the temptation to enable every payment method when you only need three. Enable cards, plus whichever wallet your audience uses, plus one BNPL if your average order value warrants it. Add others later if customer requests come in. A checkout page with 12 payment buttons converts worse than one with 4.
For the rest, it just works. Connect Stripe, enable the methods you want, configure the webhook, and let the plugin handle the day-to-day of moving money. If you also run WooCommerce Subscriptions, WooCommerce Memberships, or Smart Coupons, this plugin slots in alongside them without extra work.
Grab the WooCommerce Stripe Payment Gateway from GPL Times, connect your Stripe account, and you can be live in under an hour.