

Most people start with the free WPForms Lite or Contact Form 7. Then they hit a wall, they want conditional fields, multi-step pages, file uploads that go to Dropbox, payment in the middle of the form, or just a notification routing rule that says "if the dropdown says Sales, send the email to sales@". That’s the wall where Gravity Forms gets installed. It has been the premium form plugin of choice for serious WordPress sites since 2009, and the reason is boring: it solves all the form problems you didn’t know you’d hit until you hit them.
This review is the long-form version of "what is it actually like to use?". We’ll build a form from scratch, walk every panel that matters, look at conditional logic and notifications, then drop into the developer surface and the add-on ecosystem.
Table of Contents
- What is Gravity Forms?
- How a form actually gets built
- Key features
- How it works (for users)
- Installation and setup
- Conditional logic, the killer feature
- Notifications and confirmations
- Add-ons and what they do
- Real-world use cases
- Developer reference
- Performance, compatibility, and gotchas
- Pricing and licensing
- FAQ
- Final thoughts
What is Gravity Forms?
Gravity Forms is a WordPress plugin made by a small Florida company called Rocketgenius. It is exactly one thing: a form builder. You install it, a "Forms" menu appears in your WordPress admin, you build a form by dragging fields onto a canvas, and then you embed that form on a page using a shortcode or a block. The form runs on the front end, collects submissions, stores them in the database, sends emails, and triggers any add-on workflows you’ve wired up.
It is not a page builder. It does not lay out your pages. It does not theme your site. It does one thing, forms, and it does that thing better than any other form plugin in the WordPress ecosystem.
The reason it dominates is that "forms" turns out to be a much deeper problem than "fields and a submit button". A real form needs: input validation, file uploads, payment integration, conditional visibility, multi-page flows, anti-spam, GDPR consent, entry management, notifications routed to different people, confirmations that can redirect to a payment processor, and a few dozen other things that you only notice when you don’t have them. Gravity Forms has them all.
The Pro license adds payment add-ons (Stripe, PayPal, Authorize.net), CRM connectors (HubSpot, ActiveCampaign, Mailchimp, AWeber), workflow integrations (Zapier, Slack, Webhooks), advanced fields (Signature, Quiz, Survey, Polls), and lifecycle tools (Partial Entries, User Registration). The Elite tier unlocks them all; the basic tier limits you to the core plugin.
How a form actually gets built
Before we touch settings, let’s follow the build of one form end-to-end. The mental model is the rest of the plugin makes much more sense once you’ve done this once.
You’re building a "Get a Quote" form for a freelancer site. The form should ask name, email, project type (web, mobile, both), budget range, deadline, and a brief description. Then it should email the freelancer, send a thank-you note to the visitor, and store the entry for follow-up.
You go to Forms → New Form. The new-form screen has a gallery of templates ("Simple Contact Form", "Advanced Contact Form", "Donation Form", "Stripe Checkout Form", etc.). You pick Blank Form, name it "Get a Quote", and click Create. The form builder opens.
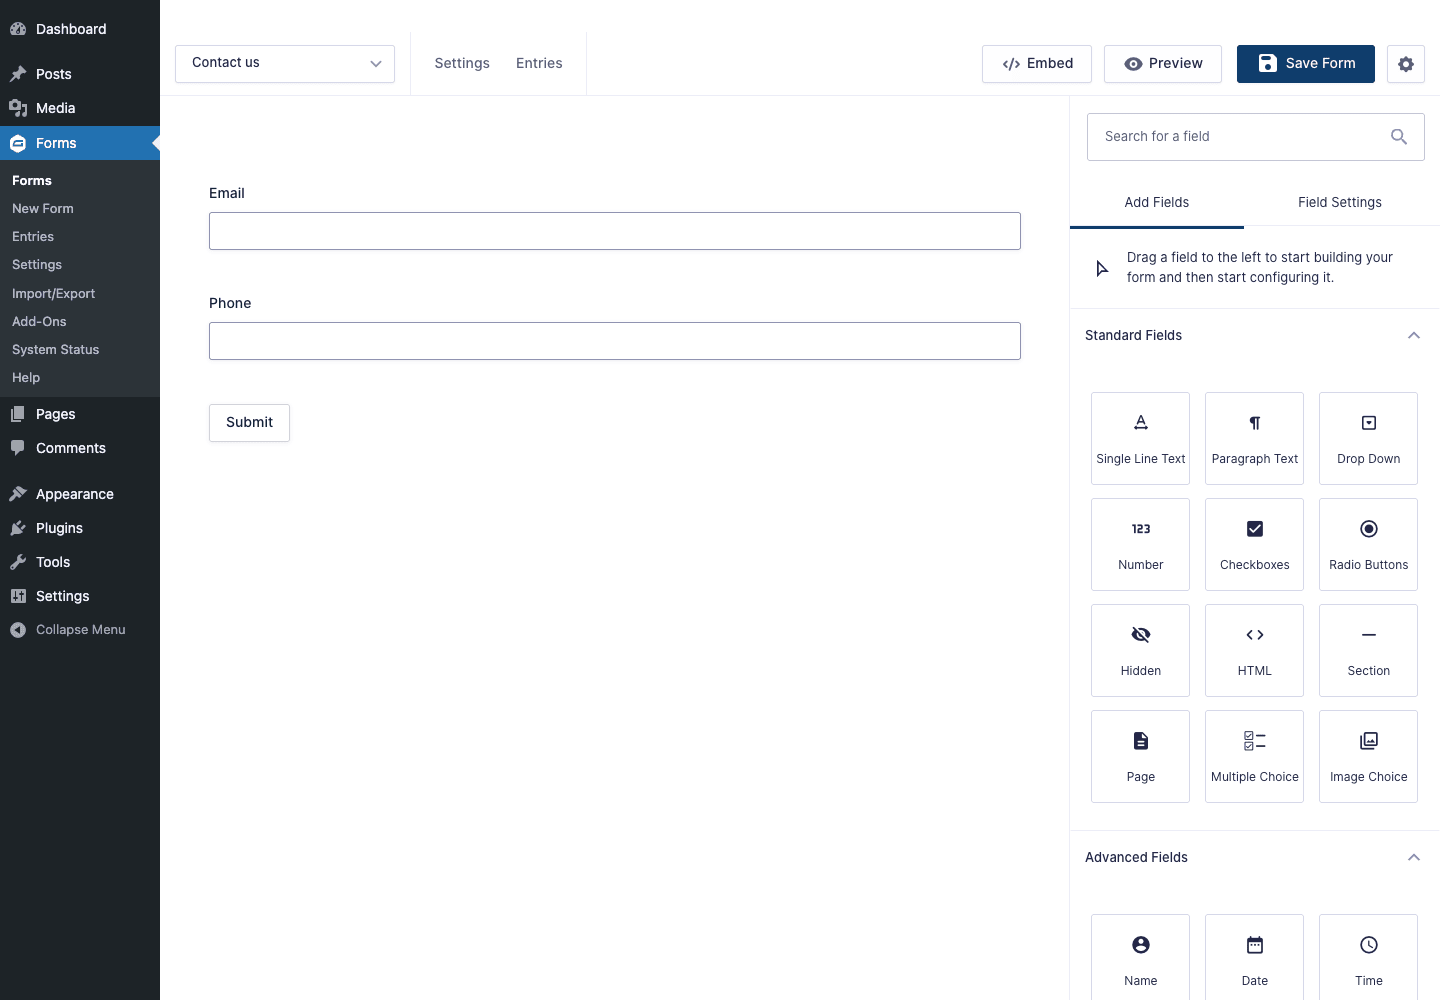
The builder has three regions: a slim top bar with the form name and Save/Preview buttons; a wide canvas where your fields live; and a right-hand panel with the field library on top and field settings underneath. You drag a Name field from the library onto the canvas. The Name field is a composite, first name + last name in one block. You drag Email. You drag Drop Down, then click on it to open its settings, and add three choices: Web, Mobile, Both. You drag Number, label it "Budget (USD)". You drag Date, label it "Deadline". You drag Paragraph Text, label it "Project description".
Click Save Form at the top right. The form is saved.
To embed it on a page: open any page in the block editor, drop in a Gravity Forms block, pick "Get a Quote" from the dropdown. Publish the page. The form is live.
Your visitor fills it in and clicks Submit. Three things happen: the entry is stored in the WordPress database (visible at Forms → Entries), an admin notification email goes to you with all the field values, and the visitor sees the confirmation message you configured. If they refresh, the form is back to blank.
That’s the whole loop. Everything else in this article is the layer of polish on top.
Key features
The features that you actually use day-to-day, in the order they come up:
- Visual form builder. Drag fields onto a canvas, click to configure. No code anywhere.
- 35+ field types built in. Standard (Text, Paragraph, Number, Drop Down, Checkboxes, Radio, Multi-Select), Advanced (Name, Address, Phone, Email, Date, Time, Website, File Upload, List, Multi-File Upload), Pricing (Product, Quantity, Shipping, Option, Total), and Post Fields (Title, Body, Excerpt, Category, Tags, Image).
- Conditional logic. Show or hide any field, page, notification, or confirmation based on the values of other fields. This is the feature that turns simple forms into proper application workflows.
- Multi-page forms. Drop a Page Break field anywhere and the form becomes multi-page with a built-in progress bar. Conditional logic decides which pages are reachable.
- Calculations. Number and Total fields can compute themselves based on other fields. "Hours × hourly rate" updates live as the visitor types.
- File uploads. Single or multi-file. Direct to the WordPress media library, or via Dropbox/Google Drive/AWS S3 with the official add-ons.
- Notifications. Per form, multiple, conditional. Route the email to different recipients based on field values ("if Department = Sales, send to sales@…").
- Confirmations. Per form, multiple, conditional. Text response on the same page, redirect to another page, or redirect to a URL with form data appended (great for sending the visitor to Stripe Checkout or a Calendly).
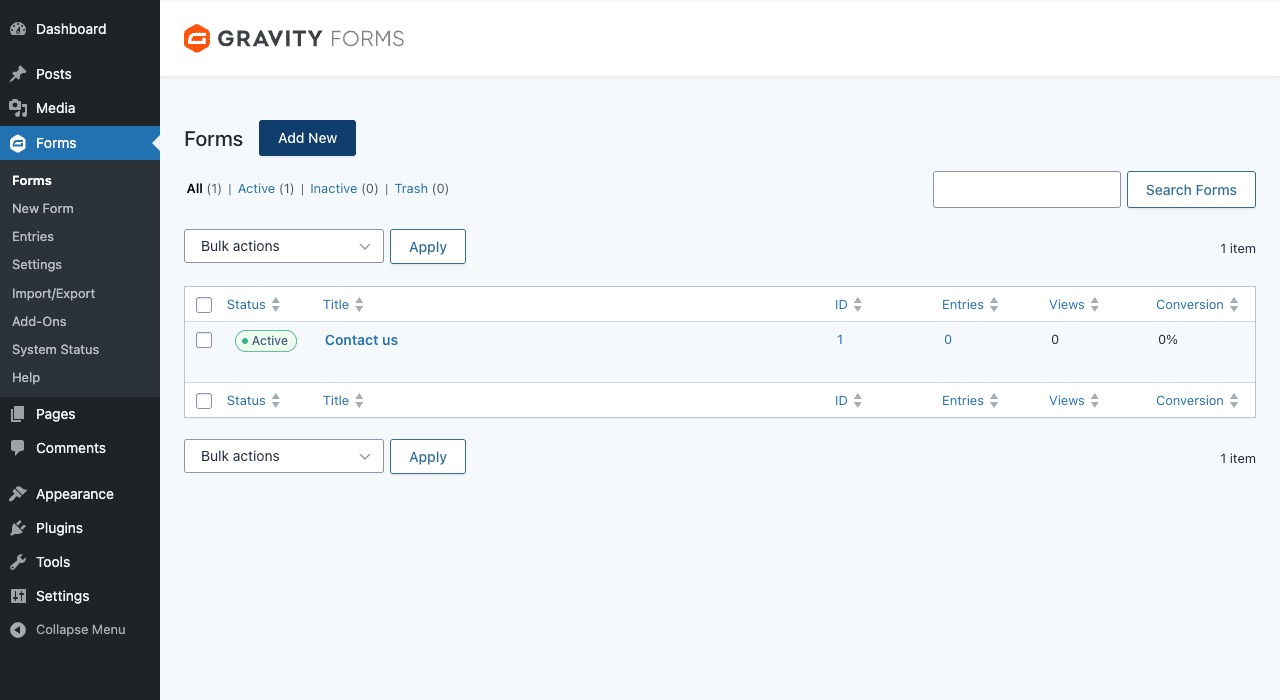
- Entries. Every submission is stored in dedicated database tables. Browse, filter, search, edit, star, mark as spam, delete, export to CSV.
- Anti-spam. Built-in honeypot, optional Cloudflare Turnstile, hCaptcha, Google reCAPTCHA v2/v3, Akismet integration.
- Pre-population. Set field default values via URL parameters, post meta, user meta, or shortcode attributes. Great for partially pre-filled "edit your profile" style forms.
- REST API. Read and write forms and entries over HTTP. Two versions (v1 and v2). Auth via consumer keys.
- Add-on ecosystem. Officially supported integrations with Stripe, PayPal, Authorize.net, Mailchimp, ActiveCampaign, AWeber, Campaign Monitor, HubSpot, Help Scout, Slack, Zapier, Webhooks, Twilio, Dropbox, plus several Gravity Perks (paid third-party add-ons).
- Form themes. The "Orbital" theme is the modern default. Previously sites used the legacy CSS-classes theme; both still work.
How it works (for users)
We’ll go through the full build of one form, panel by panel, in the order you encounter them.
Step 1: Create the form
Forms → New Form. Pick Blank Form unless you see a template that matches your exact need (the templates are starter forms, Donation, Stripe Checkout, eCommerce Form, and they’re worth checking, but it’s often faster to start blank).
Give the form a name and an optional description. The description shows above the form on the front end if you turn it on.
Step 2: Add fields
The right-hand panel shows the field library, grouped by Standard, Advanced, Post, and Pricing. Drag fields onto the canvas in the order you want them. Each field’s settings panel opens on the right when you click the field.
The settings panel has three tabs:
- General: label, description, default value, required, choices (for dropdowns/radio/checkbox).
- Appearance: placeholder, CSS classes, custom layout grid (half-width, third-width).
- Advanced: admin label, default value pre-population, conditional logic, allow field to be populated by URL parameter.
Step 3: Save and preview
Top-right Save Form. Then click Preview (the eye icon next to Save). The form renders on the front end of your site in a new tab. Test it.
Step 4: Embed on a page
Open the page in the block editor. Add a Gravity Forms block. Pick the form from the dropdown. Publish.
If you prefer shortcodes: [gravityform id="1" title="false" description="false"]. The shortcode works everywhere, page builder modules, custom theme templates, widget areas.
Step 5: Configure notifications
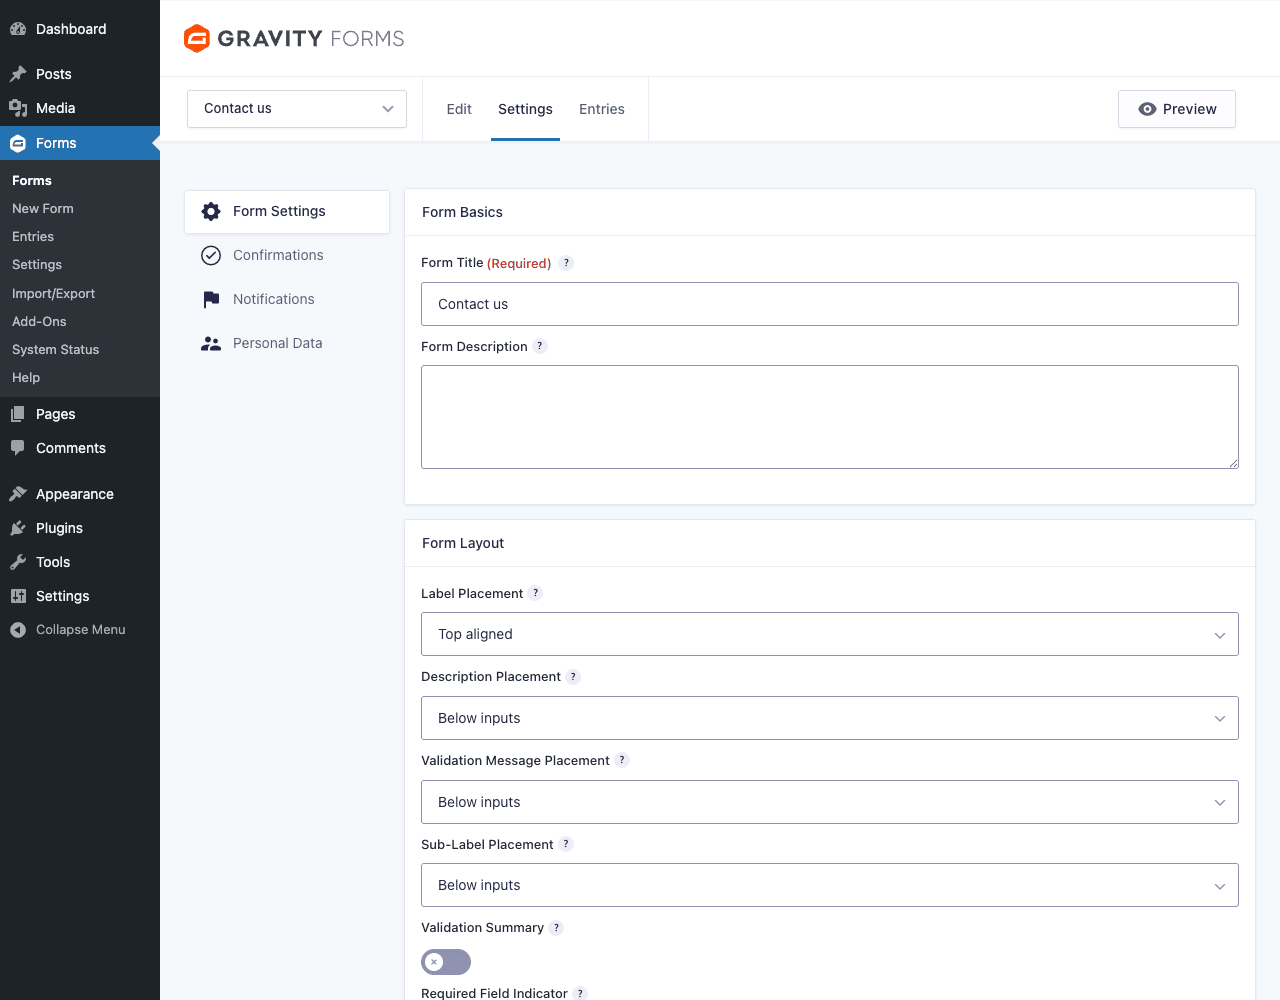
Forms → All Forms → click your form → Settings → Notifications. The default "Admin Notification" goes to the site admin email when a form is submitted. You can edit this one or add more.
For each notification: name it, set the recipient (a fixed address, an email from a form field, or routed conditionally), set the subject, write the email body using merge tags like {Name:1}, {Email:2}, {all_fields}. Conditional logic at the bottom lets you skip the notification if conditions aren’t met.
Step 6: Configure confirmations
Same place, Confirmations sub-tab. The default confirmation is a text message ("Thanks for contacting us!") shown on the same page. You can change it to:
- Text: rich-text content rendered in place of the form after submit.
- Page: redirect to a specific WordPress page.
- Redirect: redirect to any URL, optionally appending form data as query parameters. This is how you hand off to Stripe Checkout, a Calendly link, or a thank-you page that has its own analytics goal.
Multiple confirmations + conditional logic = one form can do different things based on what was submitted.
Step 7: Watch the entries
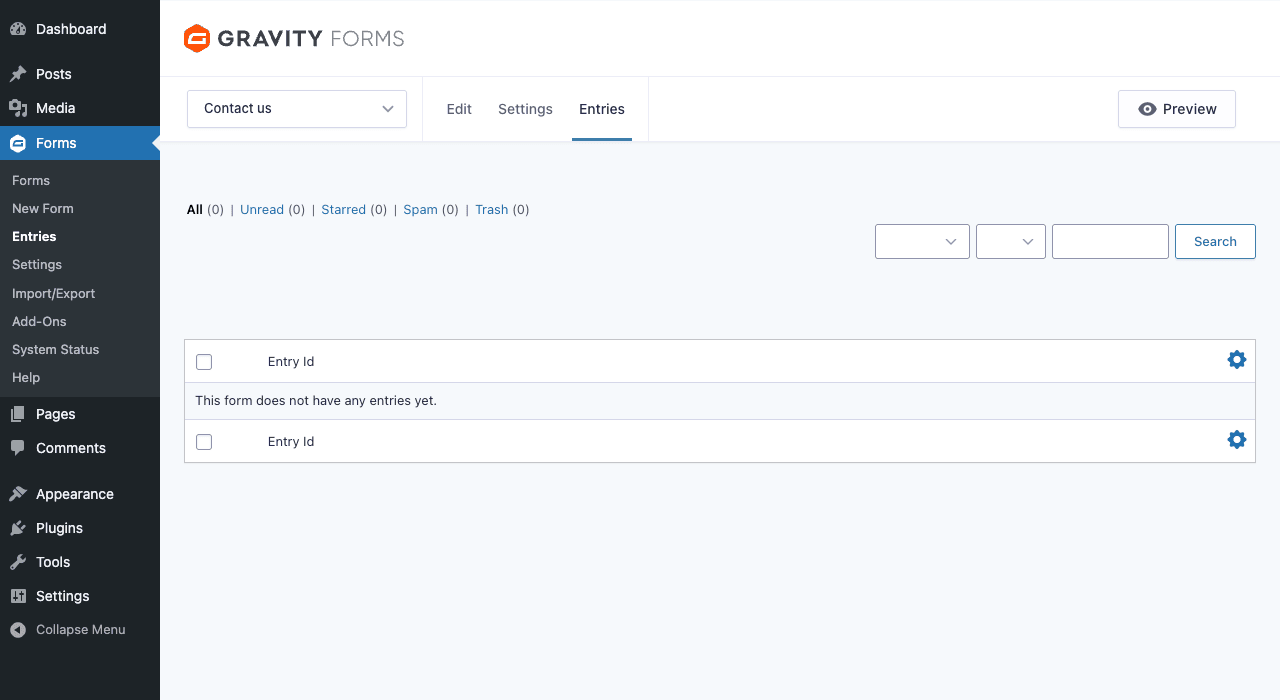
Forms → Entries → pick your form. Every submission shows up here as a row. Click a row to see the full submission, including the file uploads and the IP/user-agent metadata. Star, mark as read, mark as spam, or delete. Bulk-export to CSV from the bulk actions menu.
That’s the full build loop. Most forms are five minutes of dragging fields plus another five of writing the notification email.
Installation and setup
Setup is fast and undramatic.
Prerequisites. WordPress 6.5+, PHP 7.4+. Works with any theme. Works with any page builder.
Step 1: install the plugin from Plugins → Add New → Upload. Activate.
Step 2: paste your license key in Forms → Settings → Settings. The license unlocks updates and (on the official subscription) support.
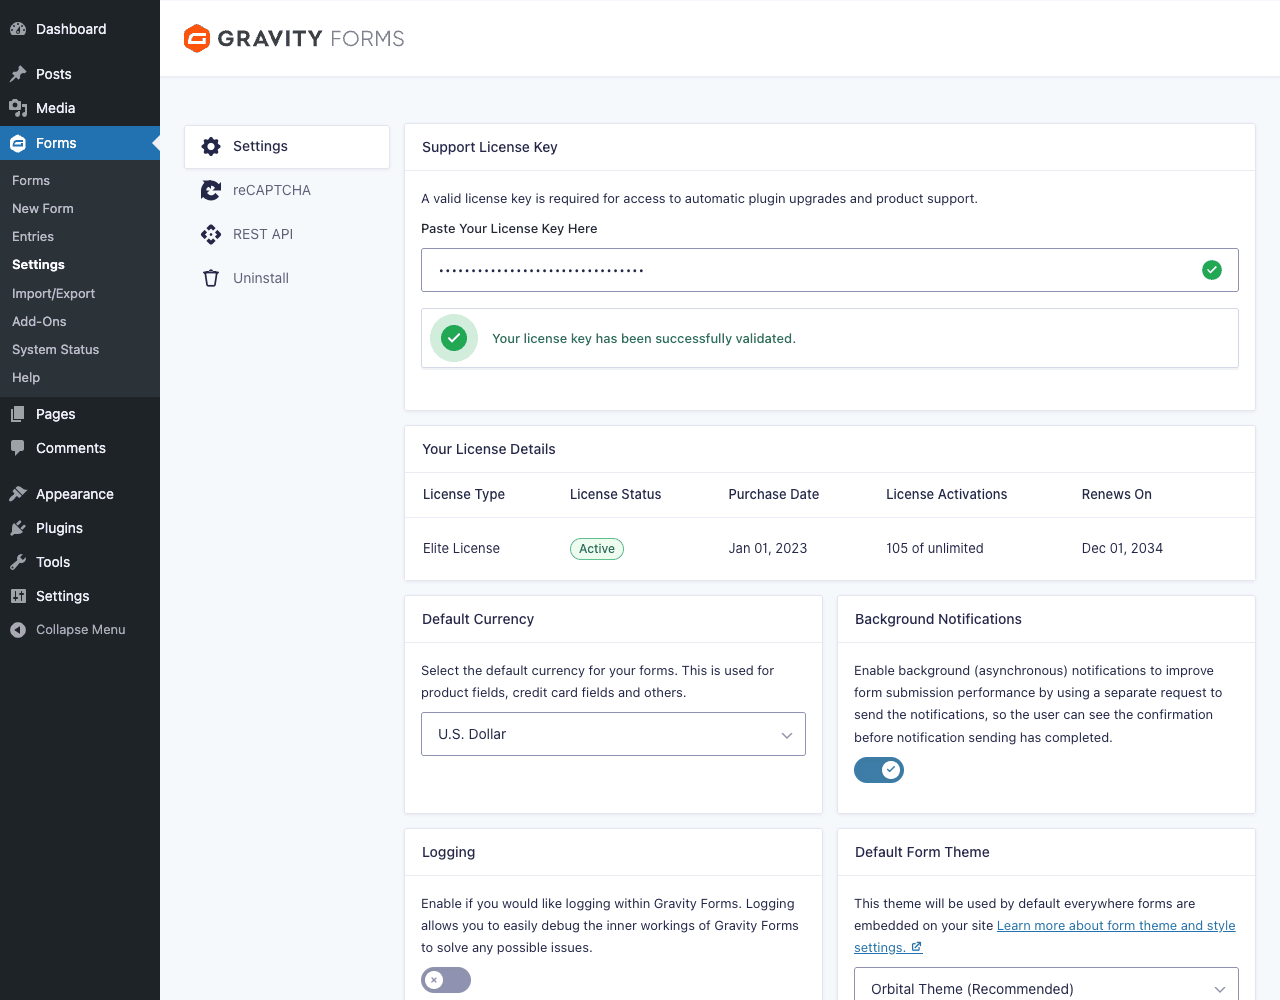
Step 3: visit each of the side-bar tabs once:
- Settings: license, default currency (used by Pricing fields), background notifications toggle, logging, default form theme.
- reCAPTCHA: paste site/secret keys if you want reCAPTCHA on forms.
- REST API: enable v1 or v2, create consumer key pairs if you’ll talk to the API from outside.
- Uninstall: nuke-everything button. Don’t click unless you mean it.
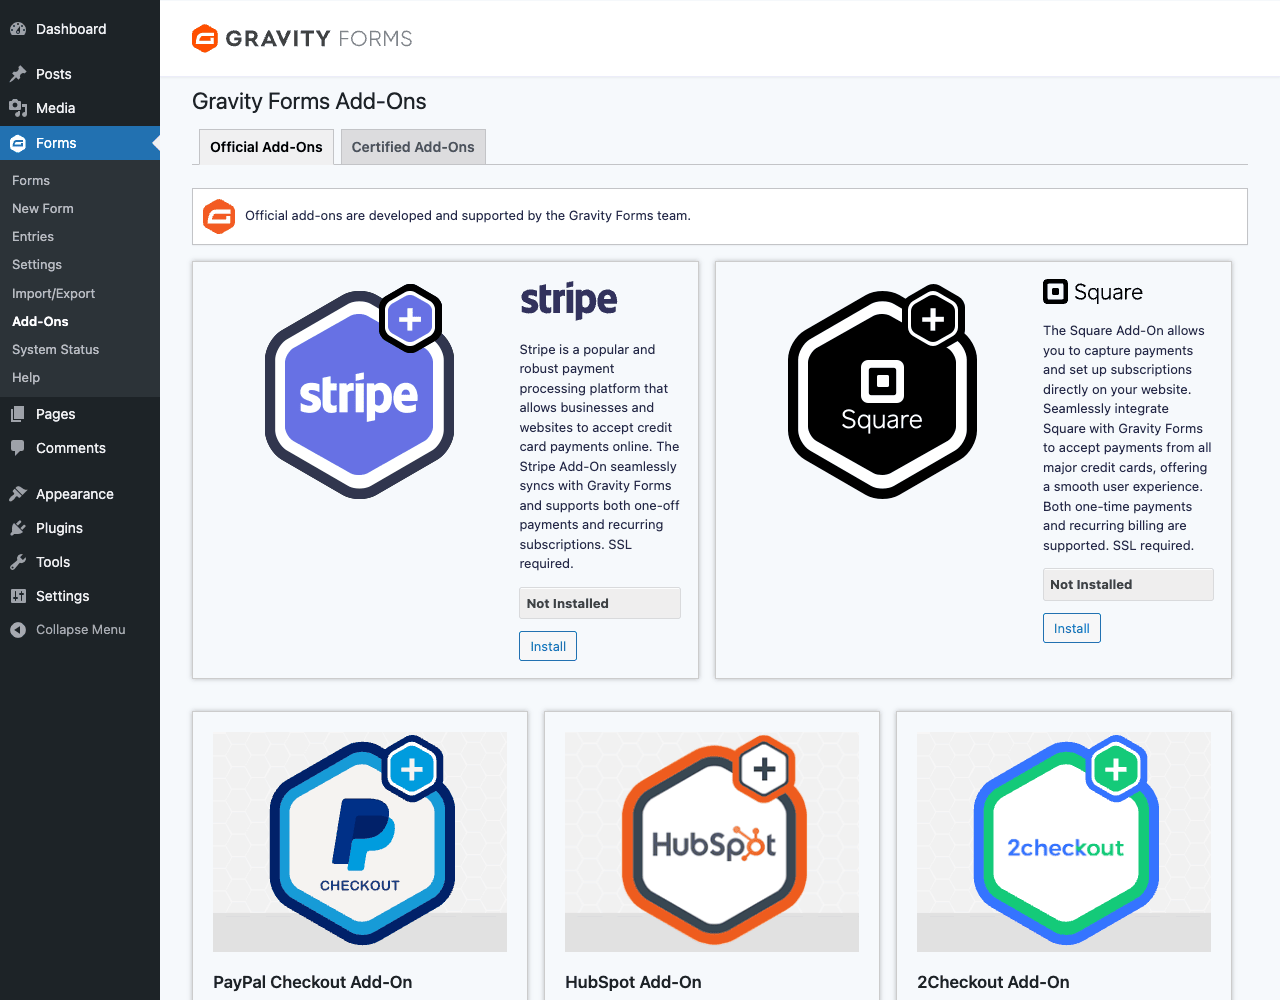
Step 4: open Forms → Add-Ons. Browse the integration directory. Install the ones you’ll use (Stripe, Mailchimp, Zapier, whichever).
Step 5: build your first form. We covered the build flow above.
You’re done. Real-world setup including the first form is fifteen to twenty minutes.
Conditional logic, the killer feature
If you only learn one Gravity Forms feature beyond the basics, learn conditional logic. It’s why people buy this plugin.
Every field has an Advanced tab with a "Enable Conditional Logic" checkbox. Tick it. A rule builder appears: "Show / Hide this field if all / any of the following match:". Add one or more conditions: "Project Type is Web". Save.
Now that field only appears when Project Type is set to Web. Same logic works on:
- Fields: show/hide based on other field values.
- Pages: skip a page break based on field values. Use this to route different respondents through different page sequences.
- Notifications: only fire an email if conditions are met. ("Send to sales@ only if Budget > $5000.")
- Confirmations: show a different confirmation message based on field values. ("If they selected Bookkeeping, redirect to /book-with-bookkeeper. If they selected Tax, redirect to /book-with-tax-pro.")
- Submit button: hide the submit button until a consent checkbox is ticked.
The rule builder supports unlimited rules with AND/OR combinators. You can build a 30-field form that behaves like five different forms, depending on what the visitor enters.
Conditional logic is the difference between Gravity Forms and a "contact form plugin". It’s why the same plugin builds quote requests, registration forms, job applications, course intake forms, multi-step booking flows, and payment forms. The underlying form is one form, and the logic does the rest.
Notifications and confirmations
The two outputs of every submission. Worth a section because most people misuse them.
Notifications are the emails sent on submit. By default, one notification goes to the admin email. You can:
- Add more notifications. A form can fire any number of emails on a single submit.
- Route by field. The To address can be
{Routing}driven: "if Project Type = Web, send to web@; if Project Type = Mobile, send to mobile@". - Conditional fire. The whole notification can be skipped based on conditional logic ("only email me if Budget > $1000").
- Custom From, Reply-To, CC, BCC. Useful if your transactional email service requires a verified sender.
- Use merge tags.
{Name:1},{Email:2},{Project Description:6},{all_fields}. Plus context tags like{form_id},{entry_id},{entry_url},{date},{ip}.
Confirmations are what the visitor sees on submit. By default, a single text confirmation says "Thanks for contacting us!". You can:
- Set the confirmation to Text (HTML rendered in place of the form), Page (redirect to a WP page), or Redirect (any URL).
- Add multiple confirmations. Use conditional logic to pick which one fires.
- Pass field values to the redirect URL. The redirect URL can include
{Email:2}and becomehttps://stripe.com/...?email={Email:2}, so the next step inherits form data.
The trap most users fall into: they treat both as static. Realistically you almost always want confirmation routing (different thank-you pages by intent) and notification routing (different recipients by field). Both take five minutes to set up and pay off forever.
Add-ons and what they do
The add-on directory is what turns Gravity Forms from "form plugin" into "workflow platform". A short tour of the ones you’ll reach for:
- Stripe / PayPal / Authorize.net. Add a Credit Card field, pick your processor, and the form charges the card on submit. Supports one-time and recurring (subscription) payments. The recurring side is good enough that some people use Gravity Forms + Stripe instead of WooCommerce Subscriptions for simple donation/membership flows.
- Mailchimp / ActiveCampaign / AWeber / HubSpot / Campaign Monitor / CleverReach. Map form fields to your ESP’s audience fields. On submit, the subscriber is created or updated in the ESP. Conditional logic decides which list/tag.
- User Registration. A submission creates a WordPress user account. Map form fields to user meta. Auto-login on submit if you want. Pair with WooCommerce Memberships and the new user can be granted a membership in the same flow.
- Zapier / Webhooks. Send the submission as a POST to any URL. Zapier connects to 6000+ apps. Webhooks goes anywhere your server can reach (Slack, Discord, a custom Lambda).
- Slack / Help Scout / Twilio. Send the submission as a Slack message, a Help Scout conversation, or an SMS via Twilio.
- Dropbox / Google Drive (via Gravity Perks). File uploads land in your cloud storage instead of (or in addition to) the WP media library.
- Signature. Visitors draw a signature with their mouse or finger. The signature is saved as an image.
- Quiz / Survey / Polls. Score-able quizzes with right/wrong answers, surveys with Likert scales, polls with live result displays.
- Partial Entries. Save form progress as the visitor types. If they bail before submitting, the partial submission is in the database and you can email them a "you didn’t finish" link.
- Nested Forms (Gravity Perks). Embed forms inside forms. Great for "list of family members" style applications where each row in a repeater is its own mini-form.
The Elite license tier unlocks every official add-on.
Real-world use cases
Five patterns that are clearly where Gravity Forms shines:
The freelancer quote form. Multi-page, conditional. Page 1 asks contact details. Page 2 branches: web project, mobile, or both. Each branch shows different fields (frameworks needed, design state, deadline, budget). Page 3 reviews and submits. Notification routes to the right team member. Confirmation redirects to a Calendly link with the visitor’s email pre-filled.
The job application portal. A long form with name, resume upload, work experience repeater (using Nested Forms), references, and a consent checkbox. Conditional logic shows different questions based on the role they’re applying for. Notifications route the application to the hiring manager for that role. Entries are exported to a CSV weekly for the recruiter.
The donation form. Stripe add-on. Conditional pricing (visitor picks $25 / $50 / $100 / Custom). Recurring or one-time toggle. Anonymous toggle (skips the name field if ticked). Confirmation thanks them by name (or "anonymous") and shows the Stripe receipt. Notification posts to Slack.
The course intake form. University-style: ten pages, conditional logic everywhere. The student’s answers on page 2 determine which pages they see for the rest of the form. User Registration add-on creates the student’s account on submit. ActiveCampaign add-on adds them to the right onboarding sequence.
The simple contact form, done right. Three fields (name, email, message). Honeypot enabled. Akismet enabled. Notification to support@ with the visitor’s email as Reply-To. Confirmation: "Thanks! We’ll get back to you within 24 hours." This is the form 80% of sites need, and Gravity Forms handles it the same as a 30-field flow.
The pattern across all five: Gravity Forms doesn’t care about form complexity. Five fields and fifty fields are the same builder, the same notifications, the same entries page. Most form plugins start to struggle past about ten fields. Gravity Forms does not.
Developer reference
Gravity Forms has one of the largest hook surfaces in WordPress. Roughly 1,500 filters and 600 actions. We’re not listing all of them. Here are the patterns you’ll actually use.
Modifying field values before submit
// Force email field to lowercase
add_filter( 'gform_pre_submission_2', function( $form ) {
 if (! empty( $_POST['input_2'] ) ) {
 $_POST['input_2'] = strtolower( $_POST['input_2'] );
 }
} );
The _2 suffix targets the form with ID 2. Drop the suffix to apply to all forms.
Reacting after a submission
add_action( 'gform_after_submission_2', function( $entry, $form ) {
 // Send to a custom CRM
 $payload = array(
 'name' => rgar( $entry, '1' ),
 'email' => rgar( $entry, '2' ),
 'plan' => rgar( $entry, '4' ),
 );
 wp_remote_post( 'https://crm.example.com/api/leads', array(
 'body' => $payload,
 ) );
}, 10, 2 );
gform_after_submission is the workhorse hook. Send to external APIs, write to custom tables, fire analytics events, anything that needs the full entry.
Custom validation
add_filter( 'gform_field_validation_2_5', function( $result, $value, $form, $field ) {
 if ( $value &&! preg_match( '/^[A-Z]{2}d{6}$/', $value ) ) {
 $result['is_valid'] = false;
 $result['message'] = 'License plate must be 2 letters + 6 digits.';
 }
 return $result;
}, 10, 4 );
The _2_5 suffix is form ID 2, field ID 5. Per-field validation hooks let you write rules that the built-in validation can’t express.
Pre-populating field values
add_filter( 'gform_field_value_promo_code', function() {
 return isset( $_GET['promo'] )? sanitize_text_field( $_GET['promo'] ) : '';
} );
Set the field’s "Allow field to be populated dynamically" → parameter name promo_code, and now ?promo=SUMMER2026 will pre-fill the field.
Filtering merge tags in notifications
add_filter( 'gform_replace_merge_tags', function( $text, $form, $entry ) {
 // Add a custom {customer_lifetime_value} merge tag
 if ( strpos( $text, '{customer_lifetime_value}' )!== false ) {
 $email = rgar( $entry, '2' );
 $ltv = calculate_lifetime_value( $email );
 $text = str_replace( '{customer_lifetime_value}', '$'. number_format( $ltv ), $text );
 }
 return $text;
}, 10, 3 );
Use custom merge tags to inject anything into notifications and confirmations, pricing, lifetime value, internal flags, links to admin pages.
Building a custom field type
The Field base class lets you register your own field. Minimal example:
class GF_Field_ColorPicker extends GF_Field {
 public $type = 'colorpicker';

 public function get_form_editor_field_title() {
 return esc_attr__( 'Color Picker', 'gpl' );
 }

 public function get_form_editor_field_settings() {
 return array(
 'label_setting',
 'description_setting',
 'rules_setting',
 'visibility_setting',
 'admin_label_setting',
 'css_class_setting',
 );
 }

 public function get_field_input( $form, $value = '', $entry = null ) {
 $id = (int) $this->id;
 $form_id = absint( $form['id'] );
 $value = esc_attr( $value );
 return "<div class='ginput_container'><input type='color' name='input_{$id}' id='input_{$form_id}_{$id}' value='{$value}' /></div>";
 }
}

GF_Fields::register( new GF_Field_ColorPicker() );
That’s the full source for a Color Picker field. Drag it onto any form, save, embed; the visitor gets a native HTML color picker that stores a hex value.
Building a custom add-on
The Add-on framework is the supported way to integrate with a third-party service. Three base classes:
- GFAddOn: generic add-on (Slack notifier, custom field provider, etc.).
- GFFeedAddOn: ESP-style add-ons where each form has feeds that map fields to remote audience/list properties.
- GFPaymentAddOn: payment processors with credit card handling, recurring billing, and IPN/webhook callbacks.
A bare-bones GFAddOn:
GFForms::include_addon_framework();

class GF_MyService_AddOn extends GFAddOn {
 protected $_version = '1.0.0';
 protected $_min_gravityforms_version = '2.5';
 protected $_slug = 'my-service';
 protected $_path = 'gf-myservice/gf-myservice.php';
 protected $_full_path = __FILE__;
 protected $_title = 'My Service';
 protected $_short_title = 'MyService';

 public function init() {
 parent::init();
 add_action( 'gform_after_submission', array( $this, 'after_submission' ), 10, 2 );
 }

 public function after_submission( $entry, $form ) {
 $payload = array( 'email' => rgar( $entry, '2' ) );
 wp_remote_post( 'https://myservice.com/api/leads', array( 'body' => $payload ) );
 }
}

GFAddOn::register( 'GF_MyService_AddOn' );
The framework gives you admin settings pages, feed management, license-check helpers, all for free. Real-world add-ons (Stripe, Mailchimp, etc.) are 1000+ lines but follow the same skeleton.
REST API
Two versions live at /wp-json/gf/v1/ and /wp-json/gf/v2/. The v2 endpoints are the current ones; v1 stays for backwards compatibility.
# List forms
curl -u "ck_xxx:cs_xxx" https://example.com/wp-json/gf/v2/forms

# Get entries for form 1
curl -u "ck_xxx:cs_xxx" https://example.com/wp-json/gf/v2/forms/1/entries

# Create an entry
curl -u "ck_xxx:cs_xxx" -X POST https://example.com/wp-json/gf/v2/entries
 -H "Content-Type: application/json"
 -d '{"form_id":1,"1":"Jane","2":"jane@example.com"}'
Consumer key/secret pairs are created in Forms → Settings → REST API.
Database schema
Gravity Forms creates its own tables: wp_gf_form, wp_gf_form_meta, wp_gf_form_view, wp_gf_entry, wp_gf_entry_meta. Entries are normalized: one row per entry in wp_gf_entry, one row per field-value in wp_gf_entry_meta. The schema is documented in the official developer docs.
For ad-hoc queries:
// Get all entries for form 1 submitted in the last 7 days
$entries = GFAPI::get_entries(
 1,
 array(
 'status' => 'active',
 'start_date' => date( 'Y-m-d', strtotime( '-7 days' ) ),
 )
);
The GFAPI class is the public API for forms and entries. Use it instead of direct SQL, it handles caching and validation for you.
Performance, compatibility, and gotchas
What you need to know that the marketing doesn’t tell you:
Asset loading is conditional. Gravity Forms only enqueues its CSS and JS on pages that have a form. Pages without forms load nothing extra. Verify with View Source if you’re chasing pagespeed scores.
Background notifications are off by default in older versions. Turn them on (Forms → Settings → Settings → Background Notifications) so the visitor sees the confirmation immediately, while the email goes out asynchronously. Otherwise, slow SMTP delays the visitor’s submit-to-confirmation latency.
Caching plays nice except for forms with conditional logic that pre-fills. If you pre-populate a form from URL params and the page is cached, every visitor sees the same pre-filled value. Most cache plugins handle this correctly because the form output is rendered server-side and cached per URL, but verify with a page builder + cache combo. WP Rocket explicitly supports Gravity Forms.
The "Orbital" theme is the default for new forms. It uses modern CSS and works well with most themes. Forms built before Orbital ran on the legacy CSS-classes theme. Both still work, but you can’t mix them inside a single form. Forms → Settings → Settings → Default Form Theme picks the default for new forms.
The Block editor block has limitations. It renders the form by id, but server-side options (like overriding the title or description) require switching to the [gravityform] shortcode. For most uses, the block is enough.
File uploads stay on your server unless you install a cloud storage add-on. Default behavior writes to wp-content/uploads/gravity_forms/. On large-volume forms (job applications, contest entries), uploads can fill the server disk fast. Install the Dropbox or Drive add-on if you expect more than a few hundred files per month.
Spam filtering needs configuration. The built-in honeypot is on by default and catches most bots. For real spam (humans paid to fill out forms), enable reCAPTCHA or Cloudflare Turnstile, and turn on Akismet integration if you have an Akismet key.
Don’t manually edit entries unless necessary. Entries are editable in the admin (Forms → Entries → click an entry → Edit), but doing so changes the audit trail of what the user actually submitted. For investigations, prefer Note (admin-only comment on the entry) over editing the values.
HPOS doesn’t apply. Gravity Forms doesn’t use WooCommerce’s High-Performance Order Storage. Its tables are its own. If you’re integrating GF entries with a Woo store, the join is on user_id or email.
Translation strings live in gravityforms/languages/. Text domain is gravityforms. Non-English sites: drop your .mo file there.
Pricing and licensing
The official Gravity Forms pricing is tiered:
- Basic: $59/year, 1 site, core plugin only (no payment, no CRM, no Zapier).
- Pro: $159/year, 3 sites, core + most add-ons (Stripe, Mailchimp, Zapier, etc.).
- Elite: $259/year, unlimited sites, every add-on including Webhooks and the developer perks.
All tiers are subscription-based and require annual renewal for updates and support.
GPL Times sells the Elite-equivalent bundle as a one-time purchase under GPL. The bundle ships the core Gravity Forms plugin plus the popular add-ons (Stripe, PayPal, Authorize.net, Zapier, Webhooks, User Registration, Partial Entries, Signature, Nested Forms, Quiz, Twilio, Dropbox, Help Scout, Mailchimp, ActiveCampaign, AWeber, Campaign Monitor, CleverReach, Agile CRM, and many more) in one download. The code is identical to the official distribution. Updates come from GPL Times rather than from Rocketgenius. For a freelancer running five client sites or an agency with twenty, the math vs. the Elite subscription is dramatic.
The trade-off: official Gravity Forms support (ticket-based, generally responsive) is gated to paying subscribers. If you build forms professionally and need a guaranteed reply when something breaks on a Friday afternoon, the official subscription is worth it. If you’re confident reading docs and stack-overflow, the GPL Times bundle is the better deal.
FAQ
How does Gravity Forms compare to WPForms / Formidable / Ninja Forms / Fluent Forms?
All are competent. The differences narrow each year. Gravity Forms wins on stability (the codebase is 15+ years old and has a deep hook surface), on add-on ecosystem (the official integrations are first-party and stay updated), and on developer API (the GFAPI class and add-on framework are well-documented and stable). WPForms has a slightly more polished editor (we reviewed it too). Formidable Forms Pro has stronger calculation features and a different mental model around displaying form data on the front end (we covered that in our complete Formidable Forms guide). Ninja Forms is free up to a point. Fluent Forms Pro is faster on heavy pages. For long-running production work, Gravity Forms is the safe pick. If you specifically want a tree-based form editor for complex multi-step + conditional layouts, take a look at our Quform walkthrough.
Can I migrate my forms from another plugin?
Yes, but not automatically. The data models are incompatible. The realistic path: export entries from the old plugin as CSV, rebuild the forms in Gravity Forms, import historical entries via the Import/Export tool’s CSV import (Gravity Perks has a "Migrate to Gravity Forms" plugin that does some of this for popular sources).
Will my forms keep working if I disable the plugin?
No. The form rendering is plugin-dependent. Disabling Gravity Forms means every page with a form shows the shortcode as plain text. The data in the database stays intact, so re-enabling the plugin restores everything.
Can I customize the form CSS?
Yes, several ways. Per-form CSS classes on each field, per-form Custom CSS in the form settings, site-wide CSS in your theme. The Orbital theme uses CSS variables for colors, fonts, and spacing, override them in your theme and every form follows.
Does it work with WooCommerce?
Yes. The Gravity Forms Product Add-Ons plugin (third-party, sold by Gravity Perks) lets a Gravity Form drive a WooCommerce product’s add-to-cart flow. Without it, GF and Woo coexist but don’t share data automatically.
Can I use it for surveys / quizzes / polls?
Yes. Three separate add-ons (Survey, Quiz, Polls) turn GF into a survey tool. They’re all bundled in the Elite tier and in the GPL Times bundle.
What about GDPR?
Built-in Consent field type. Personal Data sub-tab on each form lets you mark which fields are personal data, configure data retention, and respond to subject-access requests. WordPress’s Personal Data Exporter / Eraser endpoints integrate automatically.
Can I save partial form submissions?
With the Partial Entries add-on, yes. The user’s progress is autosaved as they type. Useful for long forms where bail-outs are common.
How many entries can it hold?
Tens of thousands without issue. Past about 500k entries on a single form, the entries table benefits from index tuning. Cloud-storage add-ons help with file-upload-heavy forms.
Is it RTL friendly?
Yes. The Orbital theme supports RTL out of the box.
Final thoughts
Gravity Forms is the boring, reliable choice for forms on WordPress, and "boring and reliable" is exactly what you want when forms are the thing standing between you and your leads, customers, and applications. It will not impress your friends. It will, however, build any form you can describe in a sentence, run it for a decade, and handle every edge case (multi-step, conditional, payment, file upload, anti-spam, routing, GDPR) without complaint.
Two recommendations if you’re picking it up. One: don’t skip conditional logic. Open the Advanced tab on the second field you add and turn it on. Once you’ve seen conditional fields working live, every form you build after will be five times more useful for the same effort. Two: configure notifications and confirmations the day you build the form, not later. The default notification email is fine for testing but not for production. Five minutes spent routing notifications and writing custom confirmations is the difference between a form that works and a form that just sends submissions.
If you’re choosing between Gravity Forms and a competitor and you can’t decide, here’s the heuristic: pick Gravity Forms if you’ll be using the same form plugin for the next five years and you don’t want to migrate again. Pick a competitor if you have a very specific feature need (a Notion sync, a Slack-first workflow, a Zapier-only flow) that one of them solves better.