

I’ve built five "directory-shaped" WordPress sites in the last three years. A property listing site, a yoga teacher directory, a SaaS comparison index, a recipe library for a food brand, and an internal staff directory for a regional clinic. Each one needed the same three ingredients: a custom post type, a few custom fields, and a templated card grid on the front end that loops the CPT and renders it nicely.
Each one, I built differently. The property site got ACF Pro + a hand-rolled single-property.php and archive-property.php in a child theme. The yoga directory used Pods + custom shortcodes. The SaaS index was raw Gutenberg with a ServerSideRender block I wrote myself, which I am still slightly embarrassed about. The recipe library was JetEngine inside Crocoblock’s dynamic listing. The clinic was Bricks Builder’s loop builder pointed at an ACF custom post type.
All five worked. None of them were the same. Every time a client asked "can we add a new field" I had to remember which stack I’d used. Some had a UI for it, some required PHP.
Toolset Blocks is one more swing at this problem, from a vendor that has been thinking about it longer than most. The angle is different. Instead of asking you to wire blocks to a query yourself, or asking you to write PHP, it ships one big "View" block that you drop into the editor, configure with dropdowns, and template using nested blocks. It plays especially nicely with WPML, which makes sense because it’s built by the same team.
This is what I found after rebuilding the property listing demo on Toolset Blocks. Where.
Table of Contents
- What is Toolset Blocks?
- Toolset Blocks vs Toolset Views: which one do you actually need?
- The three-plugin Toolset stack: Blocks, Types, and Maps
- Installation and the first View
- Building a property listings page from zero, end to end
- Conditional display: the block that hides itself
- Content Templates and WordPress Archives
- Migration: moving from ACF plus theme files to Toolset Blocks
- WPML integration: the unfair advantage
- What Toolset Blocks does not do, and what to reach for instead
- Developer reference: hooks, filters, shortcodes, REST
- Pricing and licensing
- FAQ
- Final thoughts
What is Toolset Blocks?
Toolset Blocks is the Gutenberg-block-based front-end builder from OnTheGoSystems, the same vendor that makes WPML. It lets you display custom post type data on the front end of a WordPress site without writing template files. You drop a "View" block into a page, it queries any post type, and you template the result with normal Gutenberg blocks that read field data from the post being looped.
It’s the second-generation interface for what Toolset has been doing since 2012. The original product was called "Toolset Views" and used a shortcode-driven UI with a custom HTML editor in the admin. That product still exists, but inside the same plugin. If you install Toolset Blocks, you also get the legacy Views editor for back-compat. New work is supposed to happen in blocks. Old work keeps rendering.
Under the hood, every View is still stored as a WordPress post in a private view post type, and Content Templates live in view-template. The block UI writes to the same database fields the legacy UI used. That’s worth knowing because it means migration between the two interfaces is cheap, but it also means the plugin carries some architectural choices that predate Gutenberg.
The vendor’s pitch is: design dynamic templates the same way you build normal WordPress pages. No PHP. No shortcode strings. No second context switch.
If you want to retrace any step on a real install, Toolset Blocks is on GPL Times, and the download includes the full WPML-aware feature set. The walkthrough below was done on a sandbox copy of that zip.
Toolset Blocks vs Toolset Views: which one do you actually need?
This is the question that derails most new Toolset users on day one.
The short version: they are the same plugin. You install Toolset Blocks and you get both the new block-based editor and the legacy Views editor, side by side. The difference is the interface you choose when you build a new View.
If you click "Add new View" from the Toolset menu, you land in the classic Views editor, which is a long admin page with sections for Query, Filter, Loop output, and Pagination. You write shortcodes by hand or by clicking buttons that insert them for you. The output is [wpv-view name="my-view"] that you paste anywhere.
If you open the block editor on a page and add the View block, you get a multi-step wizard that does the same job visually. You pick a loop style (grid, table, list), pick a content type, and template the loop with nested blocks. The View object is created behind the scenes, but you never see the shortcode.
So when do you use which?
- New projects, blocks-first themes. Use the View block. The output is cleaner Gutenberg markup, the editing experience is in-context, and translations through WPML are wired up by default.
- Existing sites with a lot of legacy Views. Stick with the classic editor for those, edit them in place. Migrating a 300-line View to blocks for no reason is busywork.
- Sites where editors should never see the underlying configuration. The block UI hides the query details inside the sidebar, so a content editor opening the page sees a "View Loop" box, not a wall of dropdowns.
- Complex queries with custom SQL or programmatic post relationship filtering. The classic editor exposes hooks and a meta-query builder that the block UI hides. If you need to filter by a join across three tables, classic Views is still where you’ll end up.
The honest take: Blocks is the future, Views is the legacy. But the legacy isn’t deprecated and won’t be soon, because the customer base built a decade of sites on shortcodes. If you’re starting today, start in the block editor and only touch the classic UI when a feature isn’t exposed there yet.
The three-plugin Toolset stack: Blocks, Types, and Maps
Toolset isn’t one plugin. It’s a stack, and the naming makes it confusing if you’ve never used it.
Toolset Types is the foundation. It registers custom post types, custom taxonomies, and custom fields through an admin UI. It is in roughly the same conceptual slot as ACF and Pods. If you’ve used ACF, Types is the part of Toolset that does ACF’s job. No display, just the data model.
Toolset Blocks (this one) is the front-end half. It reads the data Types registered and lets you display it through Gutenberg blocks. It does not register fields. If you install Blocks without Types, you can still build Views, but you’ll be querying built-in post types (posts, pages, media) with built-in fields only.
Toolset Maps is the map block. It reads any address or coordinate field, renders Google Maps or Azure Maps, and supports clustered markers. Optional. Skip it if you don’t need maps.
There are also Toolset Access (role-based per-field permissions) and Toolset Forms (front-end submission forms). Both genuinely useful, both optional.
The bundling matters because the documentation often shows screenshots that mix Types and Blocks. A reader thinks "I’ll install Blocks" and then can’t find the "Post Types" menu, because that menu lives in Types. If you’ve already covered the data model side, the Toolset Types walkthrough on this blog is the companion piece to this article.
Quick mapping if it helps:
| What you need | Plugin |
|---|---|
| Define a "Property" post type with Price, Bedrooms, Address fields | Toolset Types |
| Show a grid of Properties with filters on the front page | Toolset Blocks |
| Render a map of all listings with clustered pins | Toolset Maps |
| Restrict who can edit which field on the back end | Toolset Access |
| Let visitors submit a new Property from the front end | Toolset Forms |
If you only buy Blocks, you’ll hit a wall the minute a client asks for a custom field that isn’t already on the post type. Plan to buy Types alongside it.
Installation and the first View
Standard WordPress install. Upload the zip from Plugins -> Add New -> Upload, activate, and you’ll see a new "Toolset" item in the admin menu with four sub-items: Content Templates, WordPress Archives, Settings, and Export / Import.
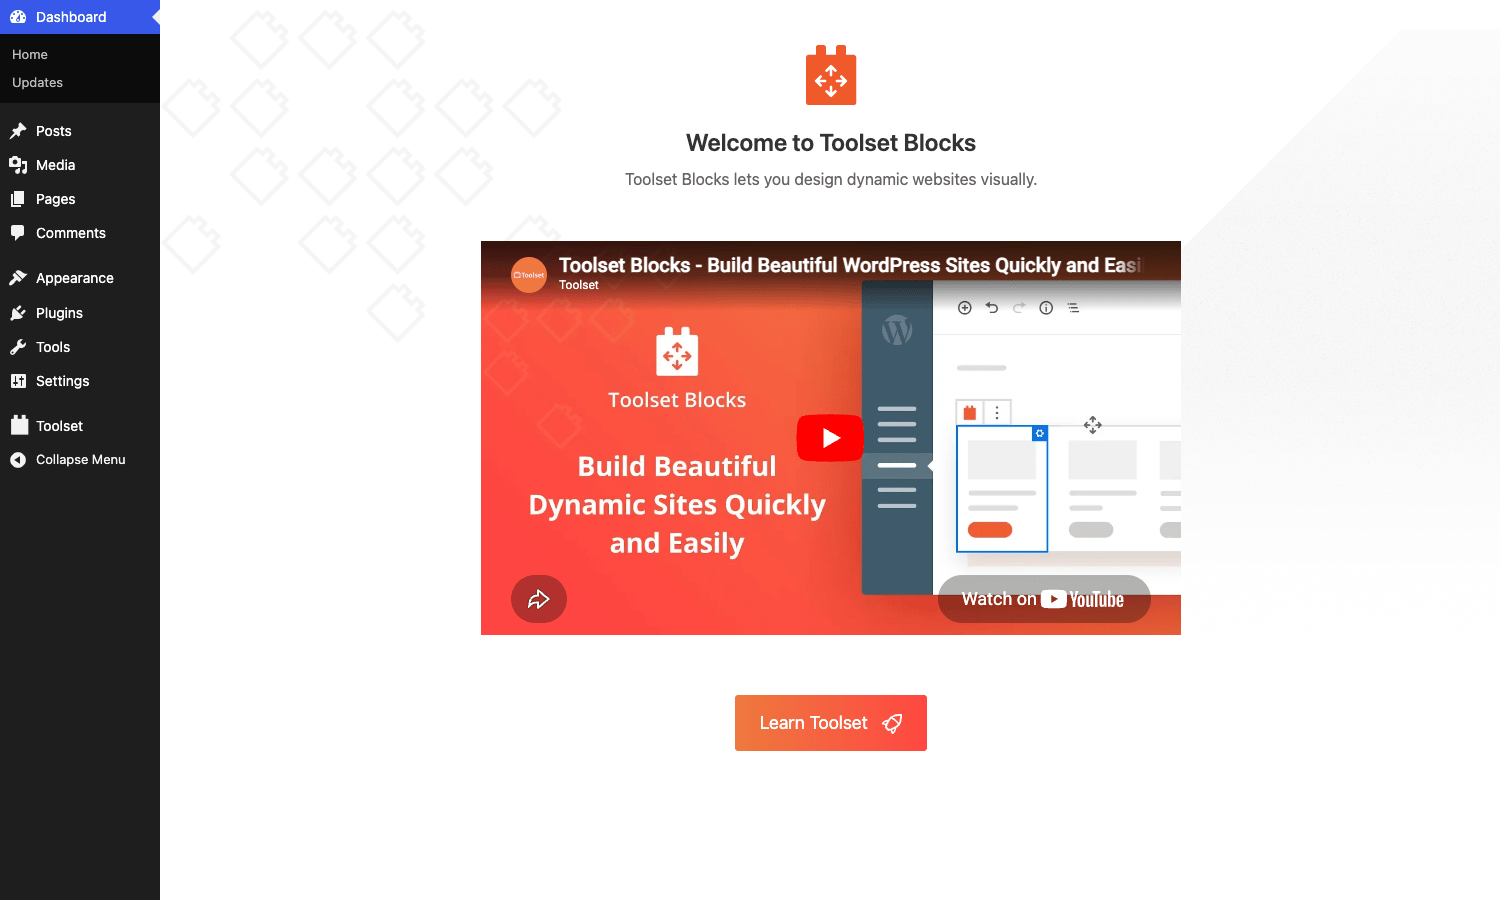
The first time you load the dashboard, you get a welcome screen with a product intro video and a "Learn Toolset" button. Skip the video, it’s marketing.
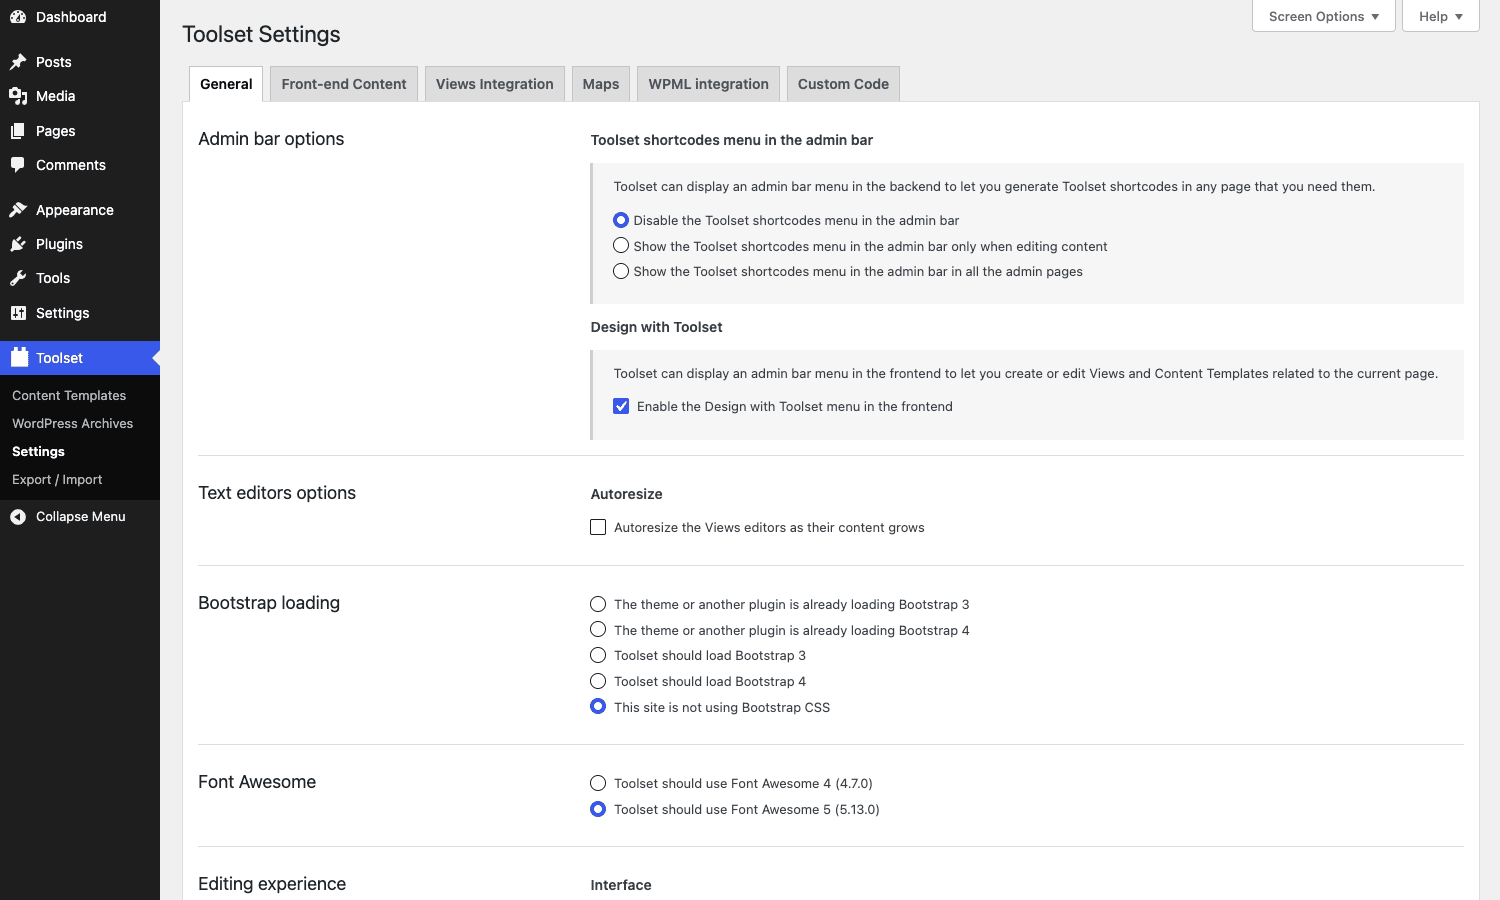
Open Toolset -> Settings. The General tab is mostly fine on defaults. The two things to set:
- Bootstrap loading. If your theme already loads Bootstrap, tell Toolset so it doesn’t load a second copy. If your theme is a modern block theme without Bootstrap, pick "This site is not using Bootstrap CSS". The default is "use Toolset’s", which can clash with theme styles.
- Front-end admin bar menu. The "Design with Toolset" toolbar item lets you jump from any front-end page to its Content Template or View. Handy for development, distracting for clients. Toggle off if you’re handing over the site.
Now the first View. Create a new Page in the block editor. Type a title, add a block, search for "View". The Toolset View block has an orange calendar icon and is the first result.
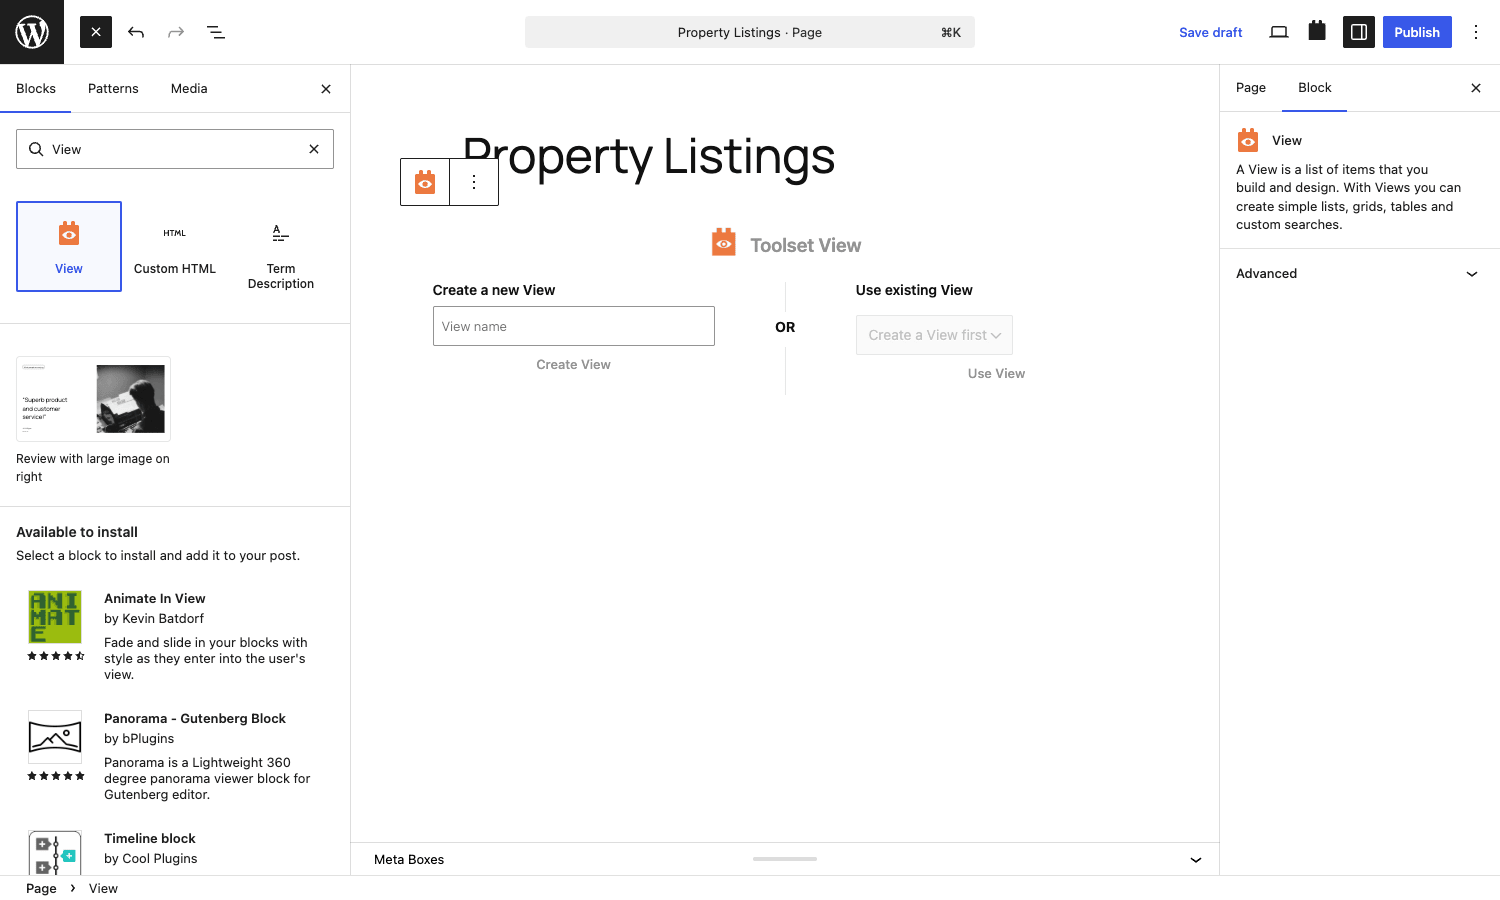
The block asks you to either create a new View or pick an existing one. New users almost always create new. Enter a name. The name is internal only, used in the Views list so you can find this View later.
The next screen is the design step. You pick which controls the View should ship with (pagination, front-end sorting, search) and which loop style: card grid, masonry, two-column, full-width, list, or numbered list.
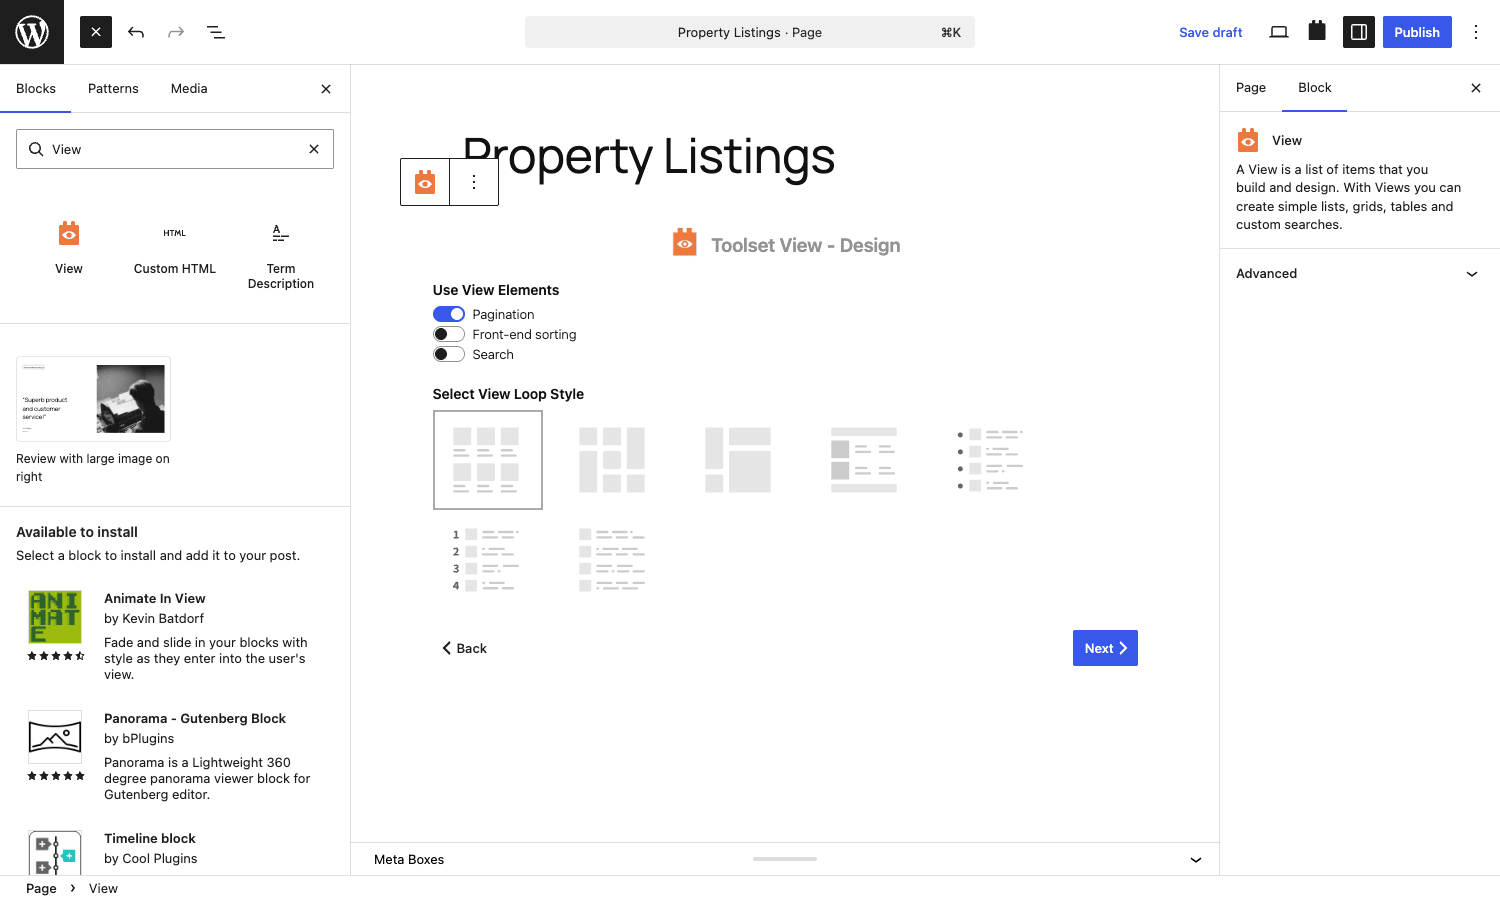
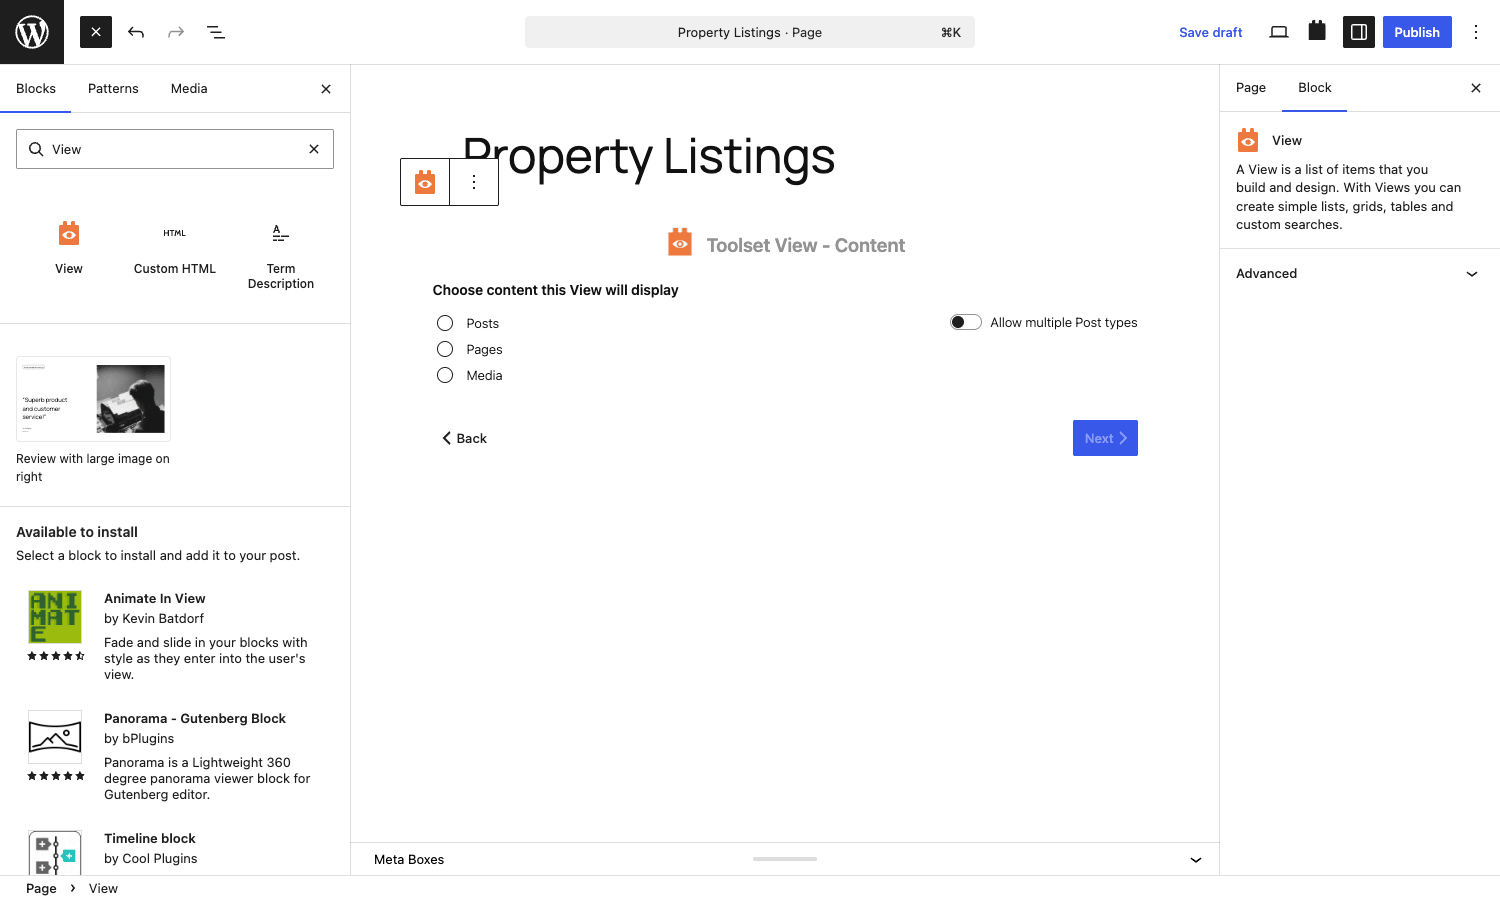
After design comes content selection. This is where you tell the View what to query. Posts, Pages, Media, or any custom post type that Types has registered. You can also toggle "Allow multiple Post types" to let one View query several at once.
Click through and you land on the canvas. This is where the actual work happens. The View block now shows a structured layout: pagination at the top, a View Loop in the middle, more pagination at the bottom, and an Add Sorting / Add Other Blocks toolbar.
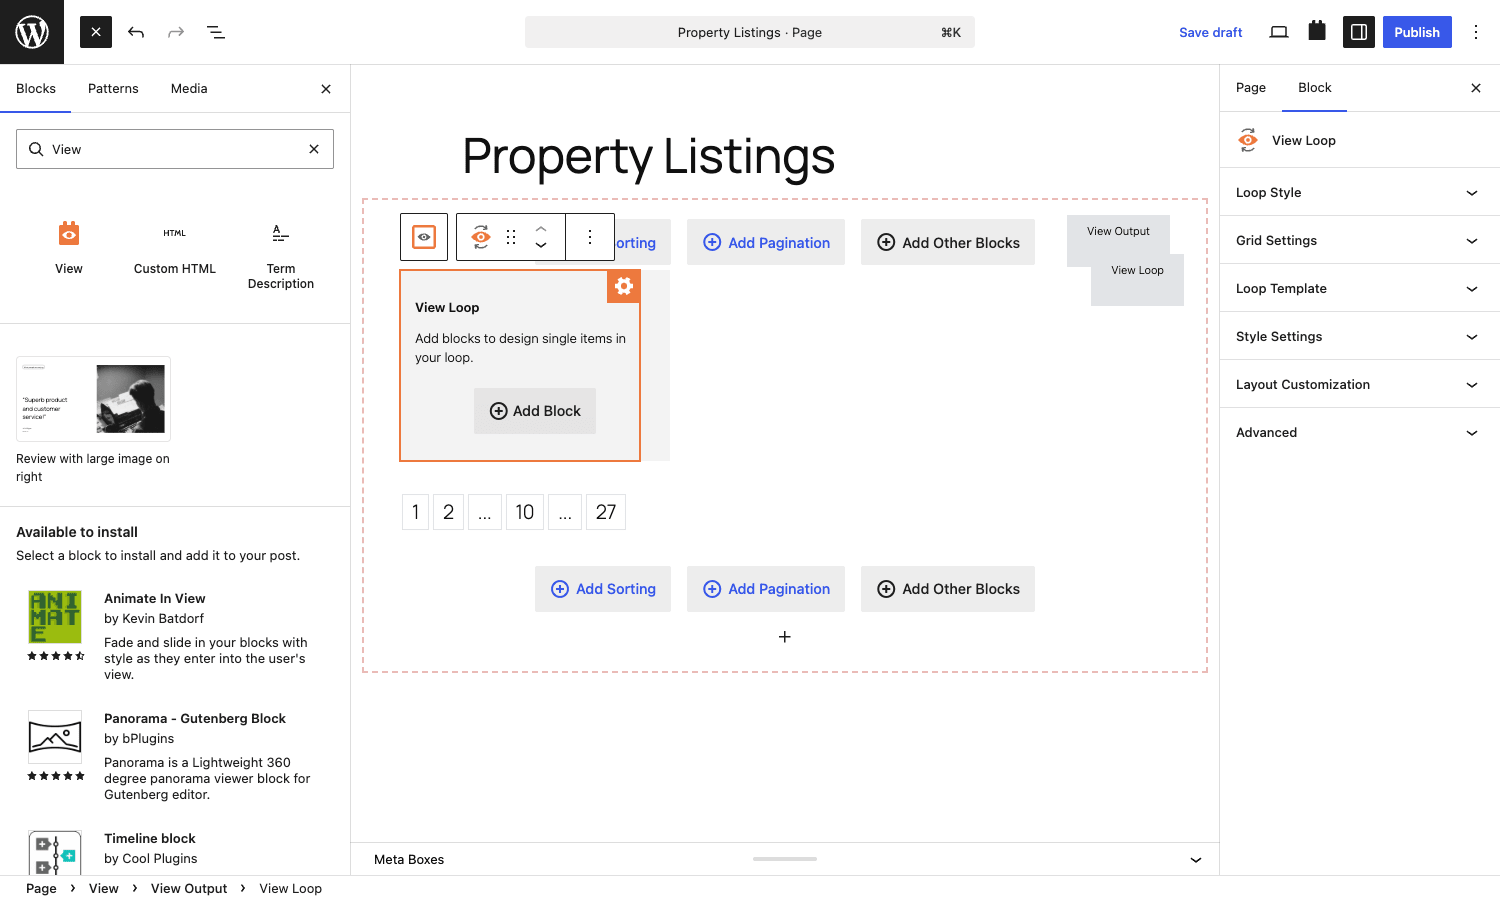
The View Loop is the inner template. You add blocks inside it and they get repeated for each matching post. A Heading block here will print every post’s title. A Field block reading "Price" will print every Price. A Container with two Field blocks and an Image becomes the card layout for one record, repeated.
Save the page and the View renders on the front end with whatever real data exists in the post type. No theme file edits.
Building a property listings page from zero, end to end
Theory is easy. Let me walk through one concrete build: a Property Listings page that queries a Property post type and shows each listing as a card in a three-column grid.
I’m assuming Toolset Types is also active and you’ve registered a Property post type with these fields:
address(single-line text)price(numeric)bedrooms(numeric)bathrooms(numeric)property_type(taxonomy: House, Apartment, Townhouse)cover_photo(image)
Add five or six sample listings with realistic data before you start building. Empty Views look broken even when they’re working.
Step 1: Create the page. Add a new Page in the block editor titled "Property Listings". This is the URL visitors will land on.
Step 2: Add the View block. Search "View", drop it in, name it properties-grid.
Step 3: Pick the loop style. Choose the three-column grid. Enable Pagination and Front-end sorting. Leave Search off for now (we’ll add it later as a custom search filter).
Step 4: Select content. Toggle the Property post type (not Posts). Single content type, no need to enable multi-type.
Step 5: Template the loop. Inside the View Loop block, add an Image block bound to the cover_photo field. Then a Heading block bound to the post title. Then a Container block. Inside the container, two Field blocks side by side: one reads price, the other reads bedrooms. Add a Button block linked to the single post permalink with the label "View details".
The trick: each block has a "dynamic source" sidebar control. When you select the Image block, the right panel shows a dropdown for "Image source" with options like Featured image, Post field, Custom field. Pick Custom field, then pick cover_photo. The block now reads from that field for every post in the loop.
Step 6: Add sorting. Click "Add Sorting" above the Loop. A sort dropdown appears in the editor. Configure it to sort by Price (ascending or descending) and by Date.
Step 7: Add a custom search. This is a separate block you place above the View. Search the inserter for "Custom Search". You get a Search Form block that you can drop fields into: a price range slider tied to the price field, a checkbox group tied to the property_type taxonomy, etc.
Step 8: Save and preview. Front-end now shows a real grid of properties with sort, paginate, search.
Total time, if you’ve done it once before: maybe twenty minutes. If you’ve never used Toolset, expect an hour because you’ll be reading panel tooltips. By the third site, it’s the same twenty minutes every time, which is the actual value proposition.
The same build in a hand-rolled theme would be: register the CPT, create archive-property.php, write a custom WP_Query, write the search form HTML, hook a pre_get_posts filter to honor the search params, write the price-slider with JavaScript, style everything. A solid day, more if you don’t already have a starter theme.
Conditional display: the block that hides itself
Every dynamic site eventually hits this problem: "show this widget only to logged-in users", or "show this discount banner only to members on the Pro plan", or "hide the price if the post has a price_hidden checkbox set".
Toolset Blocks has a Conditional block for exactly that.
It’s a container block. You drop it on the page, click "Edit conditions" in the sidebar, and the rule builder opens.
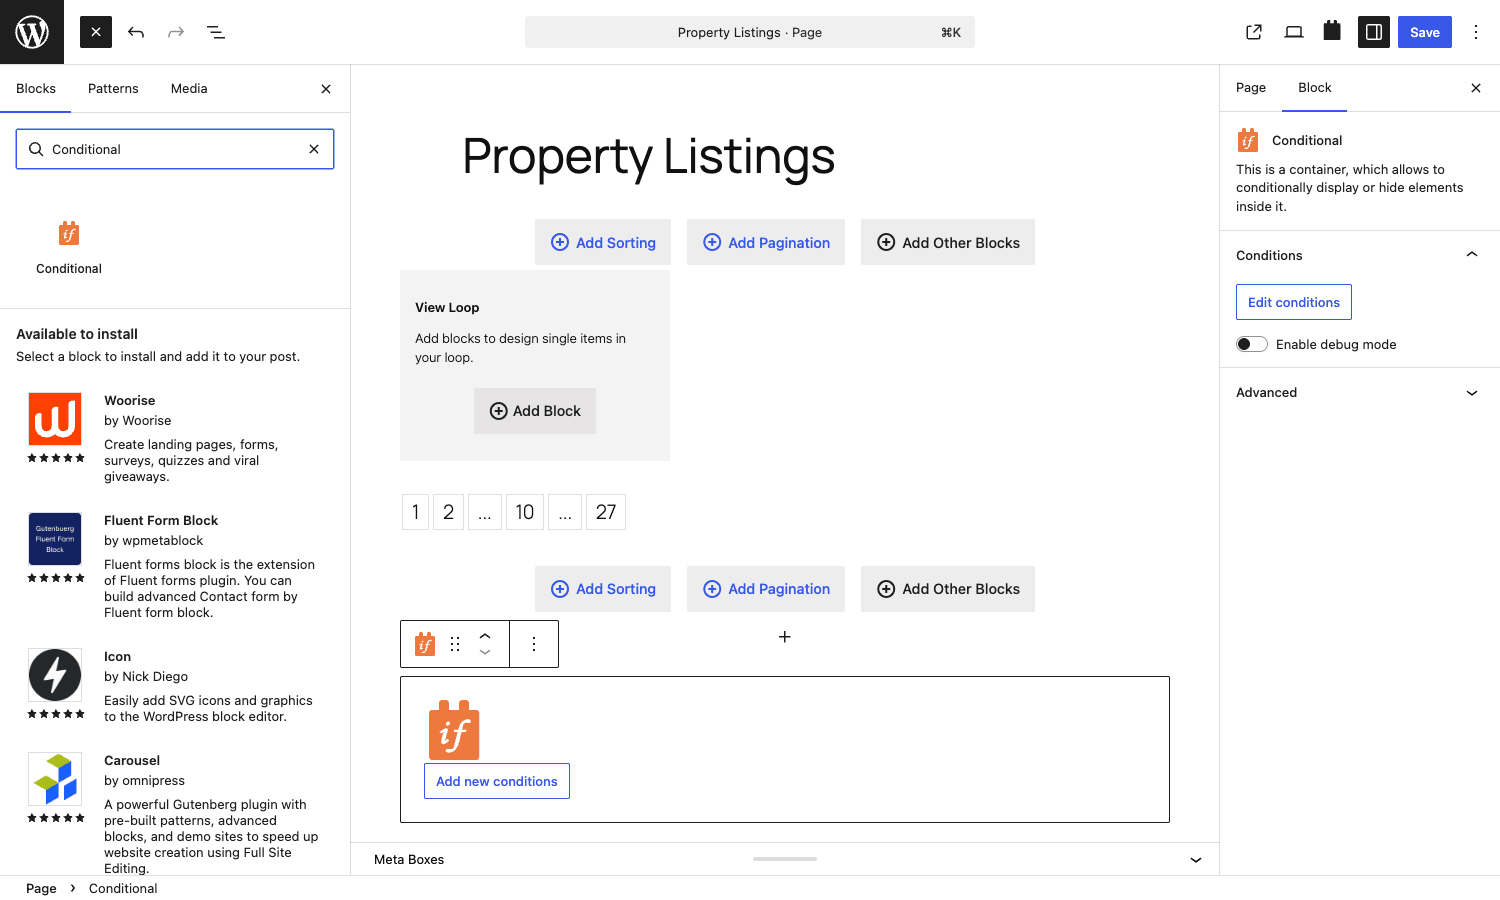
The rule builder takes three things: a field, an operator, and a value. The field can be any post field, any taxonomy term, any user field, any global like the current language or the current date. The operator changes based on the field type (equals, not equals, greater than, contains, in array, regex). Multiple conditions are AND’d by default or you can flip to OR. A NOT toggle inverts the whole rule.
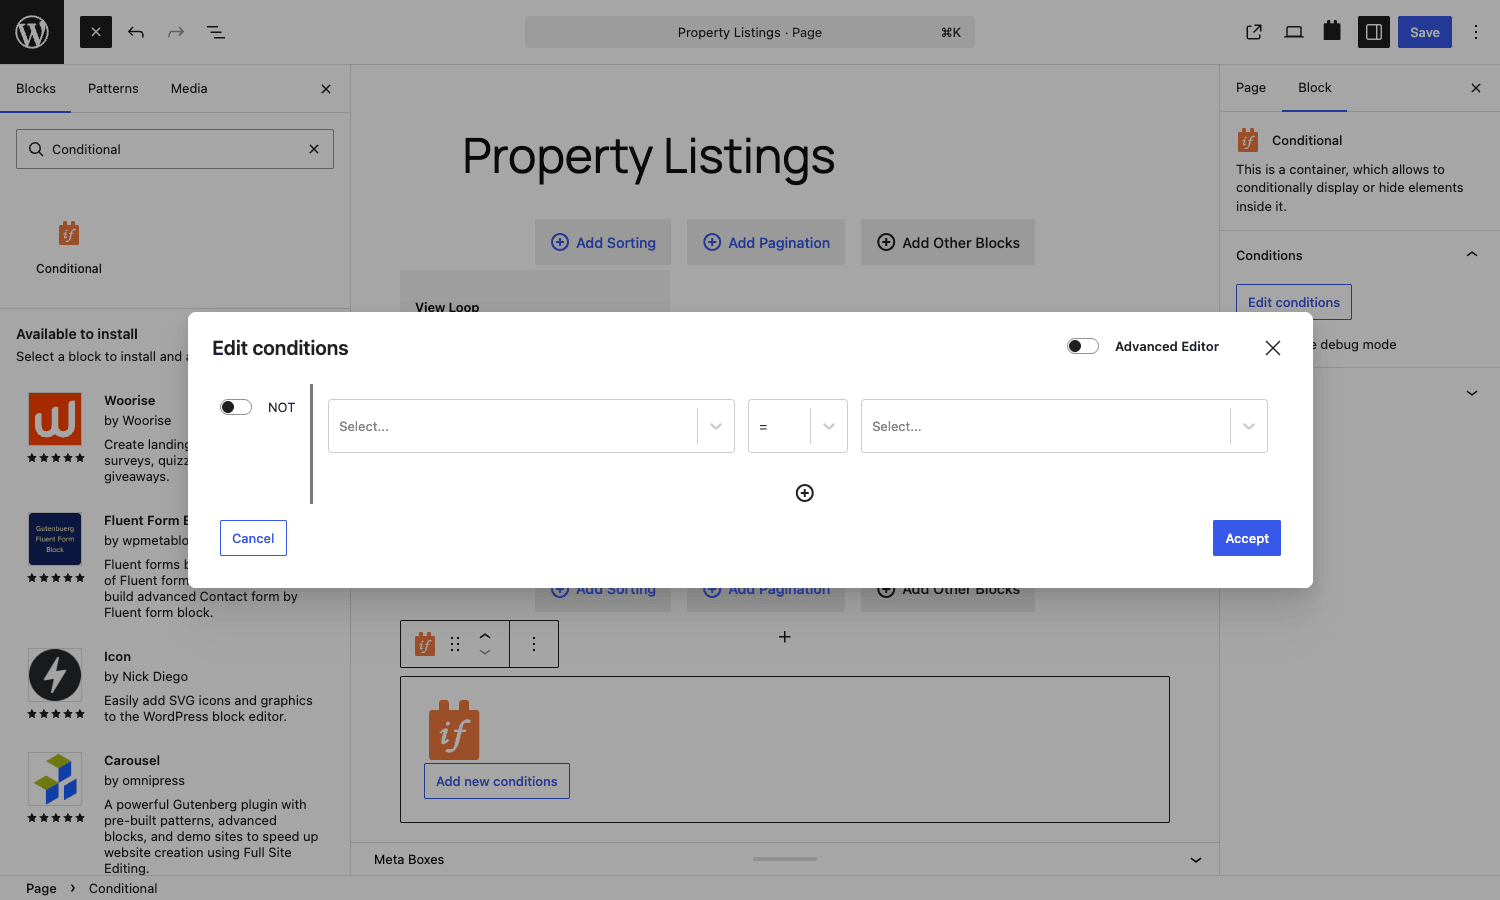
Whatever you put inside the Conditional block renders only when the rule passes.
For the property site, I used it for three things:
- Hide the "Contact agent" CTA when
agent_visibilityfield equals "internal_only". - Show a "New listing" badge if the post was published less than seven days ago. Condition:
post_dategreater than (today minus 7 days). - Show a different price label in the loop for listings where the price field is empty. The fallback says "Contact for price" instead of leaving a blank row.
The Advanced Editor toggle in that modal switches the rule into a raw expression syntax. If you’ve used the classic Views [wpv-if evaluate="..."] shortcode, that’s the same engine. You can write [types field="price"][/types] > 500000 AND [types field="bedrooms"][/types] >= 3 and Toolset will evaluate it at render time. The visual builder is friendlier, but the text mode is what advanced users reach for when they need a calculation the dropdowns don’t cover.
One quiet detail worth knowing. The condition is evaluated server-side. The Conditional block doesn’t render the inner content into the HTML at all when the rule fails. That matters for two reasons: it means hidden content isn’t view-source-able by curious visitors (so this is safe for "members only" widgets), and it means search engines don’t index content that the user wouldn’t see.
Content Templates and WordPress Archives
The View block handles "list of posts". For "single post" and "list of posts on an archive page", Toolset has two other building blocks.
Content Templates are layouts you assign to a post type. Open Toolset -> Content Templates -> Add New. The editor is the standard block editor with the full Toolset block library available. You build the layout once with Field blocks pulling dynamic data. Then you assign the template to a post type from the Usage tab. From that point on, every single Property post on the site renders using your template, regardless of which theme template would otherwise apply.
The template replaces the theme’s single-{post_type}.php without you touching a PHP file.
WordPress Archives are layouts for the archive views: archive-property.php, category.php, tag.php, search results, date archives. Same idea. You build a layout in the block editor, you assign it to one or more archive contexts, and Toolset takes over the rendering on those pages.
The handy thing about Archives is that you can have one Archive template for the entire site’s tag pages and a different one for Properties’ archive. The assignment UI lets you scope by archive type.
Where this gets opinionated: Content Templates and Archives are system-wide overrides. Once you assign a Content Template to the Property post type, every Property uses it. Good for consistency. Bad if a specific Property needs a different layout. The workaround is the Conditional block inside the template, which lets you branch on per-post metadata, but that adds template complexity. Some teams prefer to use a View block on a regular Page for "list of properties" and skip the Archive template entirely. There’s no wrong answer, just trade-offs.
Migration: moving from ACF plus theme files to Toolset Blocks
This is the question Toolset’s own documentation doesn’t answer well, and it’s the most common scenario I see in real projects.
You already have a site running ACF Pro and a child theme with files like single-property.php, archive-property.php, and a custom front-page.php that runs a WP_Query for the latest five properties. You want to move to Toolset Blocks so the marketing team can edit those layouts without touching code.
Here’s the migration plan I follow.
Step 1: Install Toolset Types alongside ACF. They coexist. ACF keeps managing the existing fields. Types is just there. Don’t try to convert ACF fields to Types fields, that path is painful.
Step 2: Tell Toolset about the ACF field keys. Toolset’s filter UI doesn’t auto-discover ACF fields. You expose them via the wpv_filter_wpv_get_postmeta_keys filter:
add_filter( 'wpv_filter_wpv_get_postmeta_keys', function( $keys ) {
 $keys[] = 'price'; // ACF text field
 $keys[] = 'bedrooms'; // ACF number field
 $keys[] = 'cover_photo'; // ACF image field
 return $keys;
} );
Now Toolset’s Field block dropdown shows your ACF fields as available data sources.
Step 3: Build the new View on a staging page. Don’t touch the theme files yet. Build a View block on a new page called "Properties (new)". Get the look right with real data. This is just a layout exercise.
Step 4: Create a Content Template for the Property post type that replicates single-property.php. Same data sources, same approximate layout. Preview it on an existing Property URL. The Content Template takes precedence over single-property.php, so the new layout will show on the live URL even though the theme file still exists.
Step 5: Create a WordPress Archive for the Property archive. Same drill. The Archive will render whenever someone visits /property/, overriding archive-property.php.
Step 6: Delete the theme files. Once you’ve confirmed the Toolset layouts work for every Property on the site, delete single-property.php and archive-property.php from the child theme. Toolset is now the source of truth.
Step 7: Decide on ACF Pro’s future. You can keep ACF Pro forever. Types adds nothing on top of it for fields that already exist. The reason teams migrate fields from ACF to Types is usually for the WPML field translation pipeline, which Toolset wires up automatically and ACF requires the ACF Multilingual addon to handle. For a single-language site, keeping ACF is fine.
The migration takes about half a day for a small site, two or three days for a complex one. The biggest risk is forgetting to expose meta keys via the filter above. If a Field block shows "no value" in the loop, that’s almost always the cause.
WPML integration: the unfair advantage
Most Toolset reviews skip this because they’re written by people building single-language sites. If you’re building multilingual, this is the entire reason to pick Toolset over Bricks loop builder or JetEngine.
Toolset Blocks ships with WPML wired into every layer:
- Views and Content Templates are translatable as full WordPress posts. WPML’s translation editor knows what they are. A translator opens the View, sees the English layout, and translates the field labels and surrounding text directly.
- Custom fields registered through Types are translatable per-field. The Types UI has an "Allow translation" dropdown per field with options for translate, copy, or copy-once.
- Field blocks automatically render in the current language. You don’t write a
wpml_current_languageswitch. Toolset handles it. - Conditional blocks can branch on
wpml_current_language. So "show this banner only on the French version of the site" is two clicks. - The View block’s query respects WPML’s language filter. A View configured to show all Properties shows the Italian Properties on the Italian site and the German ones on the German site, with no extra config.
The catch: this works because Toolset and WPML are made by the same vendor. If you’re already on WPML, Toolset is the easiest dynamic-content stack to add. If you’re on Polylang or TranslatePress, the integration ranges from "works partially" to "works in limited modes". The vendor will tell you to switch to WPML. They’re not entirely wrong, but factor it in.
I’ll be honest about a critique here. Toolset’s deep WPML integration is also why its data model carries some opinionated choices. Many-to-many relationships are wired through Toolset’s own m2m system instead of using WordPress’s built-in post-to-post taxonomy approach, partly because the m2m system survives translation correctly. If you’re not multilingual, those choices feel heavier than they need to be.
What Toolset Blocks does not do, and what to reach for instead
Toolset Blocks is opinionated. There are real things it doesn’t do, and being clear about them saves you from picking the wrong tool.
Visual front-end editing. Bricks Builder, Oxygen, and Breakdance let you edit the layout from the front end with a live preview that includes the surrounding theme. Toolset’s View block previews inside the Gutenberg editor, which doesn’t always match the theme’s full output. If pixel-precise front-end editing is the priority, reach for Bricks.
Full theme building. Toolset templates per post type, not the whole theme. Headers, footers, global typography all stay with your theme. If you want a theme builder, this is the wrong tool. Elementor Pro Theme Builder, Bricks, and Astra Pro do this. Toolset focuses on the dynamic content surface only.
Complex WooCommerce product templates. Toolset can render WooCommerce products through Views, but it doesn’t reproduce WooCommerce’s full single-product template (price, gallery, related products, cross-sells, variations, add-to-cart logic). You’d be re-implementing it block by block. If you’re customizing single-product pages, use WooCommerce’s built-in blocks or a WooCommerce-focused builder.
Massive datasets with infinite scroll. The View block does support AJAX pagination and load-more, but on multi-thousand-row queries you’ll hit performance issues. The query is still a standard WP_Query, so it inherits WordPress’s limitations on big result sets. For tens of thousands of records, look at Facets WP or a custom REST endpoint.
Headless WordPress front ends. Toolset’s value is the in-WordPress block UI. If your site is Next.js consuming REST or GraphQL, Toolset gives you nothing your frontend can’t already do.
Lightweight, single-CPT, single-view sites. If you only need one page that loops one CPT, you might be better off with the built-in Query Loop block in core Gutenberg plus a few inline fields. Toolset is a heavy install (the plugin is over ten megabytes zipped) and only.
A useful mental model: Toolset Blocks is what you use when the project has multiple CPTs with related fields, multiple templated views of them, and ideally multilingual requirements. For anything simpler, it’s overkill.
Developer reference: hooks, filters, shortcodes, REST
The plugin exposes a large hook surface. Both the new block UI and the legacy editor share the same wpv_ namespace, so any filter you’ve written against Views in the past still works in Blocks.
Useful filters
wpv_filter_wpv_get_postmeta_keys registers extra meta keys so the field-picker dropdowns can see them. Use it when you have meta fields managed outside of Types (ACF, Pods, or manual add_post_meta calls).
add_filter( 'wpv_filter_wpv_get_postmeta_keys', function( $keys ) {
 $keys[] = 'external_listing_id';
 return $keys;
} );
wpv_filter_wpv_custom_conditional_functions registers a custom function callable from inside [wpv-if] conditions and the Conditional block’s Advanced Editor.
add_filter( 'wpv_filter_wpv_custom_conditional_functions', function( $fns ) {
 $fns['is_user_subscribed'] = array(
 'name' => 'is_user_subscribed',
 'callback' => 'my_is_user_subscribed_callback',
 );
 return $fns;
} );

function my_is_user_subscribed_callback() {
 return is_user_logged_in() && get_user_meta( get_current_user_id(), '_subscribed', true ) === '1';
}
Use it from a Conditional block by switching the modal to Advanced Editor and typing is_user_subscribed(). The block hides if the function returns false.
wpv_filter_wpv_get_view_settings mutates a View’s stored settings before render. Useful for runtime overrides like "only show featured posts on the homepage".
wpv_filter_adjust_view_settings_for_export, wpv_filter_adjust_view_layout_settings_for_export, and wpv_filter_view_extra_fields_for_import_export hook into the JSON import / export pipeline. If you’re moving Views between staging and production, these let you sanitize site-specific data.
toolset_filter_toolset_registered_user_editors lets you swap in a custom front-end user editor, typically Toolset Forms’ own form.
toolset_is_m2m_enabled returns whether Toolset’s many-to-many post relationships are active. Check this before reaching for the m2m API.
toolset_is_maps_available returns whether Toolset Maps is installed. Use it to guard map-only code paths.
Useful actions
wpv_action_wpv_save_item fires after a View, Content Template, or Archive is saved. Hook into it to invalidate caches or sync the layout to a CDN.
add_action( 'wpv_action_wpv_save_item', function( $item_id ) {
 if ( function_exists( 'wp_cache_flush' ) ) {
 wp_cache_flush();
 }
} );
The block UI exposes a similar lifecycle in JavaScript via the wp.data store under toolset-views, but the PHP action is the safe bet because it fires for both UIs.
views_edit_screen fires when any Views editor screen loads. Use it to enqueue your own admin assets that need to run on the Views UI.
wpv_action_view_editor_section_* series (title, top, query, filter, layout, extra) let you inject custom panels into the classic Views editor. The block editor uses the standard Gutenberg sidebar slots instead, so these don’t fire there.
Shortcodes that still work
Even with the block UI, the underlying shortcodes are alive. You can paste them into any post, page, or widget area:
[wpv-view name="properties-grid"] renders a saved View by name.
[wpv-post-body view_template="property-card"] renders a Content Template for the current post.
[wpv-if evaluate="$(price) > 500000"]Luxury listing[/wpv-if] is the conditional shortcode. Same engine as the Conditional block.
[wpv-pagination]... [/wpv-pagination] wraps the pagination controls. Used inside View loop output.
[wpv-sort-orderby] and [wpv-sort-order] emit the dropdown selects for front-end sorting.
[wpv-control-set] and [wpv-control-post-relationship] are the relationship-aware filter shortcodes, used when you’re filtering one CPT by its relationship to another. The full shortcode catalog is on the Toolset Views shortcodes reference.
The block UI generates these shortcodes under the hood when it serializes a View. If you View Source a Toolset-rendered page, you’ll see them in the markup of the View block’s saved configuration. That’s also why migration between block-based and shortcode-based interfaces is cheap: both write the same wire format.
REST endpoints
Toolset Blocks registers its REST routes under toolset-views/v1. They’re used by the block editor’s own UI, but they’re also callable from external clients.
GET /wp-json/toolset-views/v1/views lists all saved Views.
GET /wp-json/toolset-views/v1/views/{id} returns one View’s configuration as JSON.
POST /wp-json/toolset-views/v1/views creates a View from a configuration payload.
PUT /wp-json/toolset-views/v1/views/{id} updates an existing View.
POST /wp-json/toolset-views/v1/views/duplicate/{id} duplicates a View.
POST /wp-json/toolset-views/v1/views/update_data/{id} updates the View’s serialized data blob (used for incremental block-editor saves).
GET /wp-json/toolset-views/v1/view_fields returns the available field list for a given post type.
GET /wp-json/toolset-views/v1/post_types and /taxonomies enumerate the registered types so the block UI can populate dropdowns.
GET /wp-json/toolset-views/v1/content_templates and full CRUD on /content_templates/{id} mirror the Views API for Content Templates.
POST /wp-json/toolset-views/v1/get_rendered_query_filter is used by the editor preview to render a filter form server-side. Calling it from outside the editor isn’t supported but the endpoint is open.
All endpoints require an authenticated user with the appropriate Toolset capability. The default is manage_options, which means admins. If you want editors to create Views, the Toolset Access plugin exposes a fine-grained capability per UI section.
Block library
Toolset Blocks registers roughly twenty public blocks via the standard block registration API. The ones you’ll use daily:
toolset-blocks/view: the View Loop. The headline block.toolset-blocks/conditional: the conditional container shown above.toolset-blocks/container: a generic layout container with Toolset-specific styling controls.toolset-blocks/gridandtoolset-blocks/grid-column: a responsive grid.toolset-blocks/field: dynamic field renderer. Reads any post field, custom field, taxonomy, user field, or global.toolset-blocks/heading: dynamic heading (post title, archive title, etc.).toolset-blocks/image: dynamic image bound to a field.toolset-blocks/button: dynamic button with dynamic URLs.toolset-blocks/fields-and-text: a hybrid block where you write text and embed field tokens inline.toolset-blocks/repeating-field: renders a repeater field’s items in a loop.toolset-blocks/star-rating: renders a numeric field as a star rating.toolset-blocks/countdown,toolset-blocks/progress,toolset-blocks/social-share,toolset-blocks/gallery,toolset-blocks/image-slider,toolset-blocks/video,toolset-blocks/audio,toolset-blocks/youtube: assorted media and display blocks.
Internal blocks under toolset-views/ (sorting, table-column, custom-search-filter, view-pagination) are used by the View block as children. You don’t insert them directly; they show up automatically when you configure the View.
Pricing and licensing
Toolset is a paid plugin. The official license includes Blocks, Types, Maps, Access, Forms, and Module Manager in a single subscription. No free Lite version on WordPress.org for Blocks specifically.
For evaluation builds or staging, the GPL version of Toolset Blocks is on GPL Times. Same plugin zip as the official build, redistributed under the GPL terms that WordPress’s own licensing requires. You won’t get vendor support, but you do get the plugin and its dependent libraries (so the WPML hooks, the REST endpoints, the entire block library) intact. For staging and POC work, that’s usually what teams want. For production sites that need OnTheGoSystems’ direct support channel, the official subscription is still the answer.
A note worth making: Toolset’s full stack (Blocks + Types + Maps + Access + Forms) is genuinely large. Around twenty megabytes installed when everything is active. Don’t install components you won’t use.
FAQ
Can I use Toolset Blocks without Toolset Types?
Technically yes. Practically you’ll regret it within a week. Without Types you can only query built-in post types (posts, pages, media) using built-in fields. The minute a client asks for a "Property Price" field that doesn’t exist, you’ll be installing Types anyway. Plan to use them together from day one. The exception is sites built entirely around blog posts where Toolset Blocks is just templating the post grid. That works alone, but it’s also a use case where the core Gutenberg Query Loop block does the same job for free.
Why are my Field blocks showing "no value" after migrating from staging to production?
Almost always because the meta keys your fields use aren’t registered with Toolset’s filter list on the production site, even though the data exists. If you imported posts but the field definitions live in ACF or in your theme’s register_meta calls, Toolset doesn’t know to expose them in the block dropdowns. Add the wpv_filter_wpv_get_postmeta_keys filter (shown in the developer section) to whitelist them. The "empty migration" gotcha is the most-asked question in Toolset’s support forum and the answer is the same every time.
Does Toolset Blocks still need the legacy Views interface, or can I disable it?
You can’t fully disable it. Both UIs live in the same plugin and the data layer is shared. You can ignore the classic Views menu items, but they’ll keep appearing under the Toolset menu as long as the plugin is active. The vendor’s argument is that thousands of sites have shortcode-based Views built years ago, and ripping out the classic UI would break them. I think they’re right, but it does mean a slightly cluttered admin for new users.
Will Toolset survive when Gutenberg’s own Query Loop block matures?
This is the question I get most often, and my honest answer is: partly. Core Gutenberg’s Query Loop block has been getting better every release, and for "show me a grid of posts with custom fields" it’s catching up. Where Toolset still wins is the conditional display engine, the custom search forms, the WPML integration, and the WordPress Archives override. Those aren’t on core Gutenberg’s roadmap as far as I can tell. So I expect Toolset to occupy a narrower but still real niche over the next few years rather than disappear.
Can I use Toolset Views inside a Bricks Builder template?
Yes, with caveats. You render a Toolset View via its shortcode [wpv-view name="..."] inside a Bricks Code or Shortcode element. The View itself works, but Bricks’ own loop builder won’t understand it as a queryable source. So if you’re mixing the two, treat each View as an opaque widget that you drop into a Bricks layout. Don’t try to make Bricks read from a Toolset View object directly. That said, mixing the two stacks tends to mean you’re paying two licenses to solve overlapping problems. Pick one and commit.
My View shows the right posts in the editor preview but empty on the front end. What’s going on?
Cache. Toolset’s block editor renders a server-side preview that bypasses some caching layers. The front end goes through your full theme + cache stack. If a CDN or page-cache plugin is serving an old cached version of the page, you’ll see stale (or empty) output. Purge the page cache and CDN cache after saving a View. If you’re using WP Rocket or LiteSpeed Cache, exclude the page that hosts the View from cache while you’re iterating on the layout, then re-enable cache when the layout is final.
Does Toolset Blocks support post-to-post relationships, or do I need a separate plugin like Pods?
It supports them natively through Toolset Types’ m2m relationships. You define a relationship in Types (Author has many Books, for example), and then in a View you can query "all Books by this Author" using a Relationship filter in the View block. The catch is that Toolset’s relationships are a parallel system to WordPress core’s built-in post-to-post taxonomy bridge or the relationship fields in ACF Pro. If you’ve already modeled relationships in another system, migrating them to Toolset is non-trivial. Start new projects with Toolset relationships from day one if you plan to use them.
Is there a Toolset Blocks free trial?
OnTheGoSystems offers a 30-day money-back guarantee rather than a free trial. If you want to evaluate the full stack without paying first, the GPL-licensed download on GPL Times is the practical option for a staging install. For a production purchase, the money-back window covers a real-world test on your live site.
Final thoughts
I’ll be candid about the test build that prompted this article. The first time I sat down with Toolset Blocks, I almost gave up after twenty minutes. The terminology was alien. Why is there a "View" and an "Archive" and a "Content Template"? Why does the menu live under Toolset instead of next to Pages? Why is there a legacy Views editor underneath the new one?
By day two, those questions answered themselves. The "View" is a query plus a template, the "Content Template" is a single-post layout, the "Archive" is what overrides theme archive files. Once you have the mental map, the rest of the plugin is consistent. The block library is wide without feeling bloated. The conditional engine is genuinely better than ACF + Block Visibility’s plugin combo I’d been using.
Where I still get frustrated is the legacy split. New users see two UIs for the same job and don’t know which to pick. The vendor’s docs sometimes show screenshots from the classic UI when explaining a block-first feature. That confusion is real and it’s the single biggest barrier to entry. Once you accept "Blocks for new work, classic only when needed", it stops being a problem.
Would I pick Toolset Blocks for the next project? It depends on the brief.
For a multilingual property listing site, a recipe directory with translations, a team directory with multilingual bios, or any project where WPML is already in the stack: yes, every time. Nothing else integrates as cleanly.
For a single-language SaaS comparison index or a simple blog with custom fields: probably not. I’d reach for ACF Pro and the core Query Loop block, or Bricks if the team wants visual editing.
For complex CPT-driven directories with conditional logic and front-end submissions, where the team includes editors who shouldn’t touch code: yes. The Conditional block alone justifies it for that audience.
That’s the honest assessment after a week with the plugin. It’s not the right tool for every site, but for the sites it fits, it’s the easiest path from "we need a custom directory" to "the directory is live and the marketing team can edit it" that I’ve used.