

You finally need to move your WordPress site. Maybe your hosting plan is too small and you’re switching to a faster host. Maybe you built the new site on a staging domain and need to push it to production. Maybe a client signed off on the design and you’re handing the whole thing over to their server. Whatever the reason, you Google "how to move a WordPress site" and immediately discover the actual answer involves SSH, mysqldump, careful database search-and-replace for hardcoded URLs, fixing serialized data, FTP’ing thousands of files, and praying the new server has the right PHP version.
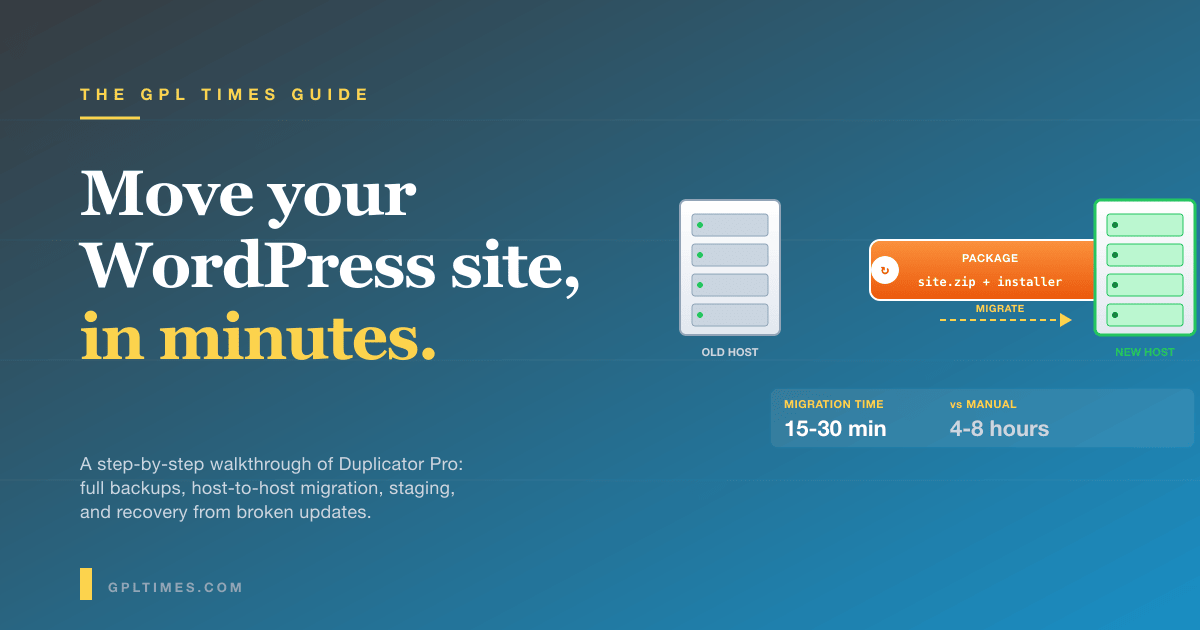
Or, you can install Duplicator Pro. The plugin packages your entire WordPress site (database, files, uploads, theme, plugins, the works) into a single archive plus an installer script. You upload those two files to the new host, run the installer in a browser, answer a few questions, and your site is live on the new server. The whole migration takes 15-30 minutes for most sites instead of the 4-8 hours the manual route takes (and a real risk of breaking things you don’t notice for weeks).
This is a full walkthrough. By the end you’ll know how to do a one-shot migration to a new host, how to set up scheduled automatic backups to Google Drive or Dropbox, how to clone your live site to a staging environment, and what to do when something goes wrong (because something usually goes wrong on the first migration, and most issues have a known fix).
I’ll use Duplicator Pro for this guide because the Pro version handles big sites and cloud destinations, which is what most real migrations need. The free Duplicator on WordPress.org works for small sites too, and I’ll note which steps require Pro as we go.
What you’ll be able to do when you’re done
- Create a full backup of any WordPress site (files + database + everything) and save it as a downloadable archive.
- Move that site to a brand new host or a different domain, with all settings, posts, images, and theme customizations intact.
- Schedule automatic backups to run nightly or weekly and push to Google Drive, Dropbox, OneDrive, Amazon S3, or another remote location, so you have off-site copies if your server dies.
- Build a staging copy of your live site to test changes safely before they hit production.
- Recover from the "I just pushed broken code to production" panic in about ten minutes.
Total time to get familiar: about 60 minutes including a practice migration.
What Duplicator Pro actually does
Duplicator Pro is a WordPress plugin made by Snapcreek (now part of Awesome Motive, the same team behind WPForms and MonsterInsights). At a technical level, it does three things every time you create a backup:
- Database export. It dumps your entire WordPress database to SQL.
- File archive. It zips your WordPress installation: wp-content, themes, plugins, uploads, wp-config.php, the works. Excludes anything you tell it to.
- Installer. It bundles a single PHP file called
installer.php(sometimesinstaller-backup.php) that, when run on the destination server, unpacks the archive, restores the database, and runs the search-and-replace needed to fix any hardcoded URLs.
That third piece is the secret sauce. The installer asks where you want to install, takes care of the URL rewriting, sets new database credentials, and handles all the boring migration logistics. You don’t touch SSH, you don’t run SQL by hand, you don’t manually edit wp-config.php. The installer does it all in a web wizard.
The "Pro" upgrade adds the features that turn this into a real production tool: cloud storage destinations (Google Drive, Dropbox, OneDrive, S3, FTP), scheduled backups, multisite support, large site handling for sites over 500MB, the Import Backups page that does host-to-host transfers without leaving WordPress, and an automated Staging environment generator.
Free Duplicator handles single-site backups, full archives, and the installer flow for small-to-medium sites (under ~500MB). If your site is over that, or if you need any of the Pro features above, you need Pro.
Step 1: Install Duplicator Pro
In your WordPress admin on the source site (the one you want to move), go to Plugins → Add New → Upload Plugin. Choose the duplicator-pro.zip file, click Install Now, then Activate Plugin.
A new "Duplicator Pro" menu appears in the admin sidebar. Click it. You land on the Backups page:
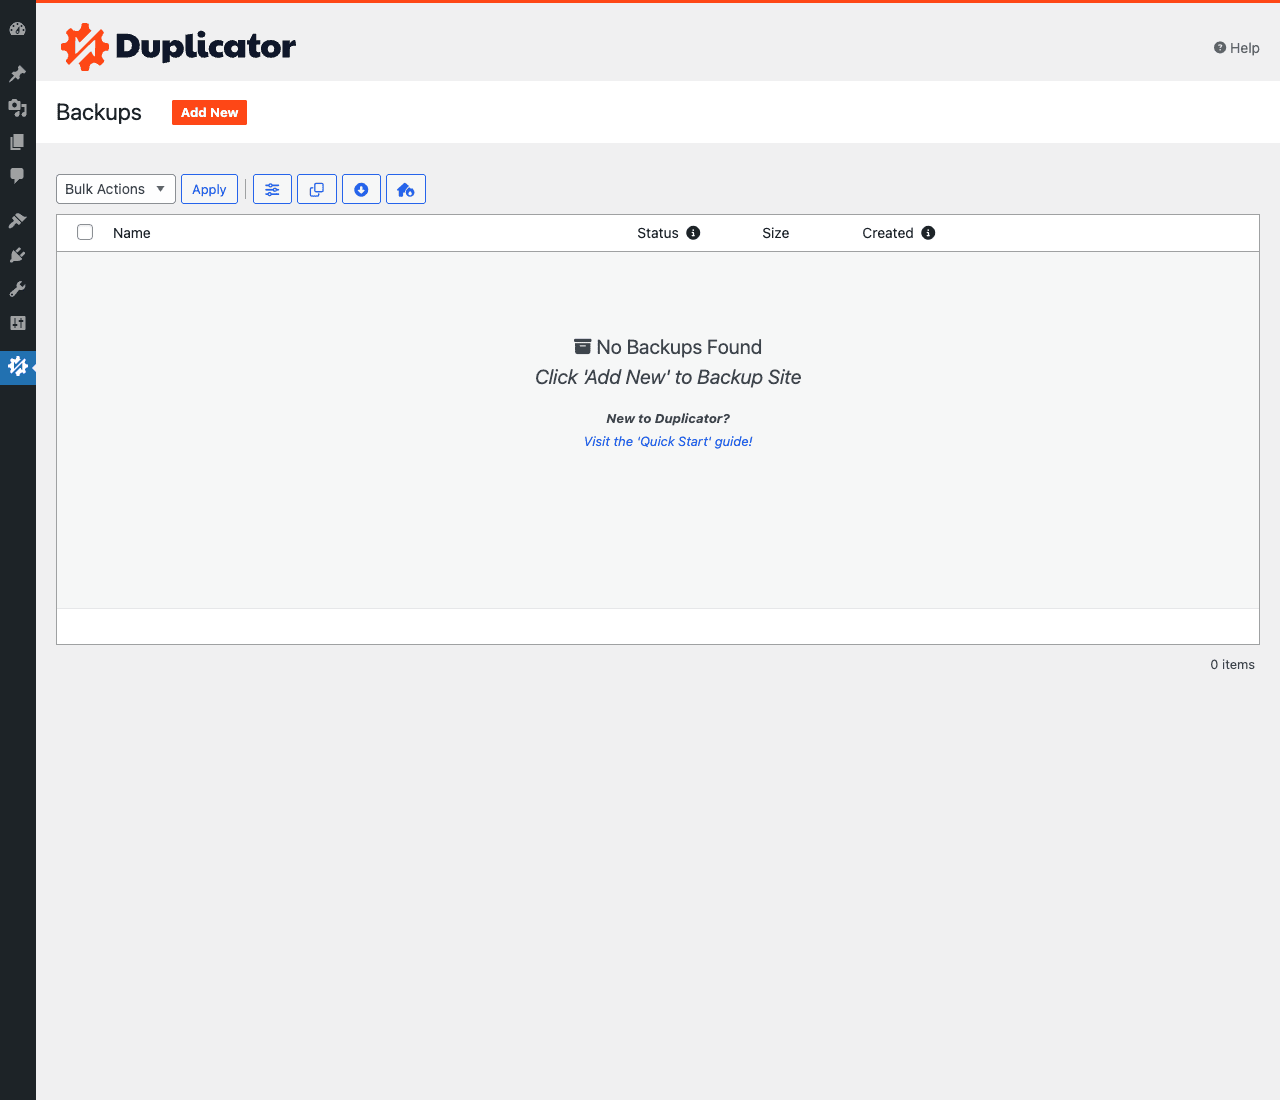
The empty state says "No Backups Found – Click ‘Add New’ to Backup Site" with a link to the Quick Start guide. The orange Add New button at the top is where every backup begins.
Before you click Add New, do one quick housekeeping step. Go to Duplicator Pro → Settings → General. Confirm two things:
- The "Archive Engine" is set to "ZipArchive". This is the default for most servers and works for sites up to a few GB.
- The "Database" build mode is set to "Optimized" for normal sites.
If your site is larger than 2GB, switch the Archive Engine to "DupArchive" (a custom format the plugin uses for very large sites). This needs PHP timeouts on your server to be reasonable; 300+ seconds works for most cases.
Save settings if you changed anything.
Step 2: Create your first backup
Click Duplicator Pro → Backups → Add New. You’ll see this:
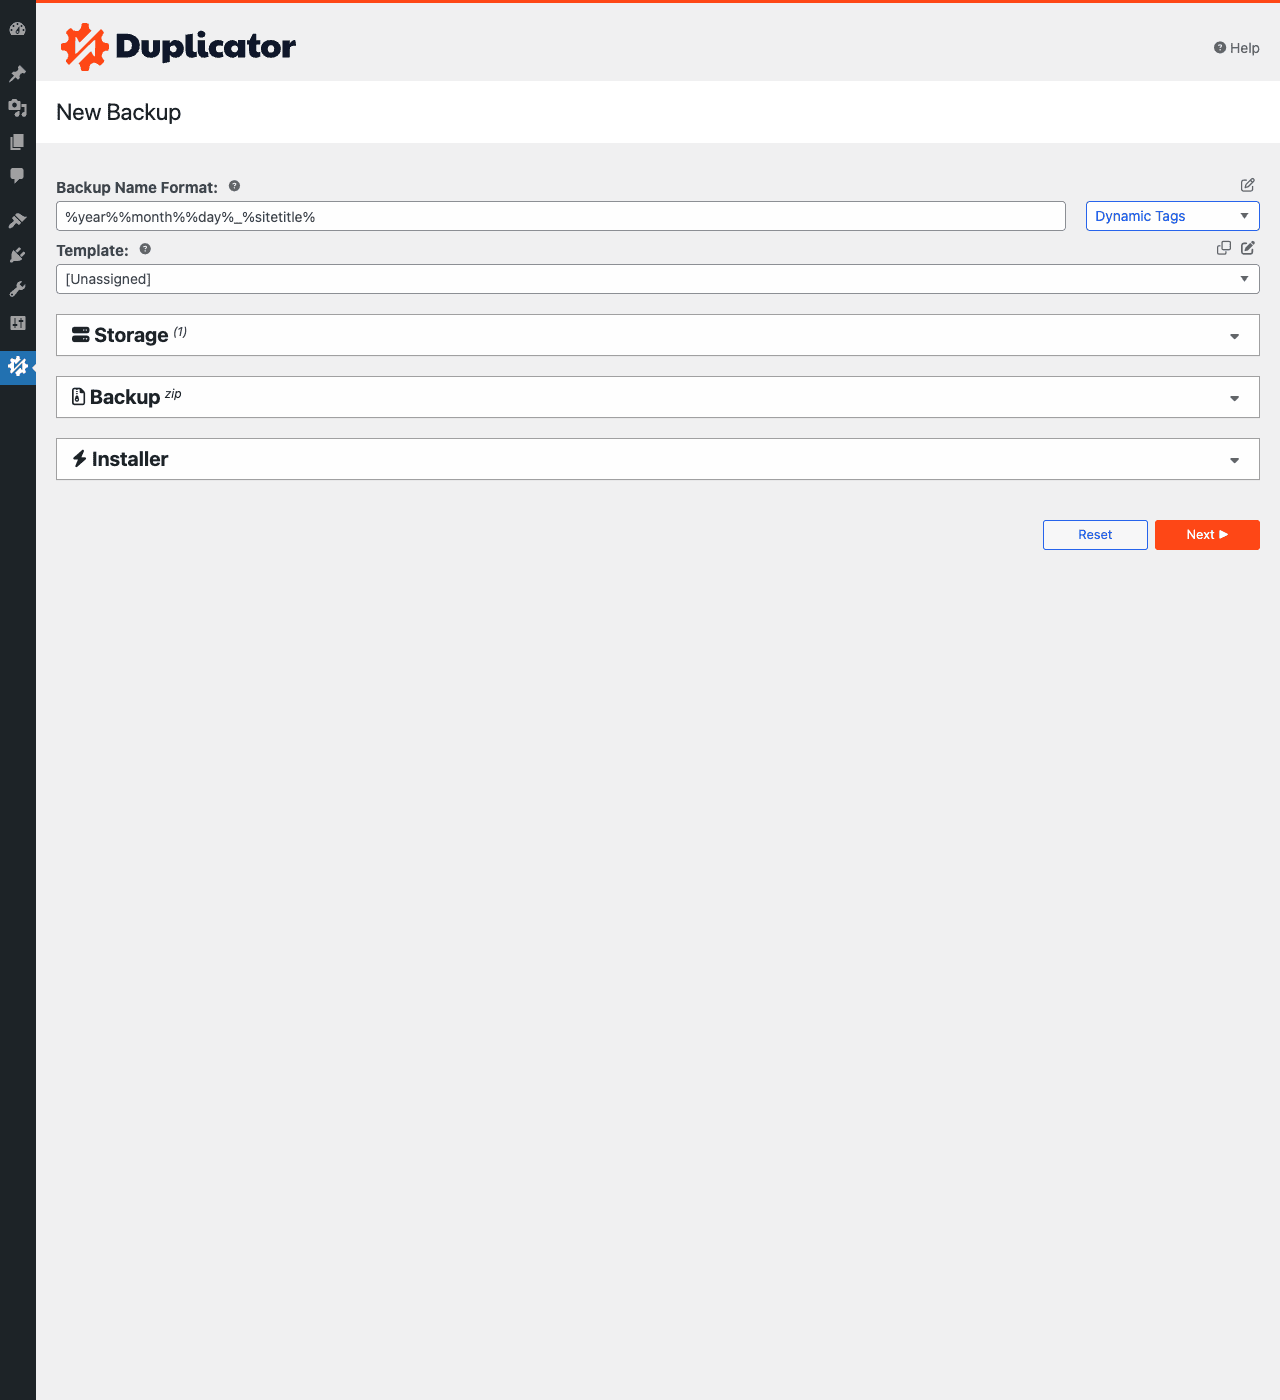
Don’t get overwhelmed. Most of this you can leave at defaults for a first backup. Here’s what each piece means:
- Backup Name Format controls what your backup files will be named. The default
%year%%month%%day%_%sitetitle%produces something like20260518_my-site. That’s perfect. Leave it. - Template is a saved set of options you can reuse. Leave at "Unassigned" for now.
- Storage is where the finished backup will be saved. By default it goes to the "Default" location, which is
wp-content/backups-dup-pro/on your server. For Pro, you can also pick Google Drive, Dropbox, OneDrive, Amazon S3, or FTP destinations. Click the Storage section to expand it and pick which destinations get a copy. For your first backup, leave it at Default. - Backup lets you exclude things from the archive. Click to expand. By default, everything is included. You can exclude
wp-content/cache/,wp-content/uploads/2020/, or specific file types. For a normal full backup, leave everything checked. - Installer has the settings the installer.php script will use when restoring. You can pre-fill the destination database credentials, set a password to protect the installer, etc. For now, leave this empty; you’ll enter the new server’s details during the restore.
Click the orange Next button at the bottom.
The plugin runs a Scan that checks your server can actually package the site. This takes 10-60 seconds. The Scan report shows green checkmarks for things that are fine and yellow warnings for things that might cause issues (large files, deep folder nesting, special characters in filenames).
Read any warnings. Most are informational. The most common ones:
- "PHP Open Base": Some hosts restrict file access. Usually fine, but if your archive fails halfway through, switch to DupArchive engine.
- "Large files detected": You have files bigger than 100MB. If you have many of them, the archive might take a while. Consider excluding them if they’re already backed up elsewhere.
- "PHP timeout": Your server’s max_execution_time is short. Most managed hosts handle this; bargain shared hosts sometimes don’t. If you hit a timeout, the plugin can resume by clicking Build again.
If everything is green or just yellow informational warnings, scroll down and click the green Build button.
The plugin now builds the archive. You’ll see a progress page with steps: "Starting…" → "Building Database" → "Building Archive" → "Saving Archive" → "Complete". This takes 1-15 minutes depending on site size. For a 200MB site, expect 2-3 minutes. For a 2GB site, 15-30 minutes.
When it’s done, you’ll see two download buttons: Archive (the zip file with your whole site) and Installer (the PHP file that handles the restore). Click both. Save them somewhere safe.
You now have a full portable copy of your WordPress site sitting on your computer.
Step 3: Move the files to your new host
You have two files to move:
- The archive zip (something like
20260518_my-site_abc123_archive.zip) - The installer (
installer.phpor sometimesinstaller-backup.php)
Connect to your new host using whatever tool you’re comfortable with. Three common options:
- FTP/SFTP with FileZilla or Cyberduck. Connect, navigate to your site’s root (usually
public_html/or/var/www/html/), upload both files. - cPanel File Manager if your host uses cPanel. Log in, go to File Manager, navigate to public_html, upload both files.
- Direct SCP/SSH if you’re comfortable with command line.
scp 20260518_*.zip installer.php user@newhost.com:/var/www/html/
Put both files in the document root of your new site. That’s usually public_html/ on shared hosting or /var/www/html/ on a VPS. If you’re not sure what your document root is, ask your host’s support, most will tell you immediately.
Important: the destination folder should be empty (or contain only a default index.html). If WordPress is already installed there, the installer will tell you so. You can either delete the existing files first or let the installer overwrite them (it will warn you before doing this).
Step 4: Create an empty database on the new host
The installer needs an empty database to import your old database into. Most hosts let you create one through their control panel.
- cPanel: MySQL Databases → Create New Database. Then Create a User and assign that user to the database with All Privileges.
- Plesk: Database Manager → Add Database.
- RunCloud / managed VPS: Databases → Create Database.
- Direct MySQL:
mysql -u root -pthenCREATE DATABASE new_site; CREATE USER 'newuser'@'localhost' IDENTIFIED BY 'password'; GRANT ALL ON new_site.* TO 'newuser'@'localhost'; FLUSH PRIVILEGES;
Write down (or save in your password manager) the four pieces of info you just created:
- Database host (usually
localhost) - Database name
- Database username
- Database password
You’ll enter all four into the installer in the next step.
Step 5: Run the installer
Open your browser and go to https://newdomain.com/installer.php (or installer-backup.php, whichever name was assigned). If the new domain isn’t pointing to the new host yet, you can use a temporary URL: ask your host for the "temporary" or "preview" URL they give you before DNS changes.
The installer wizard opens. Step 1 ("Validation") runs basic server checks. Should be green. Click "Next".
Step 2 asks for the destination database. Enter the four pieces of info from Step 4. Click "Test Database". You should get a green "Successfully connected" message. Click "Next".
Step 3 ("Replace Data") is where the magic happens. The installer shows you the old site URL and asks for the new one. Usually it auto-detects correctly. Confirm the new URL is right (e.g., https://www.newdomain.com). Click "Next".
The installer now unpacks the archive, imports the database, and runs a search-and-replace across all tables to swap the old URL for the new one. Takes 30 seconds to 2 minutes. You’ll see a progress bar and step-by-step status updates.
Step 4 ("Test Site") gives you a "Site Login" button. Click it. You’re now logged into the wp-admin of your migrated site on the new host. Click around. Check a few pages. Check the front-end. Look at uploaded images (they should all be there). Browse to a few posts. Check that WooCommerce orders are intact if you’re running WooCommerce.
Click "Final Steps" and the installer cleans up after itself: it deletes the installer.php, deletes the archive, removes the temporary backup tables, and disables itself. Your site is now fully migrated and the installer is gone.
That’s the entire migration flow. From "I want to move this site" to "the site is live on the new host" in 15-30 minutes for typical sites.
Step 6: Update DNS to point to the new host (when you’re ready)
Until DNS is updated, only the temporary URL shows the new site. Your real domain still points to the old host. When you’re satisfied the new site works, update your domain’s A record (or nameservers) to point at the new host’s IP.
DNS propagation takes anywhere from a few minutes to 48 hours. During this window, visitors might see either the old or the new site depending on where their DNS resolver cached the lookup. Some hosts have a "DNS pre-launch" feature that signals to global DNS that the change is coming, which speeds this up.
Pro tip: lower your DNS TTL (Time To Live) to 300 seconds at least 24 hours before you migrate. That way, when you flip the DNS, the change propagates in 5 minutes instead of hours. You can raise the TTL back to a normal value (3600+) after the migration is complete.
Step 7: Use Import Backups instead of FTP (Pro feature, much faster)
Steps 3-5 work for any migration, but Duplicator Pro has a faster method when both servers can talk to each other: the Import Backups feature.
On the destination site (the new host where WordPress is already installed with Duplicator Pro), go to Duplicator Pro → Import Backups:
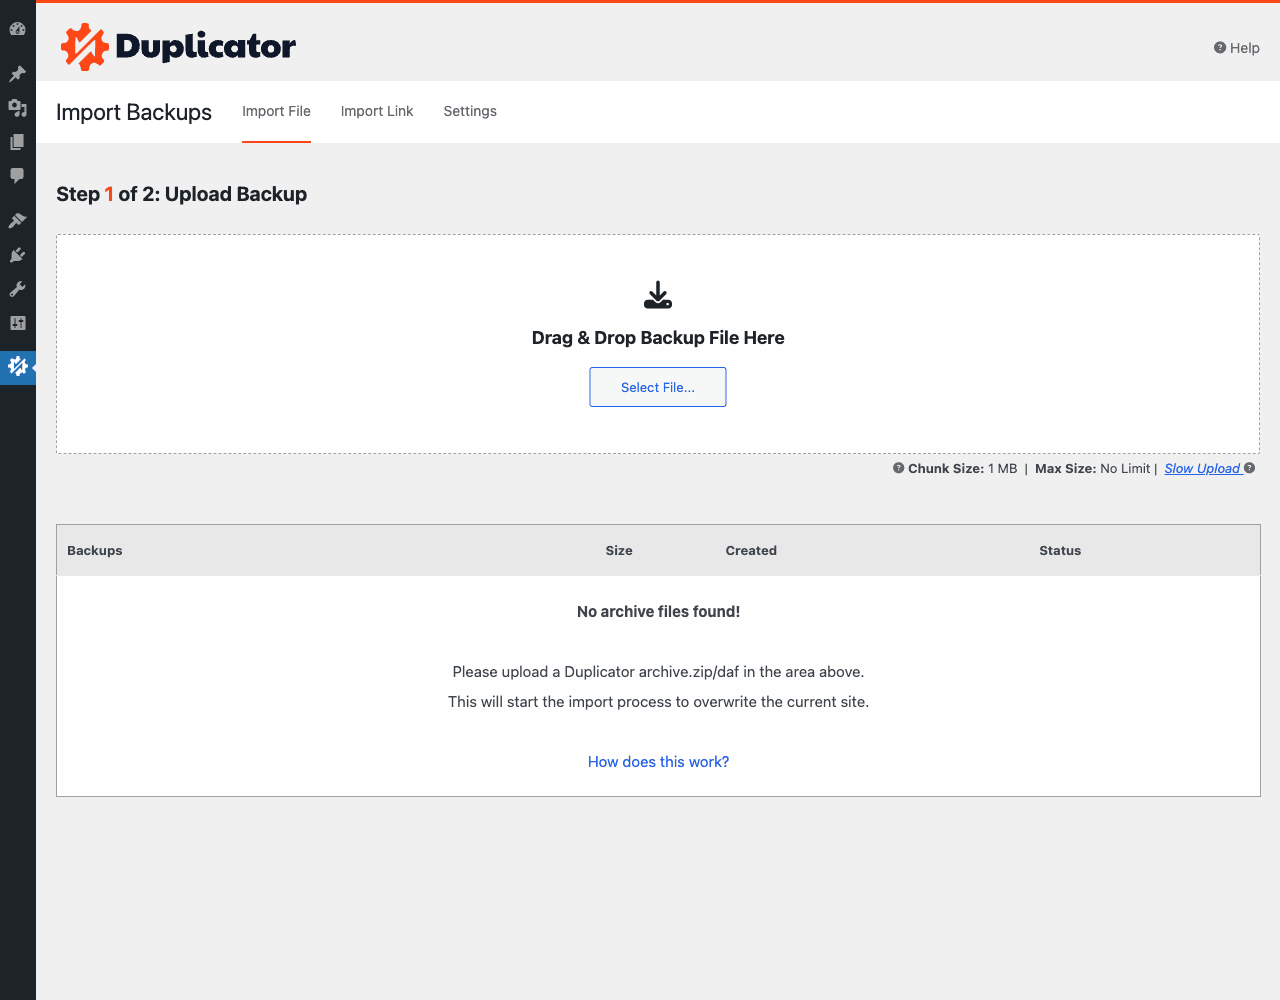
You have two options here:
- Import File: Drag and drop the archive zip directly. The plugin uploads it to the new server through WordPress’s media handling.
- Import Link: Paste the URL of the archive (if it’s hosted somewhere reachable, like a Dropbox public link or your old site’s
/wp-content/backups-dup-pro/directory). The plugin downloads it directly.
After upload, the import wizard launches inline and you go through the same Database / URL / Test / Done flow as the standalone installer, but without ever leaving WordPress admin.
This is dramatically faster than the FTP route when:
- You have a big archive (importing via WordPress media uploader handles chunks better than browser FTP).
- Both sites are reachable to each other (so you can import via URL without manual download).
- You’re moving between two sites you already manage.
For agency workflows where you migrate sites for clients regularly, learn this method. The FTP-and-installer route is the universal fallback, but Import Backups is the daily driver.
Step 8: Schedule automatic backups (Pro feature)
Migrating is a one-shot task. Backing up is something you should be doing continuously. Duplicator Pro’s Schedule Backups feature makes this set-and-forget.
Go to Duplicator Pro → Schedule Backups → Add New:
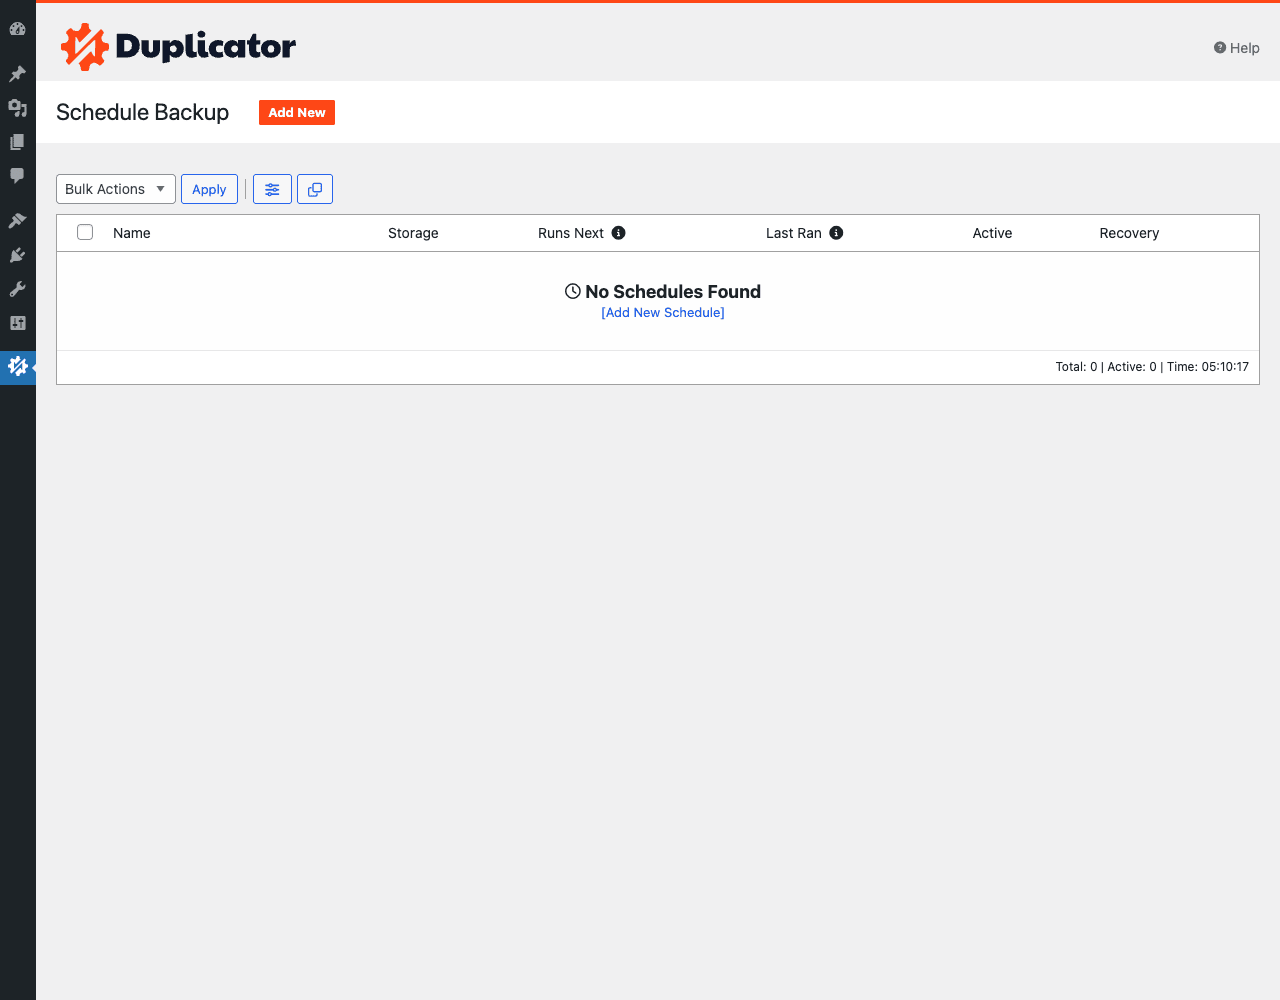
A schedule needs four pieces:
- Name: Something memorable like "Nightly Full Backup" or "Weekly Off-Site".
- Template: A saved set of backup options. If you have specific exclusion rules (e.g., always skip
wp-content/cache/), create a Template under Tools first and reference it here. For a vanilla full backup, leave "Unassigned". - Storage: Where backups go. Pick a cloud destination (Google Drive, Dropbox, OneDrive, Amazon S3, FTP) so backups live off the same server. If your server dies, the backups die with it unless they’re remote.
- Schedule: How often. Options are hourly, daily, weekly, monthly, or custom cron. For most content sites, daily at 3am local time is standard. For high-traffic e-commerce, twice daily.
Set retention: under Storage, you can tell the plugin to keep only the latest N backups and delete older ones. For Dropbox/Drive (paid storage costs money), set this to something reasonable like "keep 14 backups" so you don’t run out of cloud space.
Click Save. The schedule is now active. The plugin uses WordPress cron, which fires when someone visits your site. For low-traffic sites, this is unreliable. Set up a real system cron job that hits wp-cron.php every 5 minutes:
*/5 * * * * curl https://yoursite.com/wp-cron.php?doing_wp_cron > /dev/null 2>&1
Now your backups run on schedule whether anyone visits the site or not.
Step 9: Set up a staging environment (Pro feature)
If you make changes to your live site frequently (new theme, plugin updates, custom code), do it on staging first. Duplicator Pro can spin up a staging copy of your live site at the click of a button. If staging-and-push is your main workflow rather than the occasional migration, a dedicated tool like WP Staging Pro is built around exactly that clone, edit, and push-back loop.
Under Duplicator Pro → Staging, click "Add New". Pick:
- The source (your live site)
- The destination URL (a subdomain you control, like
staging.yoursite.com) - Whether to copy the database (yes, almost always)
The plugin then clones your live site to the staging URL automatically. You get a fresh WordPress install at staging.yoursite.com that’s identical to your live site as of the moment of cloning.
Now you can install plugin updates, theme changes, custom code, etc., on staging without risk. When something works, you have a few options for promoting it back to production:
- Manual replay: Apply the same changes on production. Fine for small changes.
- Database-only push: If your changes were only in the database (post edits, settings), you can use Duplicator to push just the database back.
- Full overwrite: If staging is now the canonical version, full-migrate it over the live site. This loses any data created on live after the staging snapshot, so it’s only appropriate when you’re sure.
Pre-launch testing on staging has saved me from broken updates more times than I can count. The cost of setting up staging is 10 minutes. The cost of a broken live site is hours of frantic troubleshooting in front of customers.
Step 10: Recover from a disaster
This is the scenario that justifies the Pro license cost. You pushed a code change, or you ran a plugin update, or you let an automated script run, and your live site is now broken. Maybe it’s white-screened. Maybe it’s showing a database connection error. Maybe a customer just emailed you that the checkout is throwing an exception.
If you have a recent Duplicator backup, recovery is fast:
- Go to
Duplicator Pro → Backups. Find the latest pre-disaster backup. - Click "Restore" or download the Archive + Installer.
- Run the installer (same as Step 5 above) but pointed at your existing live site.
- The installer will replace the current broken site with the working backup version.
Duplicator Pro also has a "Recovery" feature on each backup. Click the recovery icon on a backup row, follow the wizard, and the plugin can roll your site back to that backup’s state without you having to FTP anything. This works because Duplicator keeps a pre-configured recovery installer ready to fire.
This is the killer feature for live sites. Anything you can break, you can roll back to the most recent backup in 10-15 minutes. The peace of mind is worth the license alone.
What about backups vs. UpdraftPlus?
A reasonable question. If you’ve read about UpdraftPlus, you might wonder if you need Duplicator Pro at all. They overlap, but they’re tuned for different jobs:
- UpdraftPlus is optimized for scheduled cloud backups. Its sweet spot is "back up my site to Google Drive every night and let me restore individual files from any backup". The restore flow is good but the migration flow (move to a new host) is more cumbersome.
- Duplicator Pro is optimized for migration and cloning. Its sweet spot is "move this site from host A to host B with zero downtime and no fuss". Scheduled backups are a feature but not the headline feature. The migration wizard is genuinely best-in-class.
Many sites end up using both: UpdraftPlus for nightly cloud backups, Duplicator Pro for one-shot migrations and the occasional staging clone. They don’t conflict.
If you only buy one, pick based on your primary need. Moving sites or running an agency? Duplicator Pro. Backing up a site you rarely touch? UpdraftPlus is fine.
Common gotchas
These are the issues I’ve actually seen people hit, in roughly the order they happen:
1. "The Archive Build failed at 60% and won’t restart." Usually a PHP timeout. Two fixes: (a) Increase your server’s max_execution_time to 600+ seconds in php.ini or via your host’s control panel. (b) Switch Archive Engine to DupArchive under Settings, it has built-in resume capability and handles big sites better.
2. "The installer says ‘Failed to connect to database’ but the password is right." Check for special characters in the password. Some hosting environments strip $, &, # from MySQL passwords. Use a password without special characters (just letters and numbers) for the database user.
3. "The site loaded but images are broken." The search-and-replace didn’t catch your old domain in all places. Run Tools → Better Search Replace (a free plugin) after migration to do a second pass for any URL references the installer missed. This is especially common with sites that use serialized data in theme options or page builder definitions.
4. "WooCommerce orders show as $0 after migration." This is the dreaded serialized data corruption. Duplicator handles serialized data correctly by default. If it’s wrong on your migrated site, restore from the backup, then run the migration again with Archive Engine set to ZipArchive (not DupArchive) and select "Database: Optimized", these settings preserve serialized data integrity.
5. "I can’t upload the archive file to my new host because it’s too big." Three options: (a) Use the Import Backups feature instead, which uploads in chunks. (b) Upload via SFTP/SSH directly instead of through the browser. (c) Generate a smaller archive by excluding old uploads (e.g., everything in wp-content/uploads/2020/) and adding them manually later.
6. "DNS hasn’t propagated, but I want to test the migrated site already." Use your /etc/hosts file (Linux/Mac) or C:WindowsSystem32driversetchosts (Windows) to manually map your domain to the new IP for your own machine only. Add a line: 1.2.3.4 yourdomain.com www.yourdomain.com. Save. Now your browser thinks the domain points to the new IP without waiting for global DNS.
7. "Scheduled backup didn’t run." Almost always a WP-Cron issue. Set up a real system cron that hits wp-cron.php every 5 minutes (the cron command shown in Step 8). WordPress’s pseudo-cron only fires when someone visits the site, which is unreliable for backup schedules.
8. "I want to migrate a multisite network." This is Pro-only territory. The free Duplicator does not support multisite. Pro handles the entire network as a single archive. Test the migration on a non-production network first because multisite has more moving parts.
9. "The migrated site shows the old admin URL." Sometimes WordPress’s siteurl and home options are cached or hardcoded in wp-config.php. After migration, log into the new wp-admin and go to Settings → General. Confirm both URLs show the new domain. If they show the old domain, check wp-config.php on the new server for lines like define('WP_HOME', 'https://oldsite.com'); and update them or remove them.
10. "I want to restore just one plugin’s settings, not the whole site." Duplicator backs up the entire site as one archive. For granular per-plugin restoration, you need a different tool (the plugin’s own export feature, or a database-row-level tool). Duplicator’s strength is full-site operations.
A short note for developers
If you build sites for clients and ship them to new hosts, you should learn Duplicator Pro’s CLI behavior and the API for automating things.
The plugin doesn’t ship WP-CLI commands directly, but it exposes hooks you can use to script automation:
// Fires daily. Use to trigger custom maintenance tasks alongside Duplicator's daily flow.
add_action( 'duplicator_daily_actions', function() {
 error_log( 'Duplicator daily routine ran' );
} );

// Fires after a backup is created.
add_action( 'duplicator_after_package_build', function( $package ) {
 // Push a notification to Slack, sync to your own monitoring system, etc.
 do_my_app_notify( $package->Name, $package->Size );
} );

// Filter the license check request (rarely needed, useful for redistributed builds).
add_filter( 'duplicator_license_request_params', function( $params ) {
 return $params;
} );

// Customize page actions on Duplicator admin pages.
add_filter( 'duplicator_page_actions_packages', function( $actions ) {
 $actions[] = [ 'label' => 'My Custom Action', 'url' => '/wp-admin/...' ];
 return $actions;
} );
For pure WP-CLI scripting, you can interact with Duplicator’s database tables directly:
wp_duplicator_pro_packagesstores backup recordswp_duplicator_pro_entitiesstores related metadata (schedules, storage destinations, templates)
# List recent backups via WP-CLI.
wp db query "SELECT id, name, status, created FROM wp_duplicator_pro_packages ORDER BY created DESC LIMIT 5"

# Trigger a scheduled backup manually.
wp eval 'do_action( "duplicator_pro_run_scheduled_backups" );'
For agencies running site migrations at scale, the standard recipe is: install Duplicator Pro on the source, create a Template with your standard exclusions, configure a Storage destination (usually a cloud bucket), and let the plugin generate archives on demand. Then on the destination, run Import Backups against the archive URL.
Pricing and where to get it
Duplicator Pro is sold by Snapcreek (now Awesome Motive) on an annual-license-per-site model. Tiers go up by site count: Personal (1 site), Freelancer (5 sites), Business (20 sites), Gold (unlimited). All tiers include the same feature set; only the site count differs.
The plugin is GPL-licensed. The license sold by Awesome Motive is a support and update license, not a use license. After install, you can use it on any number of sites; the license only gates support replies and the official update channel.
Because of GPL, the same plugin file is legally redistributable. Same plugin, same features, no Snapcreek update channel.
For agencies or shops running production migrations regularly, the official Awesome Motive license is worth considering. The support team is responsive, especially when you hit weird server quirks during a migration.
Quick reference: which method to use when
To wrap up, here’s a one-paragraph cheat sheet for each common scenario:
- Moving from old host to new host, both servers reachable: Install Duplicator Pro on the source. Build archive. Install WordPress + Duplicator Pro on destination. Use
Import Backups → Import Linkwith the archive URL. Done. - Moving from old host to new host, can’t install plugins on destination: Install Duplicator Pro on the source. Build archive. Download archive + installer. Upload both to destination via FTP. Visit
https://newdomain.com/installer.phpin browser. Walk through wizard. - Cloning live site to staging: Use
Duplicator Pro → Stagingand let the plugin do it automatically. - Daily off-site backups: Use
Duplicator Pro → Schedule Backups. Pick Google Drive, Dropbox, or S3 as destination. Set daily schedule with 14-day retention. - Rolling back a broken update: Use the Recovery feature on the most recent pre-incident backup.
- Switching from staging to production: Build an archive from staging. Use Import Backups on production. Confirm the URL replacement caught everything; if not, run Better Search Replace as a second pass.
Final thoughts
Duplicator Pro solves a specific problem so well that "WordPress migration" basically means "use Duplicator" for most professional WordPress workers. The free version handles small one-shot migrations. The Pro version handles the things that turn into real work at scale: large sites, scheduled cloud backups, host-to-host transfers without FTP, multisite, staging automation, and recovery from disasters.
If you’ve never run a migration before, install the plugin on a test site this afternoon. Build an archive. Then download it and the installer. Even if you don’t actually migrate anywhere, going through the build flow once removes most of the mystery. The next time you have to migrate a real site, you’ll know exactly what to expect.
If you run multiple WordPress sites professionally, or you run a site that you can’t afford to lose, Duplicator Pro is worth the cost. The first time you recover a broken production site in 15 minutes instead of 4 hours, the license.
Setup checklist for new installs:
- Install Duplicator Pro on every WordPress site you manage.
- Connect a cloud storage destination (Google Drive, Dropbox, S3, your pick).
- Set up a Schedule for daily or weekly backups depending on how often you publish.
- Set up a real system cron job so backups fire reliably.
- Once a quarter, test that you can actually restore from a backup (this is the step everyone skips, and it matters). Spin up a sandbox WordPress install, import your latest backup, confirm everything works.
That’s the entire workflow. Migrations stop being scary, backups become invisible, and recovery becomes a 10-minute task instead of a panic.
Start with a non-critical site, do a practice migration to a free staging environment, and once you’re comfortable, roll it out across the sites you actually care about.
Useful external references:
- Duplicator official documentation has detailed troubleshooting for every error code the installer can throw.
- WordPress migration general guide on WordPress.org covers the underlying concepts if you want to understand what Duplicator is doing under the hood.
- Better Search Replace plugin is the recommended companion when a migration leaves hardcoded URLs behind (rare with Duplicator, but it does happen on sites using esoteric serialized data formats).