

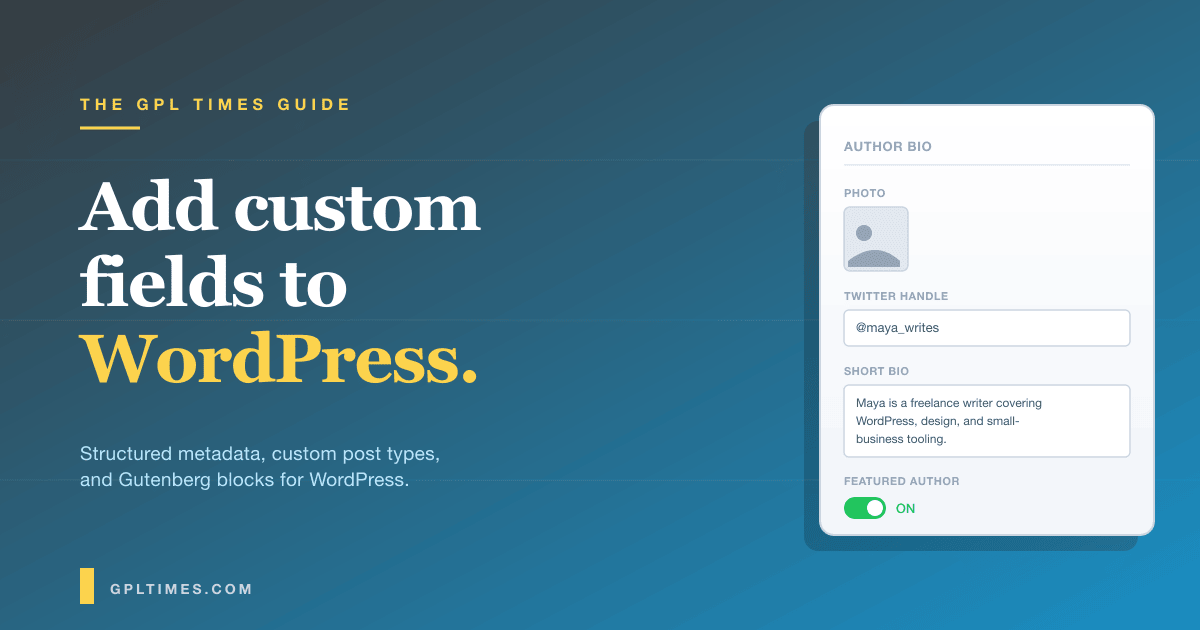
WordPress posts have a title, a body, a featured image, and a few standard metadata fields. The moment you want to add anything extra, like a "subtitle" on a blog post, a "ticker symbol" on a company profile, an "events list" on a homepage section, or a "downloadable PDF" on a product page, you run into the limits of the default editor. You can stuff things into the body. You can rig up post meta by hand. Or you can install Advanced Custom Fields Pro and have a clean, structured field appear in the editor exactly where it belongs.
This is the guide I wish I had the first time I touched ACF. The first half is for site owners and content editors who are looking at the plugin for the first time. The second half is for developers who already know what custom fields are and need the hook list, the get_field/the_field cheatsheet, the ACF Blocks API, and the REST integration. Both halves are written against the actual ACF Pro plugin running on a live WordPress demo. No screenshots from a marketing page, no copy-paste of an old version’s API.
Table of Contents
- What is ACF Pro?
- Key features of ACF Pro
- How ACF Pro works (for users)
- Installation and setup
- Step-by-step: your first field group
- Real-world use cases
- Developer reference
- Performance, compatibility, and gotchas
- Pricing and licensing
- FAQ
- Final thoughts
What is ACF Pro?
ACF Pro is the premium edition of Advanced Custom Fields, the plugin that lets you add structured custom fields to any post type, page, taxonomy, user, options page, or block in WordPress. It is now developed by WP Engine (after the original Delicious Brains acquisition), and it remains the most widely-installed developer plugin on WordPress.org, with over two million active installs of the free version alone.
The free ACF gives you the core field engine (around 30 field types, post and page locations, basic API). ACF Pro adds the field types and integrations that real production sites end up needing: the Repeater field (a list of repeating sub-fields, like a list of testimonials), the Flexible Content field (multiple block-like layouts the editor picks between), the Clone field, the Gallery field, the Options pages module (settings screens for global content like site-wide footer text or contact details), the ACF Blocks API (register native Gutenberg blocks from PHP without writing React), and the new Post Types and Taxonomies modules (register CPTs and taxonomies through a UI instead of code).
The mental model is simple. A "field group" is a collection of fields. You define the group once, pick where it should appear (on a specific post type, page, user profile, options page, or any combination), and the editor sees those fields exactly where you specified. On the front-end, you fetch the values with one of a handful of template functions like get_field() or the_field(). That is the whole concept. Everything else is variations on it.
The reason ACF Pro is so beloved by developers is that it sits between two extremes. Hand-rolled post meta is too low-level: you write the meta box code yourself, you handle sanitization, you build the UI. Page builders like Elementor or Beaver Builder are too high-level: they own the rendering and you cannot move data between them and your theme easily. ACF gives you typed, structured data in the WordPress database that your theme reads with native PHP. The data is portable, the markup is yours, and the editor experience is excellent.
Key features of ACF Pro
- 30+ field types. Text, textarea, number, email, URL, password, image, file, WYSIWYG, oEmbed, gallery (Pro), select, checkbox, radio, true/false, range, button group, link, post object, page link, relationship, taxonomy, user, Google Map, date picker, date and time picker, time picker, color picker, message, accordion, tab, group, repeater (Pro), flexible content (Pro), clone (Pro).
- Repeater field (Pro). A field that contains a list of sub-fields. Perfect for "team members", "testimonials", "FAQ entries", "highlights", anything that should be a structured list rather than a free-form WYSIWYG block.
- Flexible Content field (Pro). Define multiple "layouts" (like mini block templates) and let the editor pick which layouts to add to a post and in what order. The Pro alternative to a page builder when you control the markup.
- Gallery field (Pro). Multiple-image picker with drag-to-reorder. Returns an array of attachment objects.
- Clone field (Pro). Reference an existing field group inside another field group. DRY for field definitions.
- Options Pages (Pro). Register custom admin pages for global content. Common pattern: "Theme Options", "Site Settings", "Footer Content". The values live as
optionsrather than per-post meta. - ACF Blocks API. Register native Gutenberg blocks in PHP. You define the block’s fields with the same field-group UI you use for posts, you write one render callback, and the block is available in the inserter. No React, no build pipeline.
- Post Types UI (added in 6.1). Register custom post types through the ACF admin instead of writing
register_post_type(). The new module replaces the most common reason people used to install a separate "Custom Post Type UI" plugin. - Taxonomies UI. Same as above for
register_taxonomy(). - Local JSON. ACF can save your field group, post type, taxonomy, and options page definitions as JSON files in your theme. Git-trackable, deployable, no database export needed.
- PHP export. From the Tools screen, export any field group as PHP code (an
acf_add_local_field_group()call) you can paste straight into your theme’sfunctions.phpor a custom plugin. - Conditional Logic. A field can be shown or hidden in the editor based on the value of another field. "Show Vimeo ID only if Video Source = Vimeo".
- Validation hooks. Custom validation per field, with error messages displayed in the editor.
- REST API integration. Field values are automatically exposed in the WordPress REST API under an
acfkey on each post/page/term. No extra code. - Multilingual ready. Out of the box compatibility with WPML and Polylang.
- Field group import/export as JSON. One-click move of field groups from staging to production.
How ACF Pro works (for users)
For someone new to the plugin, the easiest mental shortcut is "ACF gives me extra boxes in the post editor". You install the plugin, define your boxes (called field groups), and tell ACF which posts or pages should see them. From then on, the editor shows your custom fields in the right place, the values save to post meta, and your theme reads them with get_field( 'photo' ) or similar.
The plugin lives at wp-admin/edit.php?post_type=acf-field-group in the WordPress admin. The top of that page has the ACF Pro logo and a tab bar (Field Groups, Post Types, Taxonomies, More) that lets you switch between the different things ACF can register:

You will see one field group called "Author Bio" in the demo above. That is what we built earlier as a teaching example. It is attached to the Posts post type and contains a Photo (image), Twitter handle (text), Short bio (textarea), and Featured author (true/false) field.
When an editor opens any post on the same site, the ACF metabox appears with those fields filled in or ready to fill:

The values save automatically when the editor clicks Update. The theme then pulls them in with template tags. As an editor, that is the entire workflow you ever need to think about.
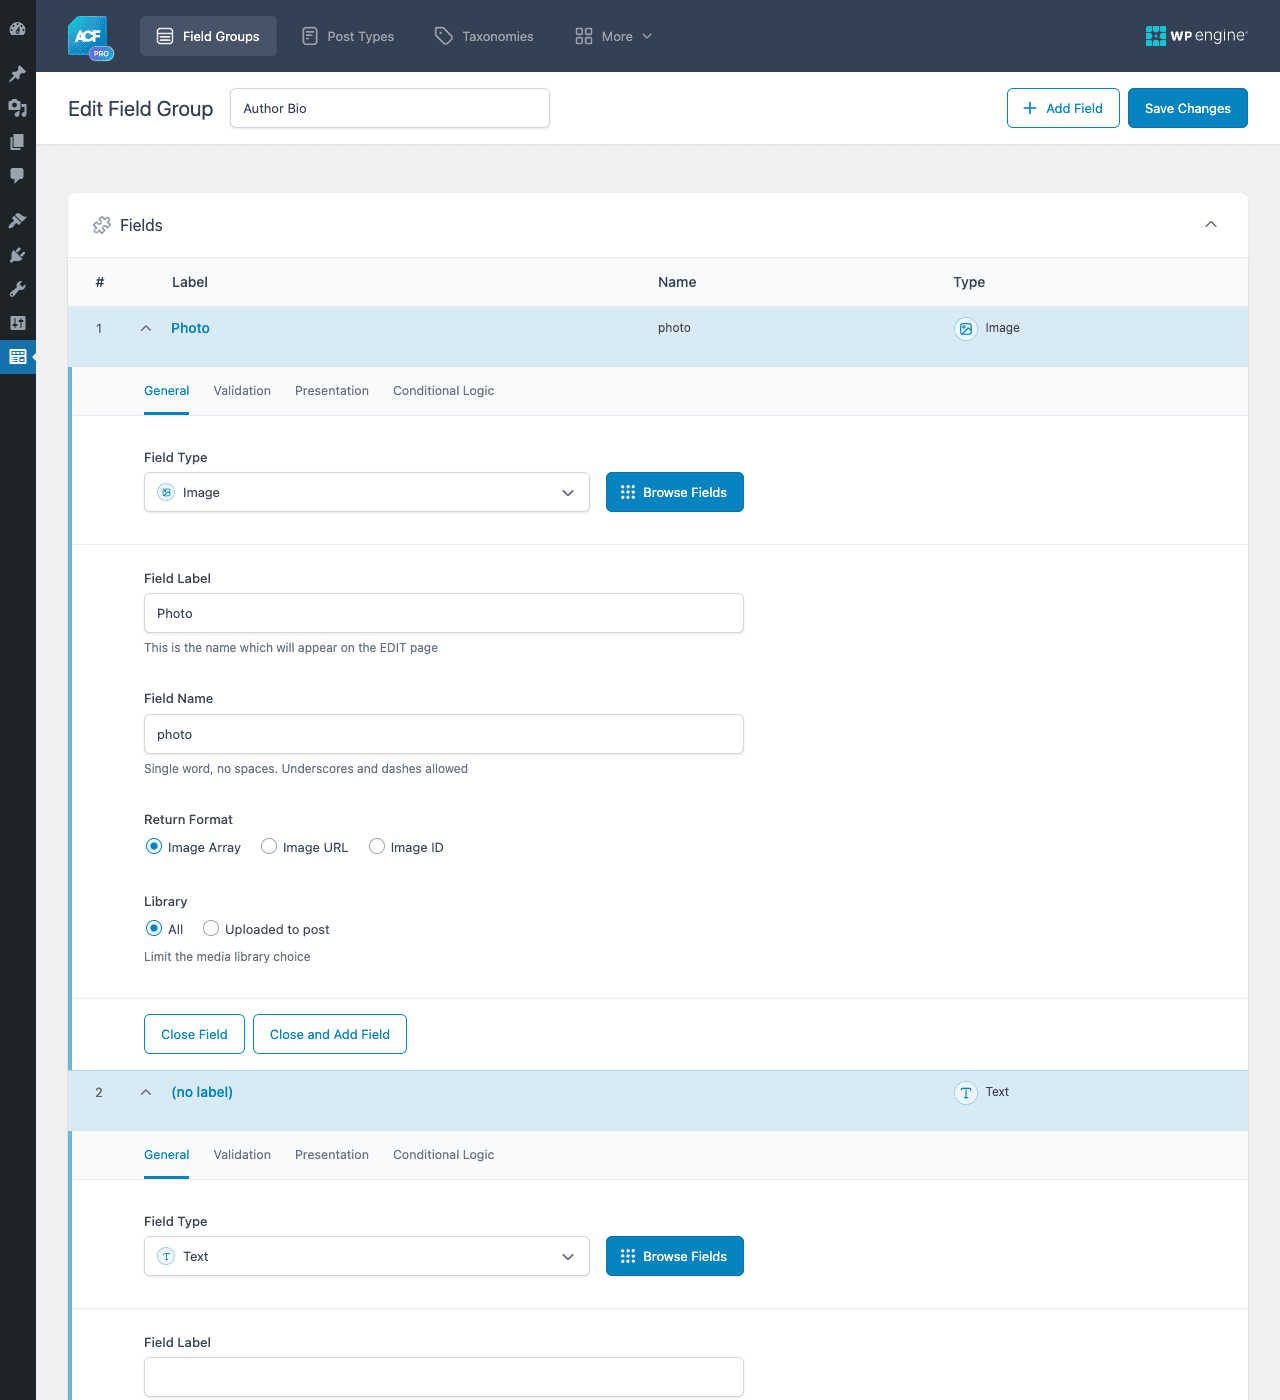
The Field Group editor itself is where you compose the fields. Each field has a label (what the editor sees), a name (what you use in code), a type (text, image, repeater, etc.), and a set of presentation settings (placeholder, instructions, width, conditional logic):
Pro adds two sibling tabs to the top nav: Post Types and Taxonomies. Both are UIs around register_post_type() and register_taxonomy(), removing the most common reason people used to install Custom Post Type UI as a separate plugin:
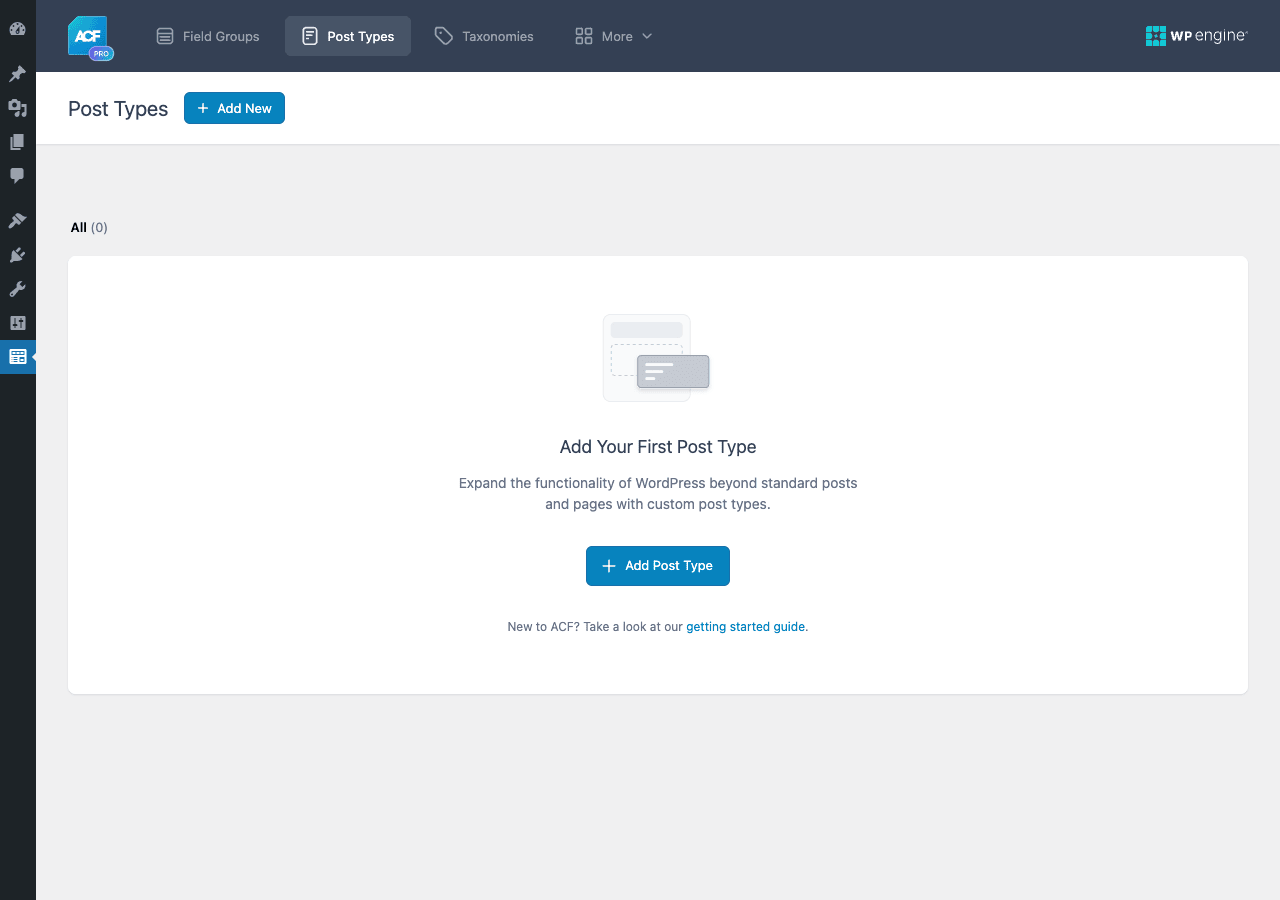
You define a "Team Member" post type here, set its labels and supports, save, and the post type appears in your admin sidebar like any other. No code, no register_post_type() call.
The More menu hides a few important secondary tools, Options Pages, the Tools screen (JSON import/export), and the Updates screen (license key entry):

Tools is the most useful screen for moving field groups between sites. Pick a field group, click Export As JSON, drop the file into the Import section on the target site, and you are done. The same screen also has "Generate PHP" which gives you the equivalent acf_add_local_field_group() call, ready to paste into a theme.
Installation and setup
ACF Pro is a single plugin zip. Installation takes two minutes.
Step 1: Install the plugin. In WordPress admin, go to Plugins → Add New → Upload Plugin, choose the advanced-custom-fields-pro.zip file, click Install Now, then Activate Plugin. A new "ACF" menu appears in the admin sidebar.
Step 2: Activate your license (optional). Go to ACF → More → Updates and paste your license key, then click Activate. The plugin works fully without a license; the key only enables automatic updates from advancedcustomfields.com.
Step 3: Decide on your storage strategy. This is the one decision worth making at the start. Out of the box, ACF saves field group definitions to the database (in a custom post type called acf-field-group). For a single-site setup that is fine. But if you plan to git-track your field definitions or deploy them to staging/production, enable Local JSON. Create a folder in your theme:
wp-content/themes/your-theme/acf-json/
Make sure it is writable by the web server. ACF will detect the folder automatically and start writing one JSON file per field group, post type, taxonomy, and options page into it on every save. On other environments, those JSON files become the source of truth and ACF reads from them. Database entries become an editing convenience rather than the canonical store.
Step 4: Build your first field group. Click ACF → Field Groups → Add New. Set a title for the group, add fields, and configure the Location Rules to decide where the group appears. Save. Done.
Step 5: Read the values in your theme. This is the connection between the editor experience and the front-end. We will walk through the patterns in the developer section.
That is the whole setup. There are no API keys to register, no SaaS account to create. The plugin runs entirely on your WordPress install.
Step-by-step: your first field group
Let me walk through the simplest possible useful field group: an "Author Bio" with a photo, a Twitter handle, a short bio, and a "featured author" toggle. By the end you will see fields appear in the post editor and read them in your theme.
Step 1: Create the field group. Click ACF → Field Groups → Add New. Set the title to "Author Bio". Click the blue "Add Field" button to add your first field.
Step 2: Add the Photo field. Field Type: Image. Field Label: "Photo". Field Name: photo (ACF auto-generates this). Return Format: "Image Array" (returns a PHP array with id, url, sizes, alt, etc). Library: "All". You can leave the rest at defaults. Click "Close Field" to collapse the editor.
Step 3: Add the Twitter handle field. Click "Add Field" again. Field Type: Text. Field Label: "Twitter handle". Field Name: twitter_handle. Default Value: empty. Placeholder Text: "@maya_writes". Maximum Characters: 50. Close Field.
Step 4: Add the Short bio field. Add Field. Type: Textarea. Label: "Short bio". Name: short_bio. Rows: 4. New Lines: "Automatically add paragraphs". Close.
Step 5: Add the Featured author toggle. Add Field. Type: True / False. Label: "Featured author". Name: featured_author. Message: "Mark this author as featured on the homepage". UI: "Stylized UI" (gives you a slider switch instead of a checkbox).
Step 6: Set the Location Rules. Scroll down to the Settings panel. Under Location Rules, the default is "Show this field group if Post Type is equal to Post". For our example we want this on every blog post, so leave the default. You can stack rules: AND them within a group, OR them across groups. Examples: "Post Type equals Post AND Post Category equals ‘Featured’" or "User Role equals editor OR User Role equals author".
Step 7: Save. Click "Save Changes" in the top right. ACF assigns a key like group_6a09c3c9678fa and stores the field group. Go to any blog post (Posts → All Posts → click any post) and scroll to the bottom of the post editor. The Author Bio metabox is now there. Fill in test values and click Update.
Step 8: Read the values in your theme. Open wp-content/themes/your-theme/single.php (or whichever template renders blog posts). Add the following inside the loop:
<?php
$photo = get_field( 'photo' );
$twitter = get_field( 'twitter_handle' );
$bio = get_field( 'short_bio' );
$is_featured = get_field( 'featured_author' );
?>

<aside class="author-bio">
    <?php if ( $photo ) : ?>
        <img src="<?php echo esc_url( $photo['sizes']['thumbnail'] ); ?>"
             alt="<?php echo esc_attr( $photo['alt'] ); ?>"
             width="150" height="150">
    <?php endif; ?>

    <h3><?php the_author(); ?>
        <?php if ( $is_featured ) : ?>
            <span class="badge-featured">Featured author</span>
        <?php endif; ?>
    </h3>

    <?php if ( $bio ) : ?>
        <p><?php echo esc_html( $bio ); ?></p>
    <?php endif; ?>

    <?php if ( $twitter ) : ?>
        <a href="https://twitter.com/<?php echo esc_attr( ltrim( $twitter, '@' ) ); ?>"
           rel="nofollow noopener">
            <?php echo esc_html( $twitter ); ?>
        </a>
    <?php endif; ?>
</aside>
Reload any post and the author bio appears. That is the whole loop: define fields, edit values, read them in PHP.
The eight steps above cover 80% of what you will ever do with ACF. The remaining 20% (repeaters, blocks, options pages, conditional logic, REST exposure) we cover in the developer section.
Real-world use cases
Different sites use ACF for very different things. A few I have actually built or seen:
1. A long-form publication with story-level metadata. Maya runs an essay site. Every post has a "subtitle" (different from the headline), an "estimated reading time" she sets manually because she wants editorial control, a "Spotify track for the post" with a URL, and a list of related-essay links. None of those fit naturally in the post body. They become four ACF fields on the post and render into a "Story header" component in the theme.
2. A small marketing site with a homepage built from sections. Anika sells handmade ceramics. Her homepage has a hero section, three feature blocks, a testimonial carousel, and a CTA. Instead of a page builder, she uses the ACF Flexible Content field on the Home page with four layouts (Hero, Feature, Testimonials, CTA). Her theme loops through the chosen layouts and renders each one. Editor experience is "drag layouts in order, fill them in". Developer experience is "the markup is mine".
3. A directory site listing therapists. Vikram runs a mental-health-services directory. Each therapist is a "Therapist" custom post type (registered via ACF Pro’s Post Types UI) with fields for accepting-insurance, specialties (multiselect), languages, fee range, telehealth (true/false), and a photo. He uses the Relationship field to link a therapist to the "Insurances accepted" taxonomy. The directory front-end queries by these meta fields with WP_Query meta_query.
4. A recipe blog with structured ingredients. Priya runs a Tamil recipe blog. Each recipe is a Post with a Repeater field "Ingredients" (sub-fields: name, quantity, unit, note) and a Repeater field "Steps" (sub-field: step description). Her theme renders the ingredients as a structured list with <schema.org/Recipe> markup. Google’s Recipe rich snippet picks it up because the markup is real, structured, and not buried in HTML.
5. A theme builder using ACF Blocks. Raj builds custom WordPress sites for clients. Instead of a page builder, he registers 8-12 ACF Blocks per site (Hero, Feature Grid, Pricing Table, Stats, FAQ, Newsletter Signup, CTA, Testimonials, etc). Each block is a small PHP file + a Twig template. Clients build pages by inserting blocks in Gutenberg and filling out fields. The design system never breaks because the only blocks the editor sees are the ones Raj wrote.
6. Site-wide settings with Options Pages. Almost every theme has "site-wide settings", footer copyright text, social media URLs, contact email, default OG image. Instead of hardcoding those or scattering them across plugins, you create an ACF Options Page called "Theme Settings", add the fields once, and call get_field('contact_email', 'option') from any template.
Developer reference
This is the longest section in the guide. If you skipped the user-facing half above, the rest of this article assumes you know what get_post_meta() does and you have written at least one WordPress plugin.
The template tags you will use most
Six functions cover 95% of front-end work:
get_field( $selector, $post_id = false, $format_value = true );
the_field( $selector, $post_id = false, $format_value = true );  // echoes
get_sub_field( $selector );           // inside have_rows() loop
the_sub_field( $selector );
have_rows( $selector );               // repeater / flexible iterator
get_field_object( $selector );        // field def + value
Examples:
// Simple value.
$price = get_field( 'price' );

// Read from a specific post.
$tagline = get_field( 'tagline', 42 );

// Read from an options page.
$contact = get_field( 'contact_email', 'option' );

// Read from a user.
$bio = get_field( 'bio', 'user_' . get_current_user_id() );

// Read from a term.
$icon = get_field( 'icon', 'category_5' );
$icon = get_field( 'icon', get_queried_object() ); // works with WP_Term too

// Repeater loop.
if ( have_rows( 'ingredients' ) ) {
    echo '<ul class="ingredients">';
    while ( have_rows( 'ingredients' ) ) {
        the_row();
        $name = get_sub_field( 'name' );
        $qty  = get_sub_field( 'quantity' );
        $unit = get_sub_field( 'unit' );
        echo '<li>' . esc_html( "$qty $unit $name" ) . '</li>';
    }
    echo '</ul>';
}

// Nested repeater (repeater inside flexible content).
while ( have_rows( 'sections' ) ) {
    the_row();
    if ( get_row_layout() === 'faq' ) {
        while ( have_rows( 'items' ) ) {
            the_row();
            echo '<h3>' . esc_html( get_sub_field( 'q' ) ) . '</h3>';
            echo '<p>' . wp_kses_post( get_sub_field( 'a' ) ) . '</p>';
        }
    }
}
The $post_id argument is unusually flexible. It accepts an int (post ID), a string (option, user_42, category_5, term_5), a WP_Term, or any object that resolves to a post.
Filters: load_value, format_value, update_value
Three filters are the workhorse of ACF customization. They fire on every field, every read, every save.
// acf/load_value, fires when reading from the database, before formatting.
add_filter( 'acf/load_value/key=field_abc123', function( $value, $post_id, $field ) {
    // Mutate the raw stored value before ACF processes it.
    return $value;
}, 10, 3 );

// acf/format_value, fires after load, lets you transform the value the theme sees.
add_filter( 'acf/format_value/name=phone_number', function( $value, $post_id, $field ) {
    if ( ! $value ) return $value;
    return preg_replace( '/[^d]/', '', $value );  // strip non-digits
}, 10, 3 );

// acf/update_value, fires when saving from the editor.
add_filter( 'acf/update_value/type=text', function( $value, $post_id, $field ) {
    return strtolower( trim( $value ) );  // normalize on save
}, 10, 3 );

// acf/validate_value, return true to accept, or an error string to reject.
add_filter( 'acf/validate_value/name=zip_code', function( $valid, $value, $field, $input_name ) {
    if ( ! $valid ) return $valid;
    if ( ! preg_match( '/^d{5}(-d{4})?$/', $value ) ) {
        return 'Please enter a valid US ZIP code.';
    }
    return $valid;
}, 10, 4 );
Note the suffix variations. ACF generates filter variations like /key={field_key}, /name={field_name}, and /type={field_type}, so you can scope your hook to one specific field, all fields with a given name, or every field of a given type. This is documented in acf_add_filter_variations().
Loading field choices dynamically
A common pattern: a Select or Radio field whose choices come from a database table, an API, or a function rather than a static list.
add_filter( 'acf/load_field/name=country', function( $field ) {
    $field['choices'] = [];
    foreach ( my_get_country_list() as $code => $name ) {
        $field['choices'][ $code ] = $name;
    }
    return $field;
} );
The same pattern works for the Post Object, Page Link, Relationship, and User field types via the acf/fields/post_object/query family of filters:
add_filter( 'acf/fields/post_object/query/name=related_product', function( $args, $field, $post_id ) {
    $args['post_status'] = [ 'publish' ];
    $args['orderby'] = 'title';
    $args['order'] = 'ASC';
    $args['posts_per_page'] = 20;
    return $args;
}, 10, 3 );
Local JSON sync
When acf-json/ exists in your theme, ACF auto-writes JSON files on every field group save. On a new environment, those JSON files become the source. You can change the directory:
add_filter( 'acf/settings/save_json', function() {
    return get_stylesheet_directory() . '/acf-json';
} );

add_filter( 'acf/settings/load_json', function( $paths ) {
    $paths[] = get_stylesheet_directory() . '/acf-json';
    $paths[] = WP_PLUGIN_DIR . '/my-plugin/acf-json';
    return $paths;
} );
You can have multiple load paths, which is how you ship default field groups inside a plugin and let the theme override them.
Registering field groups in PHP
The Tools screen has "Generate PHP" for exactly this. The output looks like:
acf_add_local_field_group( [
    'key' => 'group_author_bio',
    'title' => 'Author Bio',
    'fields' => [
        [
            'key' => 'field_photo',
            'label' => 'Photo',
            'name' => 'photo',
            'type' => 'image',
            'return_format' => 'array',
            'preview_size' => 'medium',
            'library' => 'all',
        ],
        [
            'key' => 'field_twitter',
            'label' => 'Twitter handle',
            'name' => 'twitter_handle',
            'type' => 'text',
            'maxlength' => 50,
            'placeholder' => '@maya_writes',
        ],
        // ... rest of fields
    ],
    'location' => [
        [
            [ 'param' => 'post_type', 'operator' => '==', 'value' => 'post' ],
        ],
    ],
    'menu_order' => 0,
    'position' => 'normal',
    'style' => 'default',
    'label_placement' => 'top',
    'instruction_placement' => 'label',
    'active' => true,
] );
Drop that into a plugin or a functions.php and the field group exists. It will NOT show up in the admin Field Groups list as editable (you cannot edit code-defined groups via UI), which is what you want for production. Local JSON is a hybrid: editable in admin, persisted to file.
Custom location rule types
ACF lets you register your own location-rule types. A common one: "Show this field group only on the page set as the homepage".
add_filter( 'acf/location/rule_types', function( $choices ) {
    $choices['WordPress']['homepage'] = 'Homepage';
    return $choices;
} );

add_filter( 'acf/location/rule_match/homepage', function( $result, $rule, $screen, $field_group ) {
    if ( ! isset( $screen['post_id'] ) ) return $result;
    $is_home = (int) $screen['post_id'] === (int) get_option( 'page_on_front' );
    if ( $rule['operator'] === '==' ) return $is_home;
    if ( $rule['operator'] === '!=' ) return ! $is_home;
    return $result;
}, 10, 4 );
ACF Blocks
The Blocks API in ACF Pro is one of its best features. You register a block in register_block_type() (or in block.json) and point its render callback at the ACF helper. ACF wires up the fields automatically.
Modern (block.json) pattern:
{
  "name": "my-theme/team-member",
  "title": "Team Member",
  "category": "widgets",
  "icon": "groups",
  "description": "A team member card with photo and bio.",
  "keywords": ["team", "person", "staff"],
  "acf": {
    "mode": "preview",
    "renderTemplate": "blocks/team-member/team-member.php"
  },
  "supports": {
    "align": ["wide", "full"]
  },
  "example": {}
}
Then in blocks/team-member/team-member.php:
<?php
$photo = get_field( 'photo' );
$name = get_field( 'name' );
$role = get_field( 'role' );
$bio = get_field( 'bio' );
?>

<div class="team-member <?php echo esc_attr( $block['className'] ?? '' ); ?>">
    <?php if ( $photo ) : ?>
        <img src="<?php echo esc_url( $photo['sizes']['medium'] ); ?>"
             alt="<?php echo esc_attr( $photo['alt'] ); ?>">
    <?php endif; ?>
    <h3><?php echo esc_html( $name ); ?></h3>
    <p class="role"><?php echo esc_html( $role ); ?></p>
    <p class="bio"><?php echo wp_kses_post( $bio ); ?></p>
</div>
You attach a field group to the block by setting Location Rule "Block is equal to my-theme/team-member" in the field group editor. The editor sees the block’s fields in the right sidebar, your render template draws the front-end markup. Done. No React, no build.
REST API integration
ACF Pro exposes field values automatically under an acf key on REST responses. By default, only field groups marked "Show in REST API" (under Group Settings → REST API Settings) are exposed.
GET /wp-json/wp/v2/posts/42
Response:
{
  "id": 42,
  "title": { "rendered": "Hello world!" },
  "acf": {
    "photo": { "id": 99, "url": "https://...", "sizes": {...} },
    "twitter_handle": "@maya_writes",
    "short_bio": "Maya is...",
    "featured_author": true
  }
}
You can filter the response shape:
add_filter( 'acf/rest/format_value_for_rest', function( $value, $post_id, $field ) {
    if ( $field['type'] === 'image' && is_array( $value ) ) {
        return [
            'id' => $value['id'],
            'url' => $value['url'],
            'alt' => $value['alt'],
        ];  // strip everything else
    }
    return $value;
}, 10, 3 );
To write values via REST, send a PATCH to the post with acf in the body:
PATCH /wp-json/wp/v2/posts/42
{
  "acf": {
    "twitter_handle": "@new_handle"
  }
}
WP-CLI commands
ACF ships one CLI command: wp acf json. It syncs field groups between database and the acf-json/ folder:
# Show which field groups are out of sync with JSON.
wp acf json status

# Import all JSON files into the database (overwrites DB versions).
wp acf json import

# Export all DB field groups to JSON (overwrites JSON files).
wp acf json export
These are useful for CI pipelines. Drop a wp acf json import step into your deployment after the code lands, and the database picks up whatever JSON your developers committed.
Custom post types and taxonomies
The Pro Post Types and Taxonomies modules register CPTs and taxonomies under the acf-post-type and acf-taxonomy post types respectively. You can also generate PHP from any post-type or taxonomy definition (Tools → Export As JSON → switch tab → PHP). The output is a plain register_post_type() or register_taxonomy() call you can paste into a plugin.
If you need to extend a post type registered through ACF, hook into the registration filter:
add_filter( 'acf/post_type/registration_args', function( $args, $post_type ) {
    if ( $post_type === 'team_member' ) {
        $args['rewrite']['slug'] = 'team';
        $args['show_in_rest'] = true;
    }
    return $args;
}, 10, 2 );
Options pages
Pro lets you create custom admin pages whose values live as options rather than per-post meta.
acf_add_options_page( [
    'page_title'    => 'Theme Settings',
    'menu_title'    => 'Theme Settings',
    'menu_slug'     => 'theme-settings',
    'capability'    => 'edit_posts',
    'redirect'      => false,
    'autoload'      => true,
] );

// Sub-pages.
acf_add_options_sub_page( [
    'page_title'    => 'Footer',
    'menu_title'    => 'Footer',
    'parent_slug'   => 'theme-settings',
] );
Read from anywhere:
$copyright = get_field( 'footer_copyright', 'option' );
$socials = get_field( 'social_links', 'option' );  // a repeater on the options page
Performance tip: set 'autoload' => true if the field group is loaded on every page (footer, header). It is then included in the autoloaded options cache and there are no extra DB queries.
Shortcode and WYSIWYG output
ACF registers an [acf] shortcode that renders a field value inside a post body:
[acf field="twitter_handle"]
[acf field="photo"]
[acf field="contact_email" post_id="option"]
Useful as a quick fallback when an editor wants to drop a custom field value into a paragraph without dropping into PHP.
Performance and caching
ACF reads field values via get_post_meta() under the hood. WordPress’s object cache handles the heavy lifting per request, so you generally do not need to cache field values yourself. The one place to be careful is loops with many posts and many fields each:
// Anti-pattern: each get_field() inside a 100-post loop = 100+ DB queries.
foreach ( $posts as $post ) {
    setup_postdata( $post );
    $price = get_field( 'price' );
    $promo = get_field( 'promotion' );
    // ...
}

// Better: prime the meta cache once.
$post_ids = wp_list_pluck( $posts, 'ID' );
update_postmeta_cache( $post_ids );
foreach ( $posts as $post ) {
    // get_field() now hits the primed cache, no DB roundtrip.
}
For very high traffic sites, consider transient-caching the rendered output of expensive ACF-heavy components (a homepage hero with a Repeater of 20 items, for example).
Compatibility hooks for other plugins
If you write a plugin that wants to interoperate with ACF, the safest detection pattern is:
if ( function_exists( 'acf_get_field_group' ) ) {
    // ACF (free or Pro) is active.
}

if ( defined( 'ACF_PRO' ) ) {
    // ACF Pro specifically (Repeater, Flexible, Options pages, Blocks API).
}
Common integration points: your plugin defines a post type, you ship a field group JSON file for it inside your plugin’s acf-json/ folder, and you add add_filter( 'acf/settings/load_json', ... ) so ACF discovers it. The user sees your fields but can override them through the editor UI like any other ACF-registered group.
Performance, compatibility, and gotchas
ACF Pro is built for production. The plugin author and the WordPress.org community have hardened it over more than a decade of real-world use. That said, there are a few patterns to be aware of.
Performance considerations.
- ACF stores each sub-field of a Repeater as a separate row in
wp_postmeta. A 50-item Repeater means 50+ rows per post. Theupdate_postmeta_cache()trick mentioned above is essential for archive pages that loop through many posts. - The Flexible Content field is heavier than Repeater because each layout has its own schema. Use it only when the editor genuinely needs to choose between distinct layouts. If the answer is "they always use the same one", a plain Group or Repeater is cheaper.
- The Gallery field stores attachment IDs as a serialized array in one row. Cheap to read. Use it for image lists rather than a Repeater of Image fields.
- The Options page values are cached in the autoloaded options array if you set
'autoload' => true. Default for ACF is true. Keep it that way unless your Options page is rarely-used (admin-only).
Compatibility caveats.
- ACF Pro and Secure Custom Fields (the now-renamed WordPress.org fork) are not source-compatible. Field groups defined in one will not necessarily load in the other. Stick to one in a given project.
- ACF Blocks require Gutenberg (WP 5.0+). On classic-editor-only sites, blocks will not appear.
- Repeater and Flexible Content fields do NOT auto-expose to the REST API in a flat shape. The REST response contains the raw nested array. If you need a flat list in REST, write a custom REST endpoint or transform on the client.
- The Map field requires a Google Maps API key, set under
ACF → Settings → Google Maps API. - If you used the free ACF first and then swap in ACF Pro, your existing field groups, fields, and values are preserved. ACF Pro is a strict superset.
Common gotchas.
- Field key vs. field name. Every field has both a stable
key(e.g.field_abc123, never reused) and a humanname(e.g.photo). The key is what makes JSON sync stable across sites. Renaming a field’s name does not break it; deleting and recreating it does because the key changes. ALWAYS preferget_field()with the name, but use the key when you script around field groups. - Local JSON gets out of date. If you edit a field group in admin on production, you might also need to copy the resulting JSON back to your local repo. Otherwise the next deploy will overwrite production with the older JSON. Decide on direction-of-truth: either dev → prod (admin is read-only in prod, develop locally and commit JSON) or prod → dev (admin is the source, JSON is for backup).
- Forgetting to save the field group after adding a field. Easy to add an Image field, switch tabs to Add Twitter Handle, never click Save Changes. The field type defaults to "Text", then you wonder why your front-end is getting strings instead of image arrays. Always click Save before navigating away.
- Conditional Logic only hides fields visually. It does NOT prevent the value from being saved if it was already populated, and it does not clear the value when the condition fails. If you need real conditional save behavior, hook
acf/update_valueto null out the value when its parent condition is false. - ACF Blocks render callback runs server-side on every render. Heavy queries inside the render callback will slow your editor. Cache expensive work or pre-fetch outside the loop.
Pricing and licensing
ACF Pro is sold by WP Engine on a yearly-license-per-tier model. Tiers are by number of sites the support and update license covers (1 site Personal, 25 sites Pro, unlimited Agency). Pricing changes occasionally, see advancedcustomfields.com/pro for current numbers.
The plugin is GPL-licensed (the WordPress license requires it). The license sold is a support and update license, not a use license. After install, you can use ACF Pro on any number of sites; the license only gates support replies and the automatic-update channel.
Because of GPL, the same plugin file is legally redistributable. ACF Pro is available as part of the Advanced Custom Fields product range on GPL Times. If you want to install ACF Pro on a real WordPress site and try every feature in this guide, that is the easiest path. Same plugin, same features, no separate update channel.
The WordPress.org listing for "Advanced Custom Fields" was forked in 2024 into a plugin called "Secure Custom Fields" (managed by Automattic). The forks have since diverged. This guide is written for ACF Pro as released by WP Engine. If you switch between them, expect minor incompatibility.
FAQ
Q: Do I need ACF Pro, or is the free version enough?
The free version has the core engine, around 30 field types, and the basic API. ACF Pro adds Repeater, Flexible Content, Gallery, Clone, ACF Blocks, Options Pages, and the new Post Types and Taxonomies UIs. If you need ANY of those, you need Pro. The Repeater field alone is enough reason for most production sites.
Q: Will ACF Pro slow down my site?
Not at scale. Field values are stored as standard WordPress post meta and use WP’s object cache. The performance cost is comparable to native WP custom fields. Where you can introduce overhead is large Repeaters on archive pages, see the performance section above for how to prime the meta cache once instead of per post.
Q: Can I use ACF Pro with the block editor (Gutenberg)?
Yes. ACF works inside the block editor the same way as inside the classic editor (metaboxes appear below the canvas). For deeper integration, the ACF Blocks API lets you register native Gutenberg blocks backed by ACF fields, with no React or build pipeline required.
Q: Can I migrate field groups between staging and production?
Yes. Two paths: (1) Local JSON, where you commit the acf-json/ folder in your theme and the field groups travel with your code. (2) Tools → Export As JSON / Import JSON, which is a manual one-time move per environment.
Q: How does ACF Pro compare to Custom Post Type UI?
Since ACF Pro 6.1, the Post Types module covers the same use case as Custom Post Type UI. If you are starting fresh, you can do everything with ACF Pro alone (CPTs, taxonomies, fields). If you have a site already using Custom Post Type UI for CPTs and free ACF for fields, you can keep that arrangement, or migrate to a single plugin by re-registering the CPTs through ACF Pro’s UI.
Q: Will my data be lost if I deactivate ACF Pro?
No. The values are in wp_postmeta (post meta), wp_termmeta, wp_usermeta, or wp_options depending on where you attached them. The field definitions go away (so the editor loses the metaboxes), but the values remain in the database. If you reactivate ACF Pro and the field groups are re-registered with the same field names, the existing values reappear.
Q: Is ACF Pro compatible with WPML or Polylang for multilingual sites?
Yes. Both have well-tested integrations. Per-field translation settings (translate / copy / don’t translate) are configured in the field group editor’s Group Settings panel.
Q: Can I use ACF Pro with Elementor Pro or Beaver Builder Pro?
Yes. Both page builders read ACF field values into their dynamic widgets. Elementor Pro has a native "ACF" dynamic source for any text/image widget. Beaver Builder Themer has the same.
Q: Where is the documentation?
The official docs are at advancedcustomfields.com/resources. They are well-maintained, complete, and include every field type, every hook, and every function. Bookmark the Functions page in particular.
Final thoughts
ACF Pro is one of those plugins that quietly becomes part of how you think about WordPress sites. The first time you build a field group and read it from a template, the lightbulb goes on: every site you have ever built had custom fields scattered across plugins, theme options, options pages, hardcoded strings. ACF gives you one well-designed surface for all of that.
For a beginner the path is short. Install the plugin, build a field group with the visual editor, save, and the new fields appear in the post editor. No code. Editors fill in values, and your theme renders them with a couple of template tags.
For a developer the path is just as clean. The API is consistent (get_field, the_field, get_sub_field, have_rows). The hooks are well-named and there are filter variations for every scope. Field group definitions can live in PHP, JSON, or the database depending on your team’s workflow. CPTs, taxonomies, blocks, options pages, all share the same field engine. You learn the patterns once and they compose.
The honest places where ACF Pro is not the right answer: if you want a true drag-and-drop page editor for the post body, use a page builder. If you want headless content authoring with a separate front-end, ACF works but you may prefer a content modeling tool with a richer REST/GraphQL surface (Pods, JetEngine, or a headless CMS). For everything else, ACF Pro is the most boring-good choice you can make. If you want more field types out of the box and built-in custom database tables, our Meta Box review covers the closest alternative.
If you want to install it and walk through every step in this guide on a real WordPress site, ACF Pro is available on GPL Times as part of their plugin catalog. Drop it on a staging site, build the Author Bio field group from Step 1, render it in your theme, and you will have everything you need to start using ACF for real client work.
Useful external references:
- Advanced Custom Fields official documentation, function reference, field-type docs, hook list.
- WP Engine ACF GitHub repository, source code, issues, release notes.
- WordPress REST API handbook, for understanding the REST integration ACF builds on.