

A merch store I helped on wanted customers to put their own name on the back of a jersey before checkout. A small sign company emailed me because half their support tickets were "can I see what it looks like before I buy?" And a print shop I know was drowning in artwork: customers would email a logo, the shop would mock it up in Illustrator, send a proof, wait, revise, send again. Three of those problems are the same problem, and Fancy Product Designer solves all three. They all needed a live, in-browser customizer that lets the buyer design the thing themselves and hands the merchant a clean, print-ready file at the end. That is exactly the gap Fancy Product Designer fills.
This is a long, honest walk through what Fancy Product Designer (FPD) does, how the Product Builder actually works, what the customer sees, how the print-ready output flows back to you, and a full developer reference with the hooks, shortcodes, and settings worth knowing. It’s a powerful plugin with a real learning curve, and I’ll be upfront about where that bites.
Table of Contents
- What Fancy Product Designer is
- Key features
- The Product Builder: views, layers, and bounding boxes
- The customer designer experience
- Element properties: what customers can and cannot touch
- Designs library and clipart
- Pricing Rules: charging for customization
- The AI image module
- UI Composer: tailoring the designer interface
- Pro Export and print-ready output
- WooCommerce integration and the order flow
- Developer reference: hooks, shortcodes, and the config filter
- Don’t let customers upload low-res images into a print area
- Fancy Product Designer vs product-option plugins vs print-on-demand SaaS
- Troubleshooting the common problems
- Compatibility and system requirements
- Pricing and licensing
- FAQ
- Who Fancy Product Designer is actually for
What Fancy Product Designer is
Fancy Product Designer is a WordPress and WooCommerce plugin from Radykal that turns an ordinary product into a live, customer-customizable canvas. Instead of a static product photo, the buyer sees the actual item (a t-shirt, a mug, a business card, a phone case, a sign) and can drop on text, upload an image, pick clipart, change colors, and rotate elements, all in the browser. When they add it to the cart, their design travels with the order, and you get back a print-ready file.
It is built around Fabric.js for the canvas work, with a React-based admin that the plugin calls the "backend." That admin is where you define products, arrange the designer UI, set per-element rules, and view incoming orders. The front end is the designer customers actually touch.
The important framing: FPD is an engine, not a one-click toggle. It is the thing sitting behind print-on-demand shops, custom-merch stores, promotional-product sellers, signage companies, and stationery printers. That power comes with setup work. If your shop just needs an "add your name" text field on one product, FPD is overkill and you’ll be happier with a simpler product-options plugin. If you need real per-view printable areas, color-linked elements, area-based pricing, and a downloadable PDF for the printer, this is the category leader.
It works standalone with WordPress (you can run the designer through shortcodes and collect designs by email), but it really comes alive paired with WooCommerce, where the design attaches to a real order. There’s no separate free base plugin to install from wordpress.org, which matters: Fancy Product Designer ships the whole thing in one package, so the admin renders out of the box.
Key features
Rather than dump the marketing list, here’s what actually moves the needle when you’re building a real customizer.
- Product Builder with multi-view products. A single product can have several views (front, back, sleeve, inside), each with its own background image and its own printable area. The customer flips between views and the design is tracked per view.
- Bounding boxes per view. You mark the printable region on each view. Text and images get constrained to it, so a customer can’t drag their logo off the edge of the shirt.
- Live front-end designer. Add Text, Add Image, Add Designs (clipart), recolor, rotate, resize, layer, and preview, all on the canvas, with undo/redo.
- Customer image upload. Buyers upload PNG, JPEG, or SVG (subject to a configurable max size), and the file is validated server-side before it lands on the canvas.
- Designs library. A categorized clipart and design-element library you curate, so customers drop in vetted graphics instead of only their own uploads.
- Pricing Rules. Charge extra based on what the customer adds: text length, font size, number of elements, number of colors used, image dimensions, even canvas size.
- Dynamic Views. Let the customer set their own dimensions (great for signs and banners) with area-based pricing per square centimetre.
- UI Composer. A visual editor for the designer interface itself: which modules show, where the toolbar sits, what the layout looks like.
- AI image tools. Text-to-image generation, background removal, and image upscaling inside the designer (these route through the vendor’s cloud service).
- Pro Export. Generate print-ready PDF, SVG-to-PDF, or PNG output at 300 DPI, with crop marks, automated export to email or Dropbox, and a Printful hand-off.
- 3D Preview. Wrap the flat design onto a 3D model so the customer sees the mug or shirt in the round before buying.
- Gravity Forms and sharing. Embed the designer inside a Gravity Form, and let customers share or save their designs.
That’s a lot of surface. The rest of this article walks each meaningful piece.
The Product Builder: views, layers, and bounding boxes
Everything starts in the Product Builder. This is the admin canvas where you define what a customizable product actually is, and it’s the part with the steepest curve, so it’s worth slowing down here.
A product in FPD is made of views. A plain t-shirt might have two views (front and back). A folded business card has more. Each view has a background image (your blank product photo) and a stack of elements layered on top. Elements come in a few types: an uploaded image, a piece of text, a clipart/design from your library, or an "upload zone" placeholder that invites the customer to drop their own file in.
The piece people skip, and then regret, is the bounding box. A bounding box defines the printable area on a view. You either point FPD at an existing element to use as the box (the "Element As Bounding Box" toggle) or you type in Left/Top position plus Width and Height by hand. Once a view has a bounding box, anything the customer adds is constrained to it. That’s what stops a logo from sliding off the chest of the shirt, and it’s what your print file is cropped to later.
You also pick the box Mode here: Clipping (the image is masked to the box shape) and a Scale Mode of Fit or Cover (the image scales to fit inside or to cover the box when it’s added). For round prints you can set a Border Radius on the box.
The Product Builder is a backend React app, so give it a second to initialize when you open it. If you land on a blank "0 x 0px" canvas, that means no product is selected yet. You create a product first (from scratch, from a template, or by importing one of the demo products), and then the builder loads it.
The customer designer experience
Once a product is built and enabled, the customer-facing designer is what shows up on the product page. The layout is configurable (more on that under UI Composer), but the default is a module bar down the left with the canvas to the right.
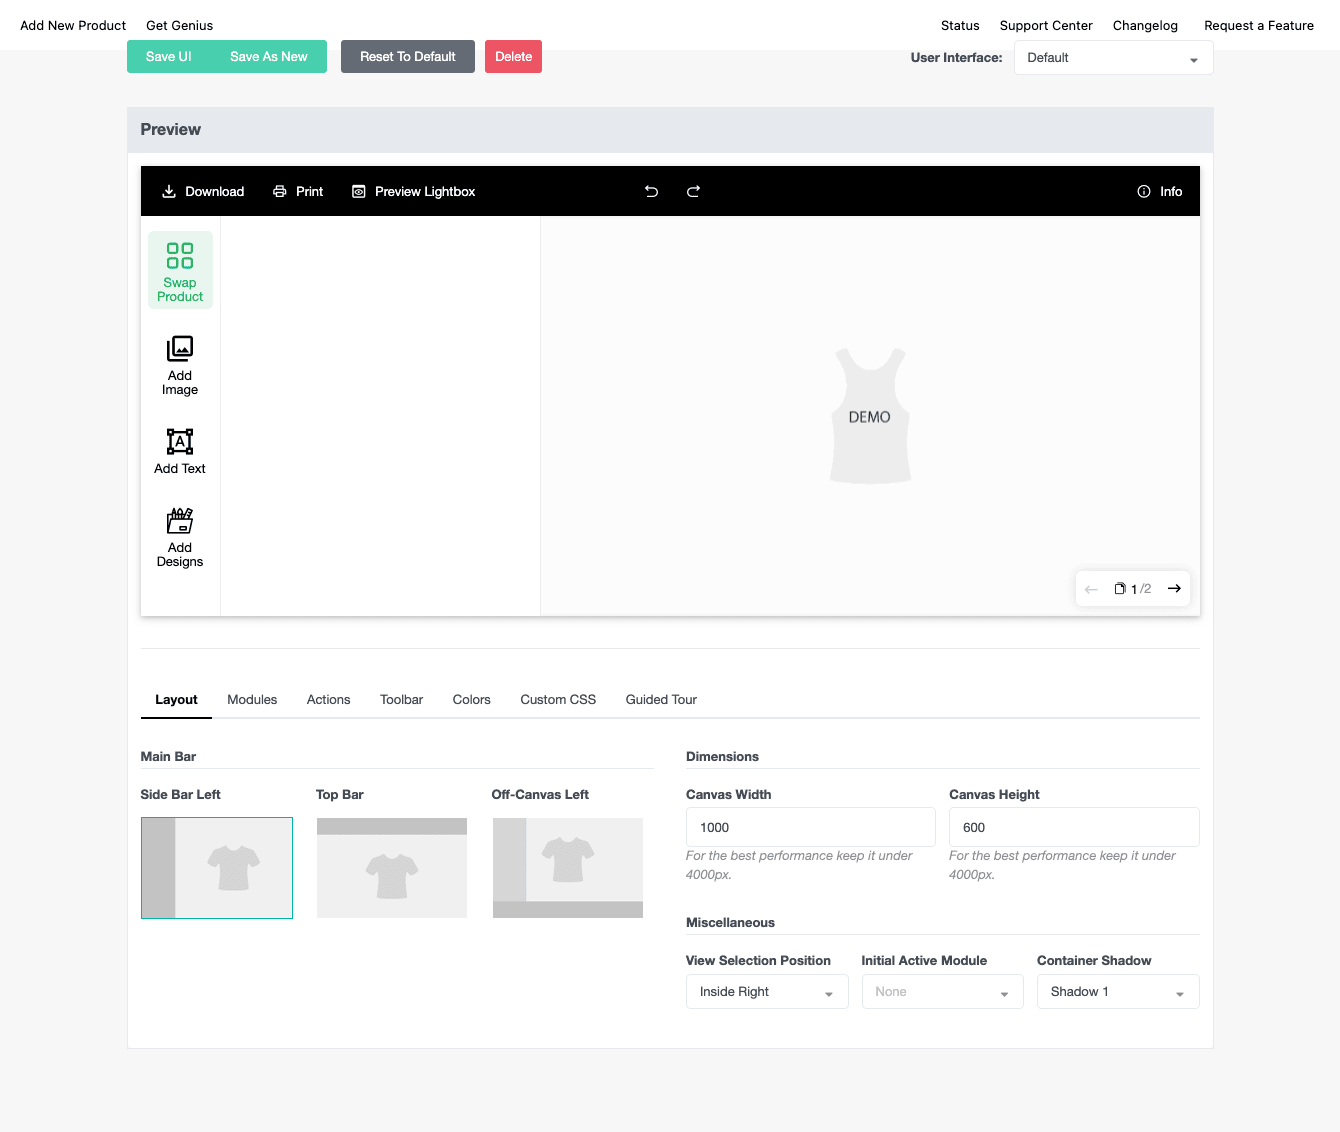
The toolbar across the top gives the customer Download, Print, and Preview Lightbox actions, plus undo/redo and an Info button. The module bar on the left is the heart of it: Swap Product (switch to a different blank), Add Image (upload their own), Add Text, and Add Designs (your clipart library). The canvas shows the current view with view pagination, so the customer can move between front and back.
Adding text drops an editable text box on the canvas. Depending on how you configured the element, the customer can recolor it, resize it, rotate it, change the font, and (if you enabled it) curve it along an arc. Adding an image either uploads a file or pulls from the library, and it snaps inside the bounding box. The whole thing is touch-aware, so it works on tablets and phones unless you deliberately disable it for smaller screens.
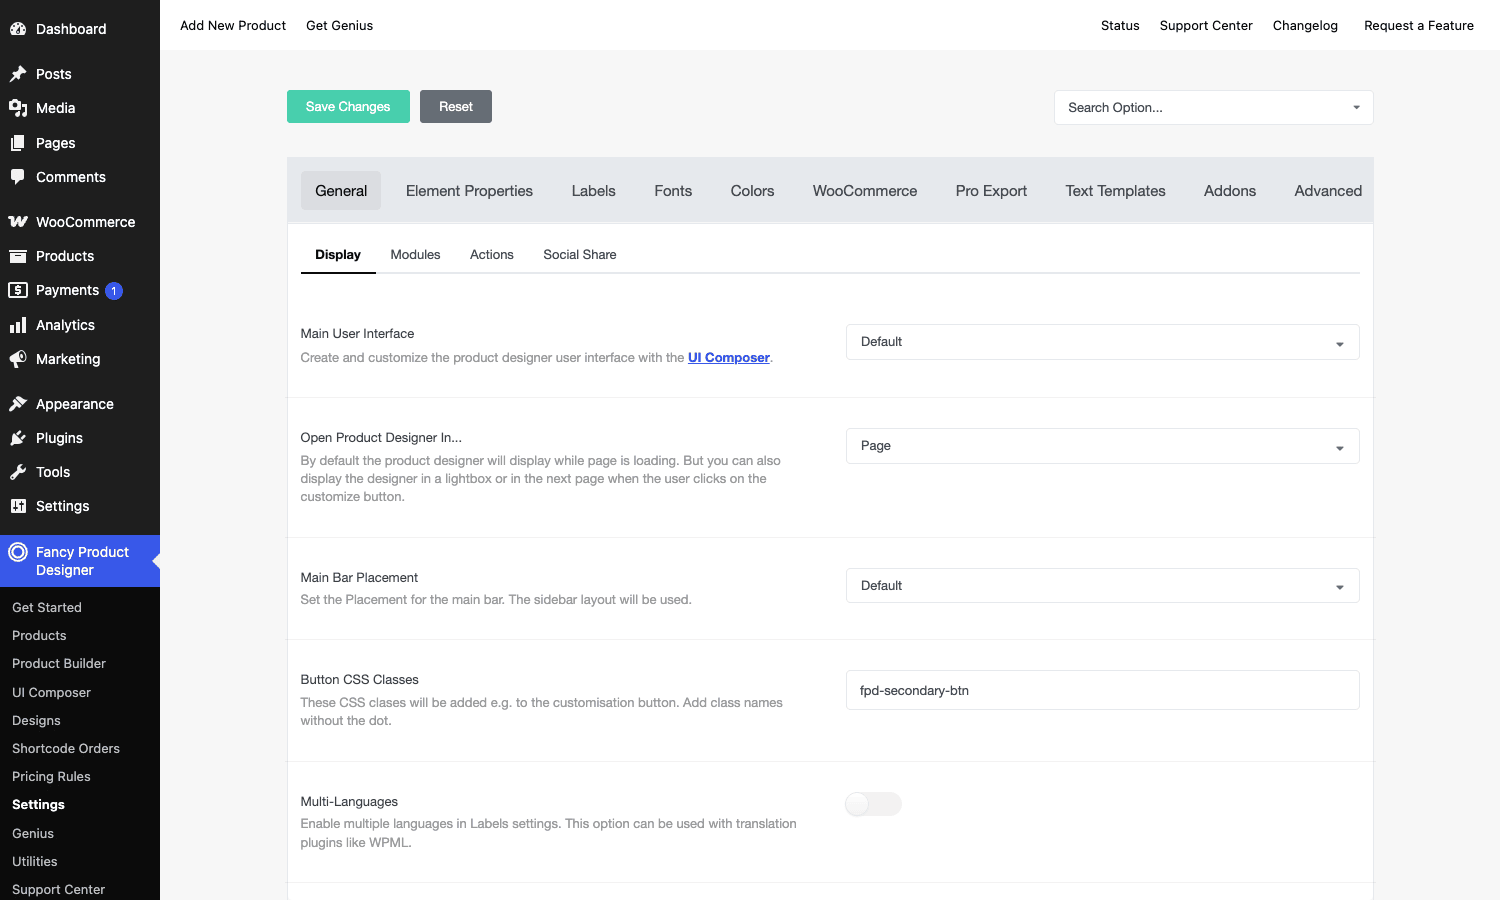
You decide where this designer opens. In the General settings the Open Product Designer In option lets you show it inline on the product page, swap it in to replace the product image, open it in a lightbox, or push it to a separate page. For a busy product page, the lightbox keeps things tidy: the customer clicks a "Customize" button and the designer pops over the page.
Element properties: what customers can and cannot touch
This is the control panel that separates a clean customizer from a chaotic one. Under Settings, the Element Properties tab sets the default behavior for every element type: customer-uploaded Images, your Custom Images, Custom Texts, and Coloring.
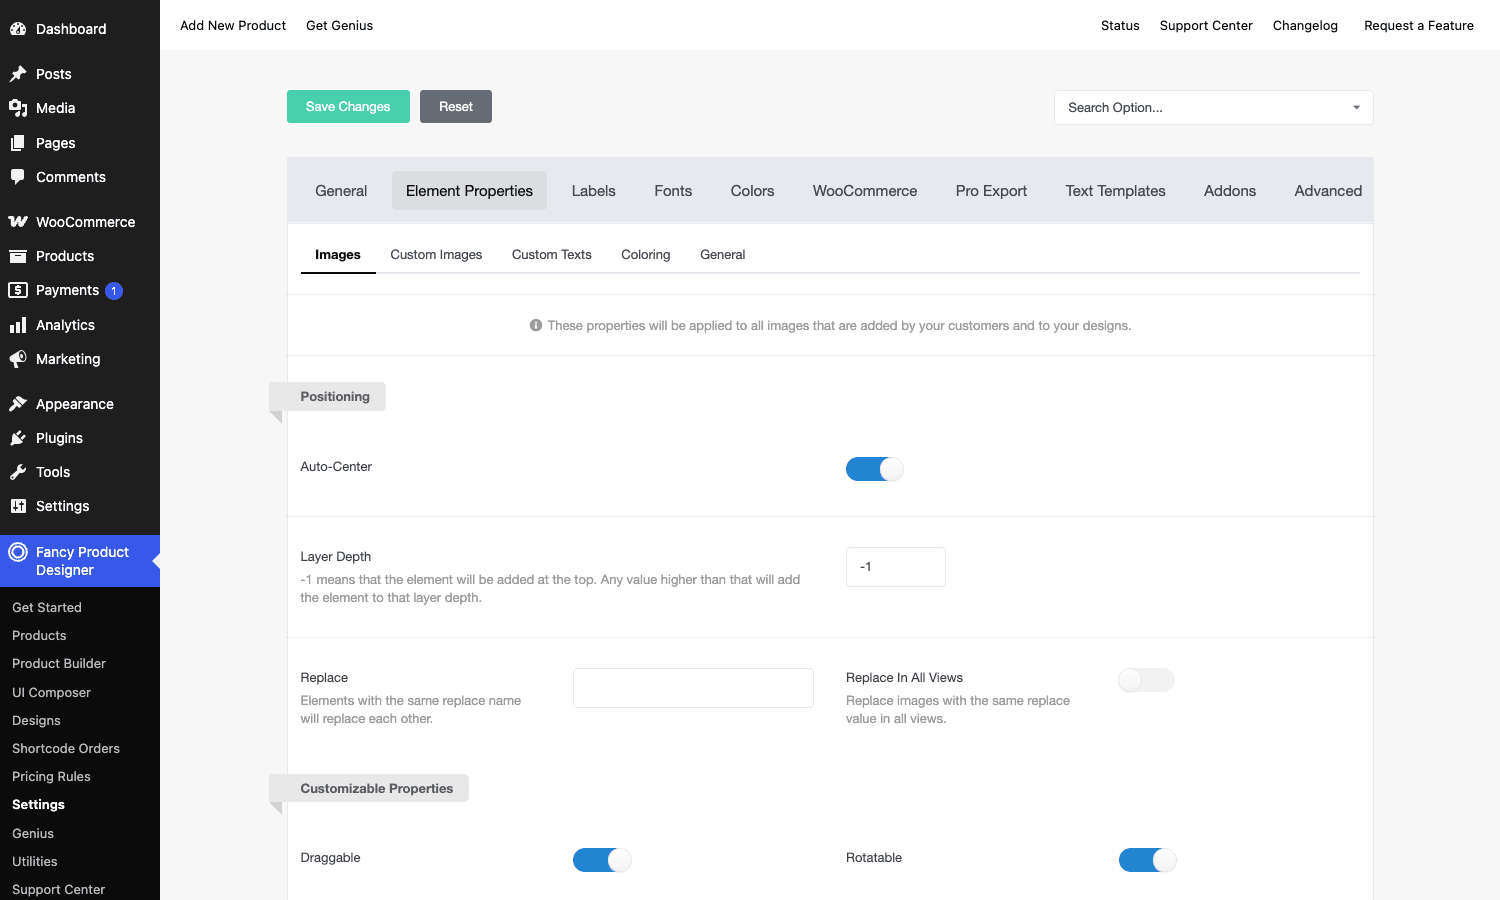
The toggles here decide what the customer is allowed to do with an element: Draggable, Rotatable, Resizable, Layer Depth Changeable, Auto-Select, Stay On Top, Allow Unproportional Scaling, and Duplicatable. Turn off Allow Unproportional Scaling and a customer can’t squash their logo into an ugly oval. Turn off Rotatable on a print that has to stay upright and you’ve saved yourself a support ticket.
Positioning controls include Auto-Center (drop new elements in the middle), Layer Depth (where in the stack it lands, with -1 meaning "on top"), and a Replace name. Replace is a quietly clever feature: elements that share a replace name swap each other out, so if a customer picks a new clipart it cleanly replaces the old one instead of stacking. There’s a "Replace In All Views" toggle so a name change on the front also updates the back.
Down in the Advanced block you can set a per-element Price (charged when that image element is added) and a Minimum Scale Limit. The minimum scale limit is your first line of defense against blurry prints: set it to 0.5 and a 1000px image can’t be scaled below 500px on the canvas. That keeps the effective resolution high enough to print.
Designs library and clipart
The Designs section is where you build the clipart catalog customers pick from through the Add Designs module. You organize designs into categories (sports, holidays, monograms, whatever fits your shop), and each design is an image or SVG you’ve vetted.
Curating a designs library is underrated. It does two things: it gives customers a creative starting point so they’re not staring at a blank canvas, and it keeps your output on-brand and printable, because you control the source files. A shop selling custom team gear, for example, can load a library of mascots and number fonts so a parent can build a jersey in thirty seconds without uploading anything.
Designs inherit their own property set, separate from uploaded images, so you can let library clipart be recolorable while keeping customer uploads locked to their original colors. SVG designs are especially nice here because they recolor cleanly and stay sharp at any print size.
Pricing Rules: charging for customization
Customization costs you money (ink, setup, larger prints), so you’ll usually want to charge for it. Pricing Rules is where that logic lives, and it’s more flexible than most people expect.
A pricing rule group watches a property and applies a price when a condition is met. The properties you can price on include Text Length, Text Size (font size), Lines Length, Image Size (origin width and height), Image Size Scaled, Amount of elements, Amount of used colors, and Canvas Size. The conditions are the usual comparisons: equal, greater than, less than, greater-or-equal, less-or-equal. So you can say "if the number of used colors is greater than 3, add 2.50" or "if text length is greater than 20 characters, add 1.00."
This maps directly onto how custom printing is actually priced. Screen printing charges per color, so the "amount of used colors" property is a real money-saver. Large-format work charges by area, so canvas size or the per-square-centimetre Dynamic Views pricing matches your cost. You can also set a flat per-element price right in Element Properties, which is the simplest case: every added image is, say, an extra dollar.
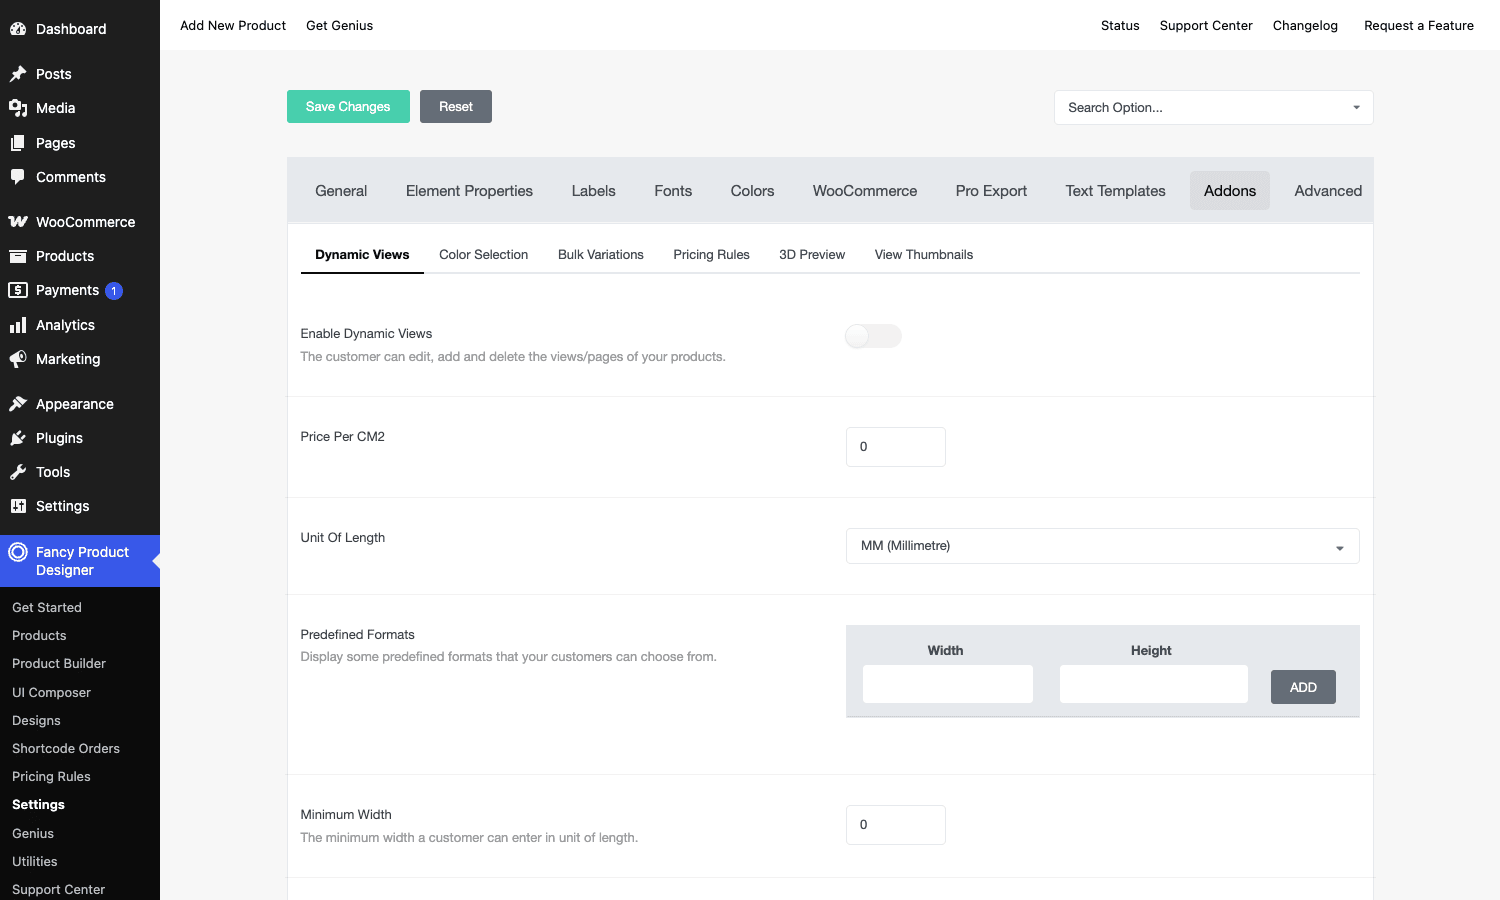
One honest caveat: pricing rules can get fiddly, and they interact with WooCommerce’s own price display. Test the math on a real product with a real cart before you go live, because a misconfigured rule that double-counts is the kind of bug a customer notices at checkout, not you.
The AI image module
FPD has an AI layer that lives inside the designer. Three tools ship: text-to-image (the customer types a prompt and gets a generated graphic to place), background removal (strip the background off an uploaded photo so a product shot drops cleanly onto a mug), and image upscaling (super-resolution to bump a small upload up to a printable size).
These are genuinely useful for the "customer uploaded a tiny low-res logo" problem, because upscaling and clean background removal turn a marginal upload into something you can print. Background removal in particular saves a ton of back-and-forth for photo products.
The honest part: the AI tools route through the vendor’s cloud service rather than running on your server. That means they depend on an active subscription to that service and an internet round-trip per request (there’s a 20-second fetch timeout in the code). If the cloud service is unavailable, the AI buttons stop working even though the rest of the designer is fine. Treat AI as a cloud-dependent add-on, not a core local feature, and don’t build your store’s whole value prop on it.
UI Composer: tailoring the designer interface
The UI Composer is one of FPD’s best ideas. Instead of forcing one fixed designer layout, it gives you a visual editor to rearrange the whole customer interface and save it as a named UI you can assign to products.
You get tabs for Layout, Modules, Actions, Toolbar, Colors, Custom CSS, and Guided Tour. The Layout tab lets you choose where the main bar sits: Side Bar Left, Top Bar, or Off-Canvas Left (a slide-out drawer, which is the right call on mobile). The Modules tab decides which tools appear (you might hide Add Image entirely on a text-only product). The Toolbar tab controls the top action row. Colors and Custom CSS let you match the designer to your theme so it doesn’t look bolted on.
Under Dimensions you set the Canvas Width and Canvas Height. The help text is blunt about keeping it under 4000px for performance, and you should listen: a giant canvas with many elements is the fastest way to make the designer feel sluggish on a mid-range phone. There’s also a View Selection Position, an Initial Active Module, and a Container Shadow for polish.
Because UIs are saved and assignable, you can run a simple Add-Text-only interface on engraved tags and a full-featured one on apparel. That flexibility is why FPD scales from one product type to a whole catalog.
Pro Export and print-ready output
Letting a customer design something is only half the job. The other half is getting a file your printer can actually use, and that’s Pro Export.
Pro Export produces print-ready output in PDF, SVG-to-PDF (the default method, which keeps vectors crisp), or PNG, at 300 DPI by default. It can add crop marks, and it runs as a print-job queue so large exports don’t block the page. The output lands in a dedicated fancy_products_orders/print_ready_files directory on your server.
The Automated Export settings are where this gets hands-off. You can have FPD generate the print file automatically when an order comes in and then deliver it: email it as an attachment, email a download link (optionally gated behind login), or push it to Dropbox. You set the export image DPI, choose the output format, and decide whether the file goes to the admin, the customer, or both. For a print shop, automated export to Dropbox means artwork lands in your production folder the moment a customer checks out, with zero manual mockup work.
There’s also a direct Printful integration in the Pro Export module, so a print-on-demand shop can fire designs straight at Printful for fulfillment.
The catch worth stating plainly: Pro Export and the AI tools depend on the vendor’s cloud service (the plugin calls it Genius). The settings panel says so directly: enabling Pro Export requires a subscription to their Pro plan at minimum. The designer, Product Builder, pricing rules, and WooCommerce hand-off all work locally, but the actual print-file rendering happens through the cloud. If that matters to your risk tolerance, factor it in: you own the design data, but the export rendering is a hosted service.
WooCommerce integration and the order flow
Paired with WooCommerce, FPD slots into the normal store flow instead of replacing it. The WooCommerce settings tab is deep, split into Product Page, Cart, Order, Catalog Listing, Global Product Designer, and Cross Sells.
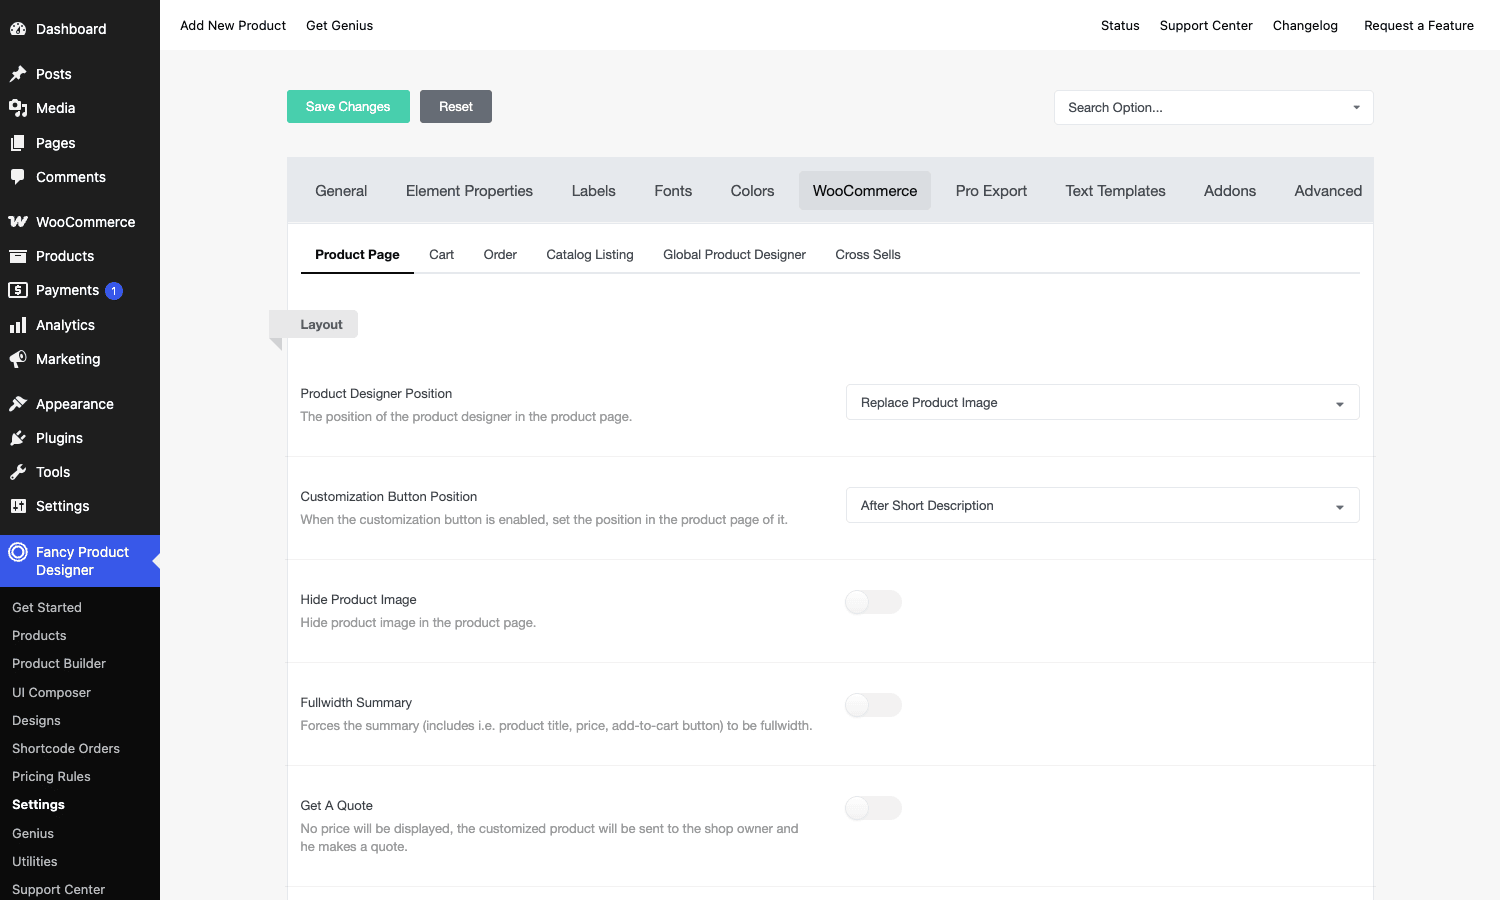
On the Product Page tab you control Product Designer Position (inline, or Replace Product Image so the designer takes over the gallery), the Customization Button Position (for example, After Short Description), and whether to hide the original product image. Get A Quote is a smart option for high-value custom work: it hides the price, and the customized product is sent to you for a manual quote instead of going straight to cart. Customize Button: Variation Needed holds the designer back until a variation (say, a shirt size) is chosen, and Disable Price Calculation turns off live pricing if you’d rather price elsewhere.
The Add-To-Cart: Load option decides whether the cart shows the customized product or the default product after adding, and AJAX Add-To-Cart Mode is recommended if your theme adds to cart over AJAX so the loading indicator behaves. The Lightbox sub-section can update the WooCommerce product image with the customer’s design when they hit Done, which is a nice touch for the cart thumbnail.
On the order side, the customer’s design carries through to the WooCommerce order. You see it in the order detail, and when Pro Export and downloads are set up, a Download link appears so you (or the customer) can grab the print-ready file. FPD also knows about Dokan, so on a multi-vendor marketplace each vendor’s customizable products work without extra wiring.
If you’re building out a custom-product store, it’s worth reading our WooCommerce Product Bundles walkthrough too, because bundles and customizers solve adjacent problems and sometimes pair well.
Developer reference: hooks, shortcodes, and the config filter
FPD is more extensible than the polished React admin suggests. Everything below is pulled from the plugin source, not invented, so it’ll match what you find in the files.
Shortcodes
The designer is shortcode-driven on the front end. The main one renders the full designer:
[fpd]
For a standalone designer with a contact form (no WooCommerce needed), use the form shortcode, which accepts a price format attribute:
[fpd_form price_format="$%d"]
Other registered shortcodes include [fpd_gf] (embed the designer inside a Gravity Forms form), [fpd_share] (share a design), [fpd_saved_products] (show a customer’s saved designs), [fpd_module] (render a single module on its own), [fpd_main_bar] (just the module bar), [fpd_action], [fpd_cs], [fpd_bulk_add_form], [fpd_view_thumbnails], and [fpd_3d_preview]. Wrap any of these in backticks in your own docs so your editor doesn’t execute them, the same way they’re shown here.
Action hooks around the designer
The two you’ll use most fire right around the rendered designer, so you can inject your own markup:
add_action( 'fpd_before_product_designer', function () {
    echo '<p class="my-designer-note">Designs are printed within the marked area only.</p>';
} );

add_action( 'fpd_after_product_designer', function ( $post ) {
    // $post is the current product post object
    echo '<div class="my-print-disclaimer">Allow 3-5 business days for custom prints.</div>';
}, 10, 1 );
When the designer is enabled on a post, this fires with the product settings, which is handy for conditional asset loading:
add_action( 'fpd_post_fpd_enabled', function ( $post, $product_settings ) {
    // enqueue an extra script only on pages that actually show the designer
    wp_enqueue_style( 'my-fpd-tweaks' );
}, 10, 2 );
On the WooCommerce side, you can react to a customized product entering the cart:
add_action( 'fpd_wc_add_to_cart', function ( $cart_item_key, $product_id, $quantity, $variation_id, $variation, $cart_item_data ) {
    // log or tag custom orders for your fulfillment queue
    error_log( 'Custom design added to cart: product ' . $product_id );
}, 10, 6 );
The config filter
The single most powerful hook is the filter that builds the front-end designer configuration. FPD passes its entire JS options array through it before handing it to the canvas:
add_filter( 'fpd_frontend_setup_configs', function ( $configs ) {
    // tighten upload handling for every designer on the site
    $configs['fitImagesInCanvas']   = true;
    $configs['highlightEditableObjects'] = true;
    return $configs;
} );
Because this is the same options object the designer reads at runtime, almost any behavior you can set in the admin you can also override here in code, which is the clean way to enforce store-wide defaults without clicking through every product.
Settings, designs, and trusted hosts
Most admin panels expose a settings filter, so you can change defaults programmatically: fpd_general_settings, fpd_advanced_settings, fpd_woocommerce_settings, fpd_addons_settings, fpd_automated_export_settings, fpd_default_element_options_settings, and the per-tab label filters like fpd_admin_labels_pricing_rules. The fpd_designs_json_string and fpd_products_json_string filters let you post-process the JSON FPD outputs for designs and products. And if you let customers paste image URLs, whitelist the hosts you trust:
add_filter( 'fpd_trusted_image_hosts', function ( $hosts ) {
    $hosts[] = 'cdn.mystore.com';
    return $hosts;
} );
Print files in code
If you’re building a custom fulfillment flow, the plugin exposes a static method to generate a print-ready file from a design payload (this requires the Pro/Genius layer):
$file_url = Fancy_Product_Designer::create_print_ready_file( $payload, true, 'nodecanvas-svg' );
FPD stores its data across its own tables (products, views, designs, orders, print jobs, categories) rather than stuffing everything into postmeta, so if you ever need to query designs directly, look at the fpd_* tables instead of the posts table.
Don’t let customers upload low-res images into a print area
Here is the failure mode that costs real money, and almost everyone hits it once. You launch your shiny new customizer, a customer uploads a 200px logo they pulled off their Instagram, they scale it up to fill the whole front of a hoodie because the canvas lets them, the design looks fine on screen, they check out, you generate the print file, and the printer outputs a blurry, pixelated mess. Now you’re eating a reprint, a refund, or an angry review, and the customer blames you, not their tiny upload.
The screen lies. A canvas at screen resolution looks crisp at any zoom, but print needs roughly 300 DPI, and a 200px image stretched across a 30cm print is nowhere near that. The fix is to never let it happen, and FPD gives you the levers.
Set a Minimum Scale Limit in Element Properties so an upload can’t be scaled past the point where it goes soft. The help text spells out the math: a value of 0.5 means a 1000px image can’t go below 500px on the canvas. Combine that with a generous bounding box that defines the real printable area, so customers can’t drag art outside the safe zone. For marginal uploads, the AI upscale and background removal tools can rescue a small file, but don’t rely on them as a policy. And add a short note via fpd_before_product_designer telling customers to upload high-resolution artwork, because a one-line warning prevents more bad uploads than any setting.
The money math is simple. A single blurry reprint on a custom hoodie can wipe out the margin on several clean orders. An hour wiring up scale limits and bounding boxes before launch is the cheapest insurance you’ll buy. Treat "the customer can upload anything" as a liability, not a feature.
Fancy Product Designer vs product-option plugins vs print-on-demand SaaS
FPD sits between two very different categories, and picking the wrong one wastes either money or capability. Here’s the honest comparison with real numbers.
Versus simple product-option plugins. Tools like WooCommerce Product Add-Ons or Product Options for WooCommerce add fields, swatches, and text inputs to a product. They’re great for "engrave this name (max 12 characters), +$5.00" and they’re cheap, often in the $49 to $79 range for a single-site year. But they give the customer zero visual feedback: no canvas, no preview, no print file. Fancy Product Designer is a different class of tool. It renders a live canvas with multiple views, per-element bounding boxes, layering, and a downloadable 300 DPI print file. If your only need is one text field, the cheaper plugin wins on price and simplicity. The moment you need the customer to see and position their design, the option plugins can’t do it at any price.
Versus print-on-demand SaaS (Zakeke, Customily, Printful’s built-in designer). The SaaS designers are slick and hosted, but the pricing model is the real difference. Zakeke and Customily run on monthly subscriptions that commonly start around $19/mo to $39/mo and climb with order volume or product count, so a busy store can pay several hundred dollars a year, every year, forever. FPD is a one-time CodeCanyon license (regular pricing has historically sat around the $50 to $90 mark for the extended-use scenarios), and the designer itself runs on your own server. Over three years, a one-time license versus a $29/mo SaaS is roughly an $1100 difference, and you keep the data on your host. The trade is that FPD’s print-file rendering and AI lean on the vendor cloud, whereas Printful’s designer is "free" only because it locks you into Printful fulfillment. If you want to own the customizer and keep fulfillment open, FPD’s one-time model is the cheaper and more flexible long game. If you want a fully hosted, zero-maintenance experience and don’t mind the recurring bill, SaaS is less work.
Three concrete numbers to anchor it: FPD ships roughly a dozen front-end shortcodes and a dozen settings tabs of control, supports three print export formats (PDF, SVG-PDF, PNG) at 300 DPI, and is a single license payment of around $50 to $90 versus the $29/mo recurring charge of every SaaS competitor.
Troubleshooting the common problems
These are the issues that actually generate support tickets, with the fix for each.
The designer doesn’t load or shows a blank canvas. This is almost always a JavaScript conflict with the theme or another plugin, or a canvas size of 0. Open the browser console; if you see a JS error from another script, that script is breaking the Fabric.js init. Try a default theme to confirm. In the admin, a 0 x 0px canvas in the Product Builder means no product is loaded yet, so create or import a product first.
Uploaded images print blurry. Covered above: the customer uploaded low-res art and scaled it up. Set a Minimum Scale Limit, define a real bounding box, and warn customers to upload high-resolution files.
Fonts don’t render in the designer or in the export. Custom fonts have to be uploaded into the Fonts panel (they live in wp-content/uploads/fpd_fonts/), and Google web fonts need enabling. If a font shows on screen but not in the print file, it usually didn’t get embedded; re-check the font is actually added in FPD rather than just available in your theme.
The export file is blank, wrong size, or never arrives. Pro Export and AI require the vendor cloud (Genius) and a Pro subscription; without it those features are disabled by design. If export is enabled but files are empty, confirm the bounding box is set (the export is cropped to it) and that the order directory is writable. Check the Status page for missing PHP pieces.
The designer is slow with many elements. Large canvases plus many elements tax the browser, especially on phones. Keep canvas dimensions under 4000px as the UI Composer warns, and lean on SVG designs over huge raster images.
License won’t activate. Make sure you’re entering the license under the right account and that allow_url_fopen and cURL are available so the plugin can reach the licensing endpoint. The Status page tells you which functions are present.
Compatibility and system requirements
FPD is more server-hungry than a typical plugin because it does image processing. The built-in Status page checks your environment, and it’s the first place to look when something misbehaves.
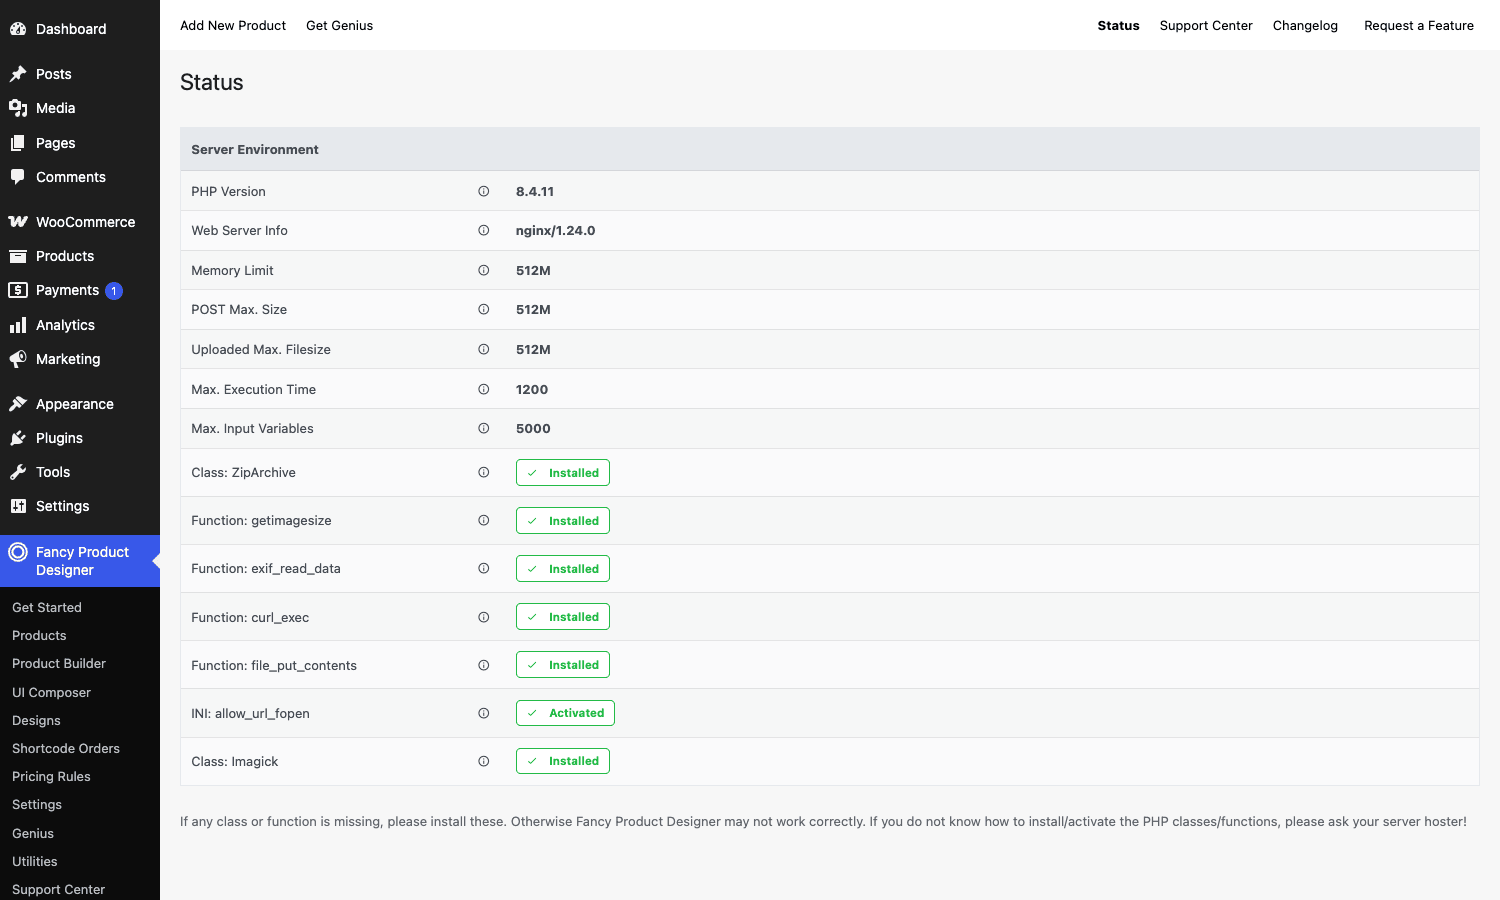
It wants the ZipArchive class (for importing and exporting products and demos), getimagesize, exif_read_data, curl_exec, file_put_contents, the allow_url_fopen INI setting, and ideally Imagick for image work. A healthy setup runs modern PHP (the demo I tested was on PHP 8.4) with a memory limit around 512M, generous POST and upload size limits, and a longer max execution time, because generating print files and handling big uploads takes time and RAM. On cheap shared hosting with a 128M memory cap and a 30-second timeout, expect trouble with large exports.
On the WordPress side, FPD works with the current WooCommerce and the common page builders, since the front-end designer is rendered through a shortcode you can place anywhere. It’s touch-aware for tablets and phones, with explicit options to disable the designer on smartphones or tablets if you’d rather not serve it there. It plays nicely with Dokan for multi-vendor stores, integrates with Gravity Forms, and supports translation through its Multi-Languages option, which is built to work with translation plugins like WPML.
Pricing and licensing
Fancy Product Designer is a commercial CodeCanyon plugin from Radykal, sold as a one-time license rather than a subscription for the core plugin. That one purchase gets you the Product Builder, the front-end designer, pricing rules, the UI Composer, WooCommerce integration, and the developer hooks, all running on your own server.
The piece that is not one-time is the cloud layer. The AI tools (text-to-image, background removal, upscaling) and Pro Export (the actual print-ready PDF/SVG/PNG rendering and automated export) run through the vendor’s hosted service and require an ongoing Pro-plan subscription, as the Pro Export settings panel states outright. So the honest mental model is: the customizer and store integration are a one-time cost you fully own, and the print-rendering and AI conveniences are a separate paid service on top. Budget for both if your workflow depends on automated print files.
You can get Fancy Product Designer through the Fancy Product Designer page on GPL Times, which is the same package you’d get from the original vendor, delivered through the GPL store. If you want to wire it into a real WooCommerce store and click through the Product Builder and UI Composer yourself, that’s the fastest way to get a working copy onto a staging environment and start experimenting with views and bounding boxes.
FAQ
Do I need WooCommerce to use Fancy Product Designer?
No, but you’ll want it for selling. FPD runs on plain WordPress through the [fpd] and [fpd_form] shortcodes, where you can collect designs by email or quote. The real payoff (a customized product that carries into a real order with pricing and a print file) only happens with WooCommerce active. Most people run them together.
What file does my printer actually receive?
With Pro Export enabled, you get a print-ready file in PDF, SVG-to-PDF, or PNG at 300 DPI, cropped to the bounding box you defined, with optional crop marks. Automated export can email it or drop it in Dropbox the moment an order comes in. Without the Pro/cloud layer, you still see the customer’s design on the order, but you don’t get the rendered print file automatically.
Are the AI image features included, or extra?
Extra. Text-to-image, background removal, and upscaling are real and genuinely useful, but they run through the vendor’s cloud service and need an active Pro subscription. They also depend on an internet round-trip, so if the service is down the AI buttons stop working while the rest of the designer keeps running. Don’t make AI the centerpiece of your store’s pitch.
Does the designer work on phones and tablets?
Yes. The canvas is touch-aware and there’s an Off-Canvas Left layout in the UI Composer that’s built for small screens. You can also explicitly disable the designer on smartphones or tablets if you’d rather not serve it there. Keep canvas dimensions reasonable, because big canvases plus many elements get sluggish on mid-range phones.
How do I stop customers from uploading low-resolution images that print badly?
Set a Minimum Scale Limit in Element Properties so uploads can’t be scaled past the point of going soft, define a proper bounding box so art stays in the printable zone, and add a short upload-quality note via the fpd_before_product_designer hook. The AI upscaler can rescue marginal files, but treat prevention as the policy.
Will it slow my store down?
The product page that hosts the designer loads the Fabric.js canvas and the designer assets, so it’s heavier than a plain product page. It only loads where the designer is enabled, though, so the rest of your store is unaffected. The bigger performance lever is canvas size and element count, not the plugin itself; keep canvases under 4000px.
Can I charge based on what the customer designs?
Yes, and this is one of FPD’s strengths. Pricing Rules can charge on text length, font size, number of elements, number of colors used, image size, or canvas size, with comparison conditions. You can also set a flat per-element price. For signage, Dynamic Views adds per-square-centimetre pricing. Test the cart math before going live.
Does it integrate with Gravity Forms or Printful?
Both. The [fpd_gf] shortcode embeds the designer inside a Gravity Forms form, which is great for quote-based custom work. Pro Export includes a direct Printful hand-off so print-on-demand shops can send designs straight to fulfillment.
Can customers save a design and come back later?
Yes. With saved products enabled, the [fpd_saved_products] shortcode shows a logged-in customer their saved designs so they can reopen and re-order them. It’s a nice touch for repeat buyers and for anyone who wants to think before they buy.
What happens if I uninstall it?
FPD stores its data in its own database tables (products, views, designs, orders, print jobs) plus a few directories under wp-content. Deactivating leaves that data in place; the customizer simply stops rendering on product pages and the shortcodes go inert. Back up those tables and the orders directory before removing anything if you have live custom orders, because that’s where customer designs and print files live.
Who Fancy Product Designer is actually for
Fancy Product Designer is the right tool when the customer needs to see and shape the product before they buy it, and when you need a clean file at the end. Custom apparel, promotional products, signage, stationery, phone cases, photo gifts: this is built for all of it, and the depth (multi-view products, real bounding boxes, area and color-based pricing, a configurable interface, and a genuine developer API) is hard to match in the WordPress world.
It is not the right tool for a shop that just wants a name field on one item. The Product Builder rewards the time you put into it, but it does demand that time, and the AI and print-export conveniences ride on a paid cloud service you should account for. Go in knowing that, set your scale limits and bounding boxes before launch, and you get a customizer you fully own running on your own store, with the print files flowing to your printer automatically. For most custom-product businesses, that ownership and that depth are exactly the trade worth making.