

If you run any WordPress site that monetises through banner placements, AdSense slots, or affiliate banners, you eventually hit the same wall: managing the markup, the scheduling, and the click counts by hand stops being fun very fast. AdSanity is the ad management plugin that takes that messy job and turns it into a normal WordPress custom post type. Four ad types, scheduling, click and view tracking, ad groups, widgets, shortcodes, a Gutenberg block, and a handful of focused pro add-ons. No more, no less.
This is a long, practical walk-through. We’ll cover what the plugin is, how to install it, how to put your first ad on the page (image, AdSense, or HTML), how scheduling and rotation actually work, and what each pro add-on adds. Then we go under the hood for developers: custom post type, taxonomy, hooks, filters, REST fields, and code examples.
Table of Contents
- What is AdSanity
- Key features at a glance
- Installation and setup
- The four ad types in AdSanity
- Placing ads: shortcodes, widgets, blocks, and template tags
- Ad groups and rotation
- Scheduling: start dates, end dates, and impression caps
- Tracking: views, clicks, and CTR
- Settings page: tracking, ads.txt, and automatic inclusion
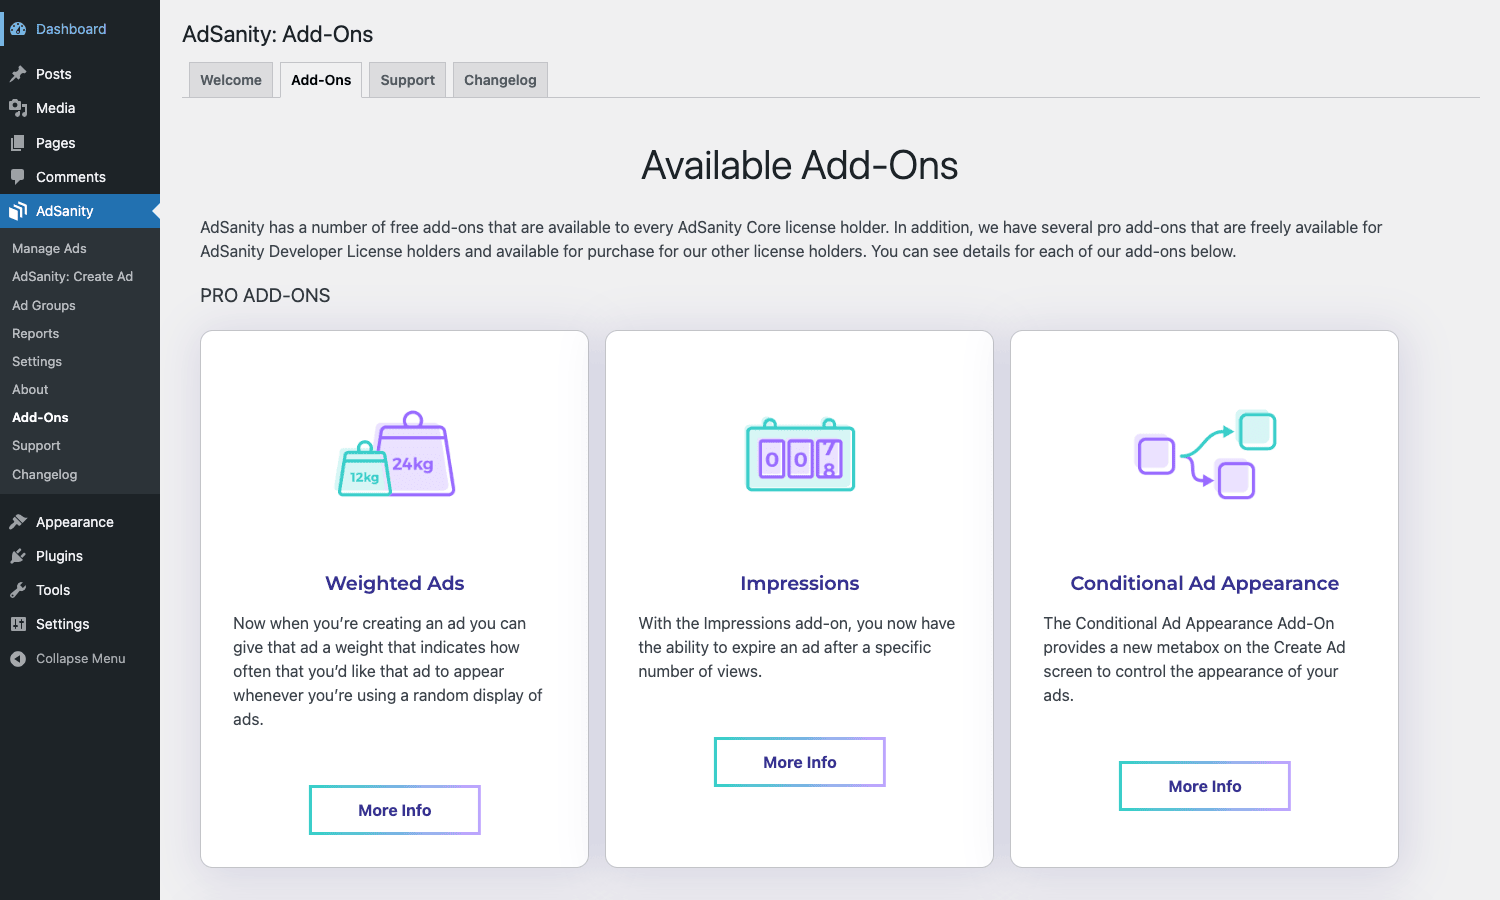
- Pro add-ons explained
- Developer reference: post type, hooks, filters, REST
- Real-world use cases
- Performance, compatibility, and gotchas
- AdSanity vs Advanced Ads Pro and other ad managers
- Pricing and licensing
- Frequently asked questions
- Final thoughts
What is AdSanity
AdSanity is a WordPress ad management plugin built and maintained by Pixel Jar. It’s been in active development since 2012, and its design philosophy is right there in the name: keep things small, keep the moving parts visible, and don’t pile on every conceivable targeting feature in the box. If you want every option pre-installed and switched on, you’ll prefer something heavier. If you want to manage banner ads, AdSense slots, affiliate buttons, and HTML5 creatives without learning a giant settings system, this is the one.
Under the hood it’s WordPress through and through. Each ad is a post in a custom post type called ads. Each ad group is a term in a hierarchical taxonomy called ad-group. Scheduling is post meta. Click and view counts are post meta. This matters because anything you already know about WordPress (queries, REST API, WP-CLI, search and replace, exports, backups) just works with AdSanity data. No proprietary tables to migrate. No magic.
Pixel Jar publishes official AdSanity documentation at adsanityplugin.com and a free core version on wordpress.org, with the paid features delivered as separate add-on plugins.
Key features at a glance
- Four ad formats in one editor. Hosted image ads, external ad-network code (AdSense, Amazon, network tags), text ads, and HTML5 creatives, all in the same Create Ad screen with a tab switcher.
- Per-ad scheduling. Set a start date, an end date, or both. Expired ads quietly disappear from the front end and from REST queries.
- Click and view tracking. Every ad accumulates per-day and all-time stats, exposed in the Reports tab with a Top 10 clicks and a Top 10 CTR list.
- Ad groups. Group related ads into a hierarchical taxonomy and rotate one of them per page view, or pull all of them as a row.
- Multiple placement methods. Shortcode, widget, Gutenberg block, page-builder widget (Elementor, Beaver Builder, Divi), or PHP template tag.
- Ads.txt management. Add and serve
ads.txtlines from the Settings panel without SSH-ing into your server. - Role-based tracking exclusion. Tell AdSanity to skip click and view counts for logged-in admins so you don’t inflate your own CTR while testing.
- Pro add-ons, not a giant pro plugin. Weighted rotation, impression caps, geolocation-style conditional rules, user-role visibility, ad-block detection, advertiser reporting, GA integration, and more, each as its own opt-in add-on.
Installation and setup
If you’re using the AdSanity bundle from GPL Times, you’ll have two zips: the core adsanity.zip and adsanity-pro-addons.zip. The pro bundle contains a folder of individual add-on zips that you install separately if you want them. You don’t have to install every add-on; pick the ones you actually need.
Steps that always work:
- In WordPress, go to Plugins -> Add New -> Upload Plugin, upload
adsanity.zip, and activate it. You’ll see a new AdSanity item in the left admin menu. - Open
adsanity-pro-addons.zipon your machine, pick whichever pro add-on zips you want (start with Weighted Ads and Conditional Ad Appearance if you’re unsure), and install them one at a time. - Go to AdSanity -> Add-Ons to confirm each pro add-on is activated. Anything you installed shows up here as "Active".
- Visit AdSanity -> Settings. Add the roles you want excluded from click and view tracking (almost always Administrator and Editor), and paste your
ads.txtlines if you serve any third-party ad networks. The plugin will serve those lines at the public/ads.txtURL automatically.
Once that’s done, you’re ready to create your first ad.
The four ad types in AdSanity
When you click AdSanity -> Create Ad you get a four-tab strip across the top of the editor, one tab per ad type.
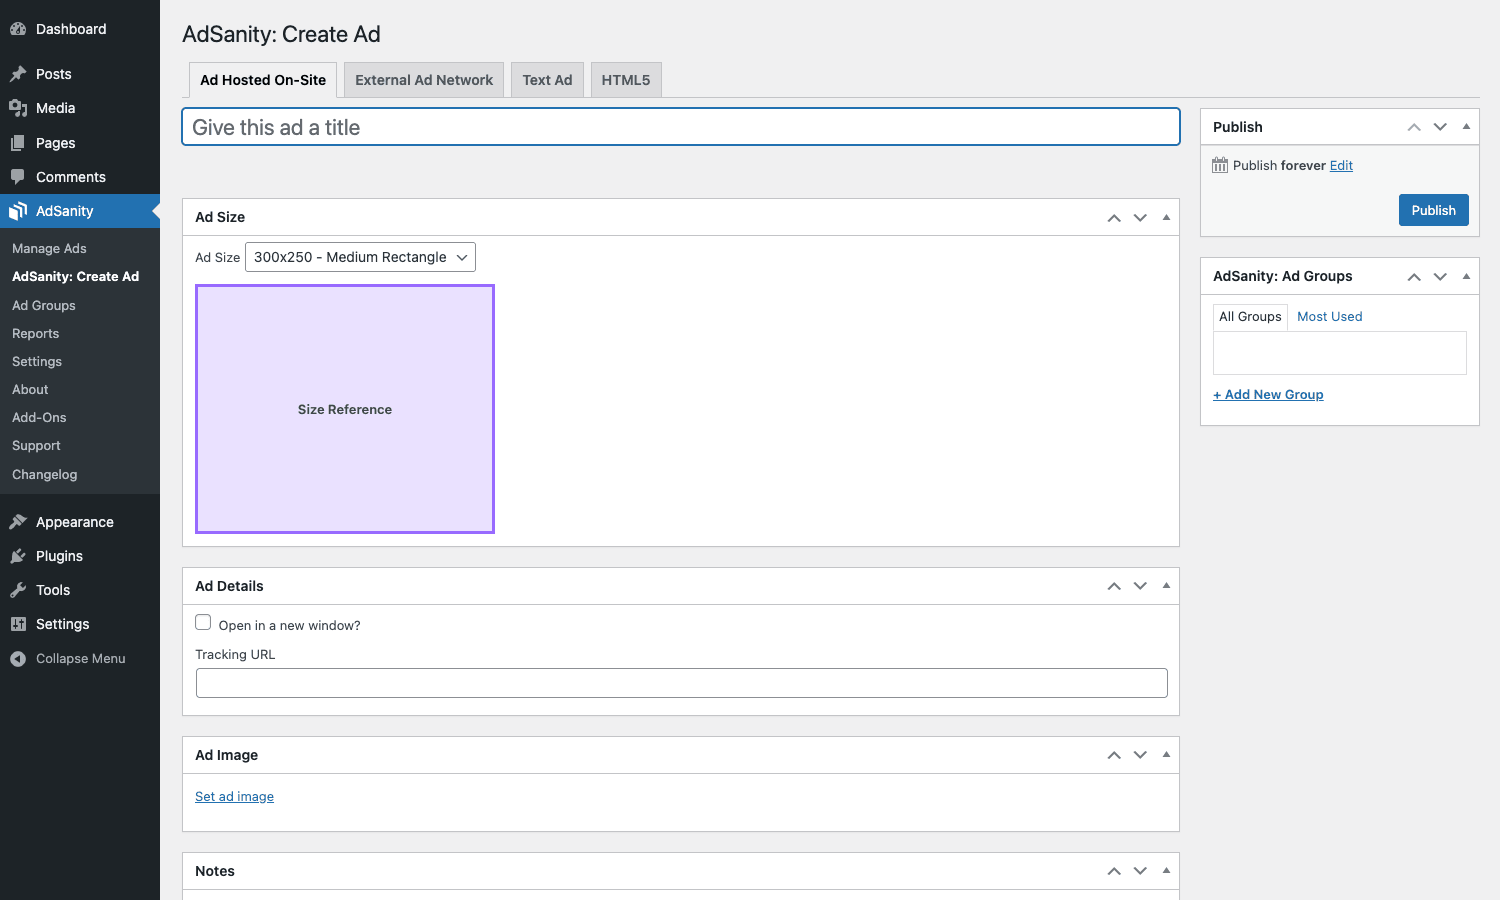
The visible size reference is the same purple block on every tab. Pick a size from the dropdown (300×250, 728×90, 160×600, custom dimensions, etc.) and the reference resizes to match, which is a small but genuinely useful touch when you’re sourcing creatives.
Ad Hosted On-Site
Pick an image from the media library (or upload one), set a Tracking URL, and you’re done. The image is your creative. The URL is where the click goes. AdSanity records the click in the click count and then 302-redirects the visitor to the tracking URL. You can choose to open the link in a new window or the same one.
This is the format you want for any image you’re hosting yourself: affiliate banners from networks that give you a URL but no embed code, sponsored placements from a direct advertiser, your own house ads pointing to a sale page.
External Ad Network
This is the AdSense, Amazon, and ad-network tab. Paste the network’s <script> tag and <ins> markup directly in the Ad Code box. AdSanity wraps it in a tracked container and serves it. If you also want AdSanity to count clicks on the wrapped HTML, you can include %link% as a placeholder in your href attribute and AdSanity rewrites it to its own redirect URL.
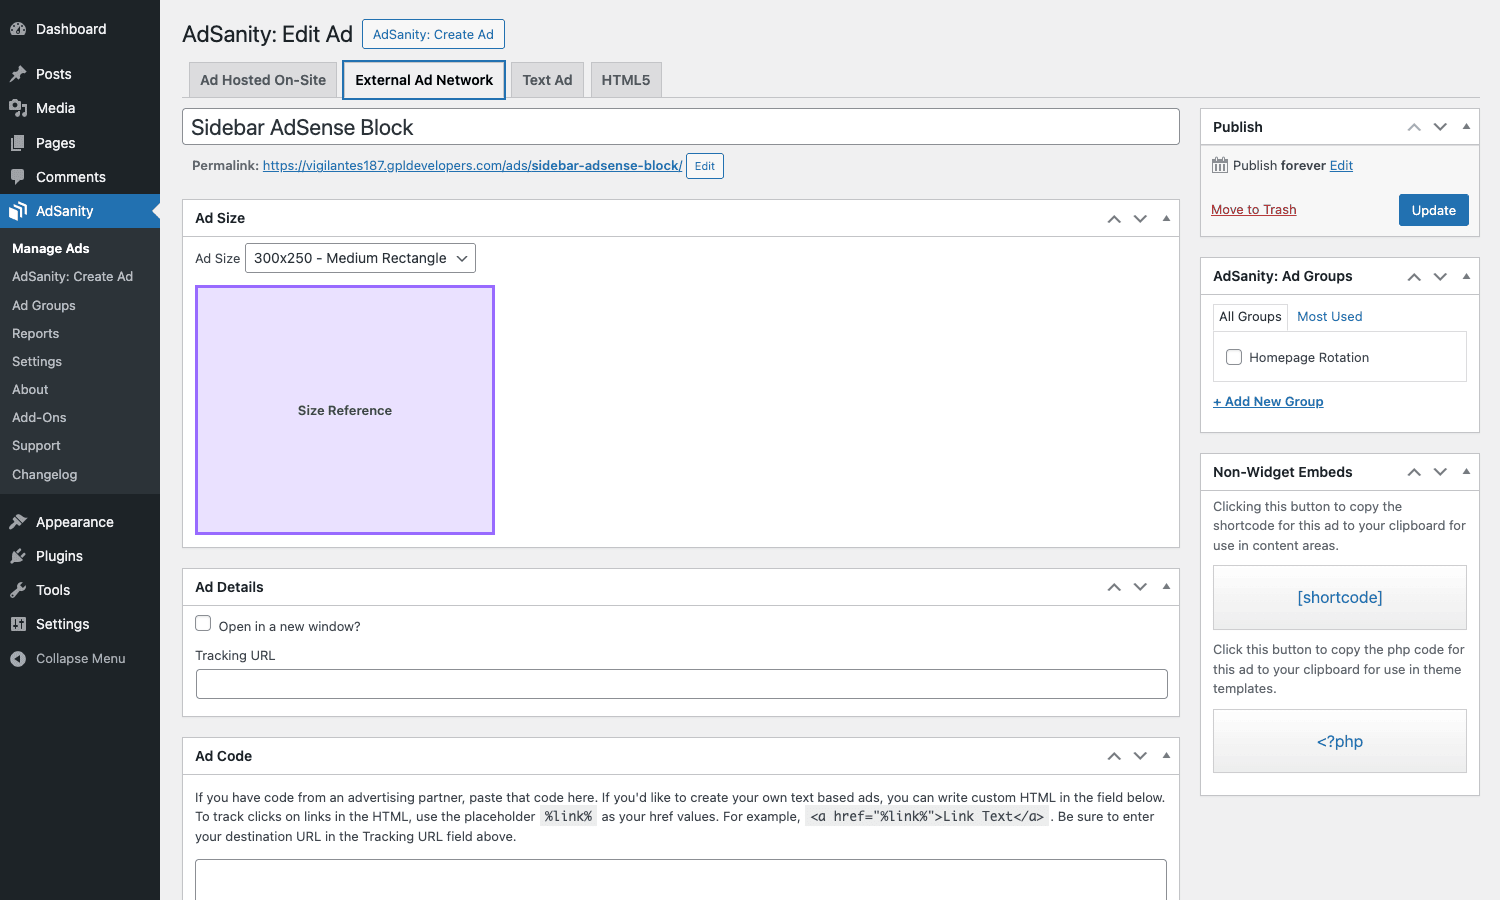
On the right side of every edit-ad screen there’s a "Non-Widget Embeds" panel with a one-click copy button for the [shortcode] and the PHP template tag for that specific ad. That’s the panel you’ll use most when you’re placing ads in posts or themes.
Text Ad
A title, a body, and a click URL. AdSanity renders it with configurable background and border colors. Genuinely useful for small house ads in sidebars, "buy us a coffee" boxes, or affiliate text links where a banner would feel heavy. Not the format most people reach for first, but it’s there when you need it.
HTML5
Upload an HTML5 ad bundle (a zip containing your HTML, JS, CSS, and assets) and AdSanity will host and serve it. This is the format you want when a network ships you a rich-media creative rather than a static banner.
Placing ads: shortcodes, widgets, blocks, and template tags
Every ad in AdSanity can be placed five different ways. The right answer depends on where the ad goes.
Shortcodes
Single ad:
[adsanity id="42" align="aligncenter"]
Ad group:
[adsanity_group group_ids="3,7" num_ads="2" num_columns="2"]
The id for a single ad is the ad’s post ID, which you can see in the All Ads table. group_ids is a comma-separated list of ad-group term IDs. num_ads is how many ads to pick out of the group; num_columns controls the CSS grid.
The plugin also registers a legacy alias [adsanity] (no underscore) so the post archive of old content keeps working. Don’t rely on [adsanity_ad] (with _ad) being available; the canonical name is [adsanity] for a single ad and [adsanity_group] for a group.
Gutenberg blocks
In the block editor, search for "adsanity" in the inserter and you’ll see four blocks:
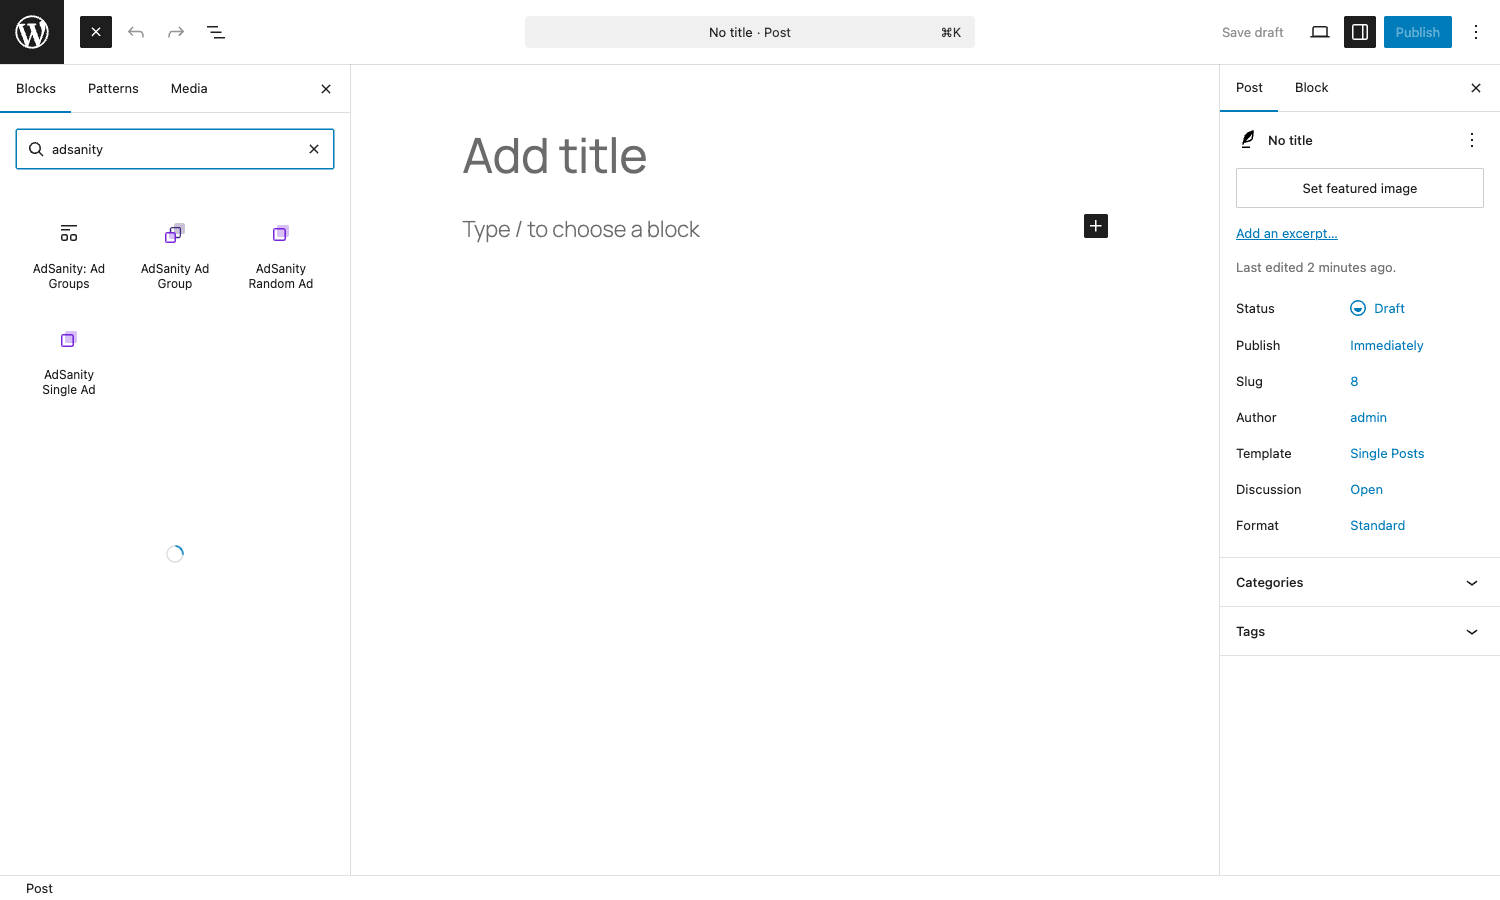
- AdSanity Single Ad , pick one specific ad by ID.
- AdSanity Random Ad , pick a random ad from across the whole catalogue, optionally filtered by group.
- AdSanity Ad Group , render an ad group (rotation or fixed list).
- AdSanity: Ad Groups , the block category itself, used when you want a multi-ad layout inside a single block.
Each block has a sidebar panel that lets you pick the ad or group, set alignment, and toggle whether to track that placement.
Widgets (classic widget areas)
If your theme still uses classic widgets (or you’ve enabled the Classic Widgets plugin), AdSanity registers three widgets:
- AdSanity Single Ad
- AdSanity Random Ad
- AdSanity Group of Ads
Drop one into the sidebar, footer, or any registered widget area, configure the ad or group, and save. That’s it.
Template tags (PHP)
For theme developers, the simplest way to place an ad in a custom template (header, sidebar, single.php, archive.php, footer, etc.) is the PHP template tag:
<?php
if ( function_exists( 'adsanity_show_ad' ) ) {
 adsanity_show_ad( array(
 'post_id' => 42,
 'align' => 'aligncenter',
 'max_width' => 728,
 ) );
}
?>
For groups:
<?php
if ( function_exists( 'adsanity_show_ad_group' ) ) {
 adsanity_show_ad_group( array(
 'group_ids' => array( 3, 7 ),
 'num_ads' => 1,
 'num_columns' => 1,
 ) );
}
?>
That’s the same call the shortcode and the widget make internally, so the output is identical regardless of where you trigger it.
Ad groups and rotation
Ad groups are nothing more than a hierarchical taxonomy attached to the ads post type. From the admin, you create them under AdSanity -> Ad Groups:
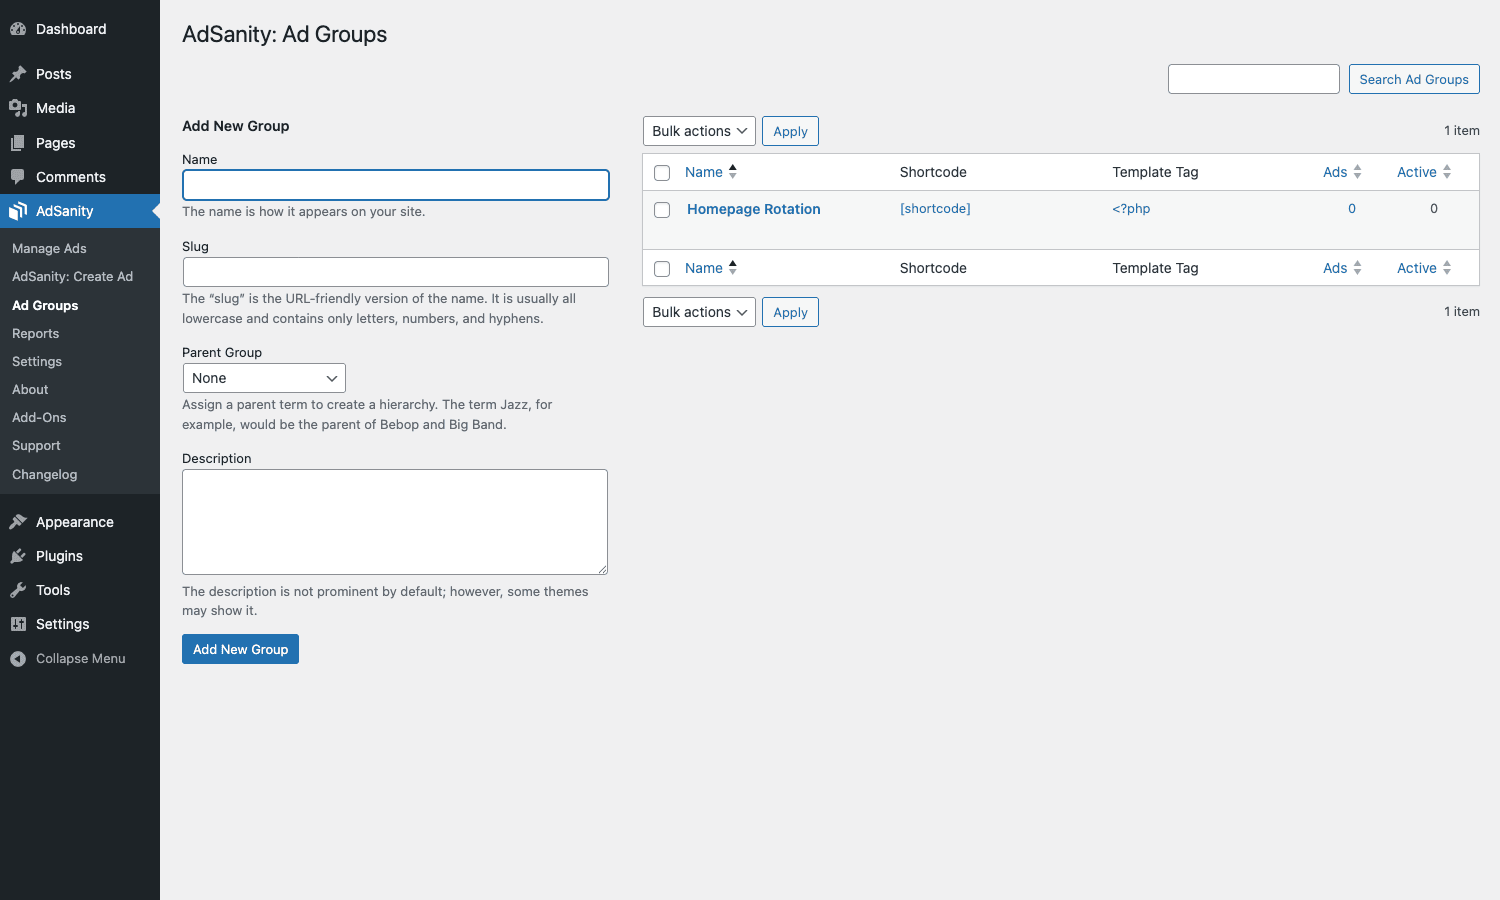
Each row in the groups table shows you the shortcode and the PHP template tag for that specific group, plus the number of ads currently assigned to it and how many are active. The "Ads" and "Active" columns are sortable, which is useful when you have lots of groups and want to find the one that has the highest concentration of expired ads.
Rotation is automatic when you use the Random Ad block, the AdSanity Random Ad widget, or [adsanity_group num_ads="1"]. By default the rotation is flat-random: every active ad in the group has an equal chance per page view. If you install the Weighted Ads pro add-on, each ad in the group can carry a weight, and the random pick is weighted accordingly. So a 30/70 split between two ads (say, advertiser A pays for 30% impressions and advertiser B pays for 70%) is a two-minute config change, not a custom plugin.
You can also display multiple ads from a group in one shot, in a grid. num_ads="3" with num_columns="3" renders three ads from the group as a three-column row, which is the standard sidebar-trio or footer-banner layout.
Scheduling: start dates, end dates, and impression caps
Every ad has two optional date fields: Display From and Until. They’re stored as Unix timestamps in post meta (_start_date and _end_date).
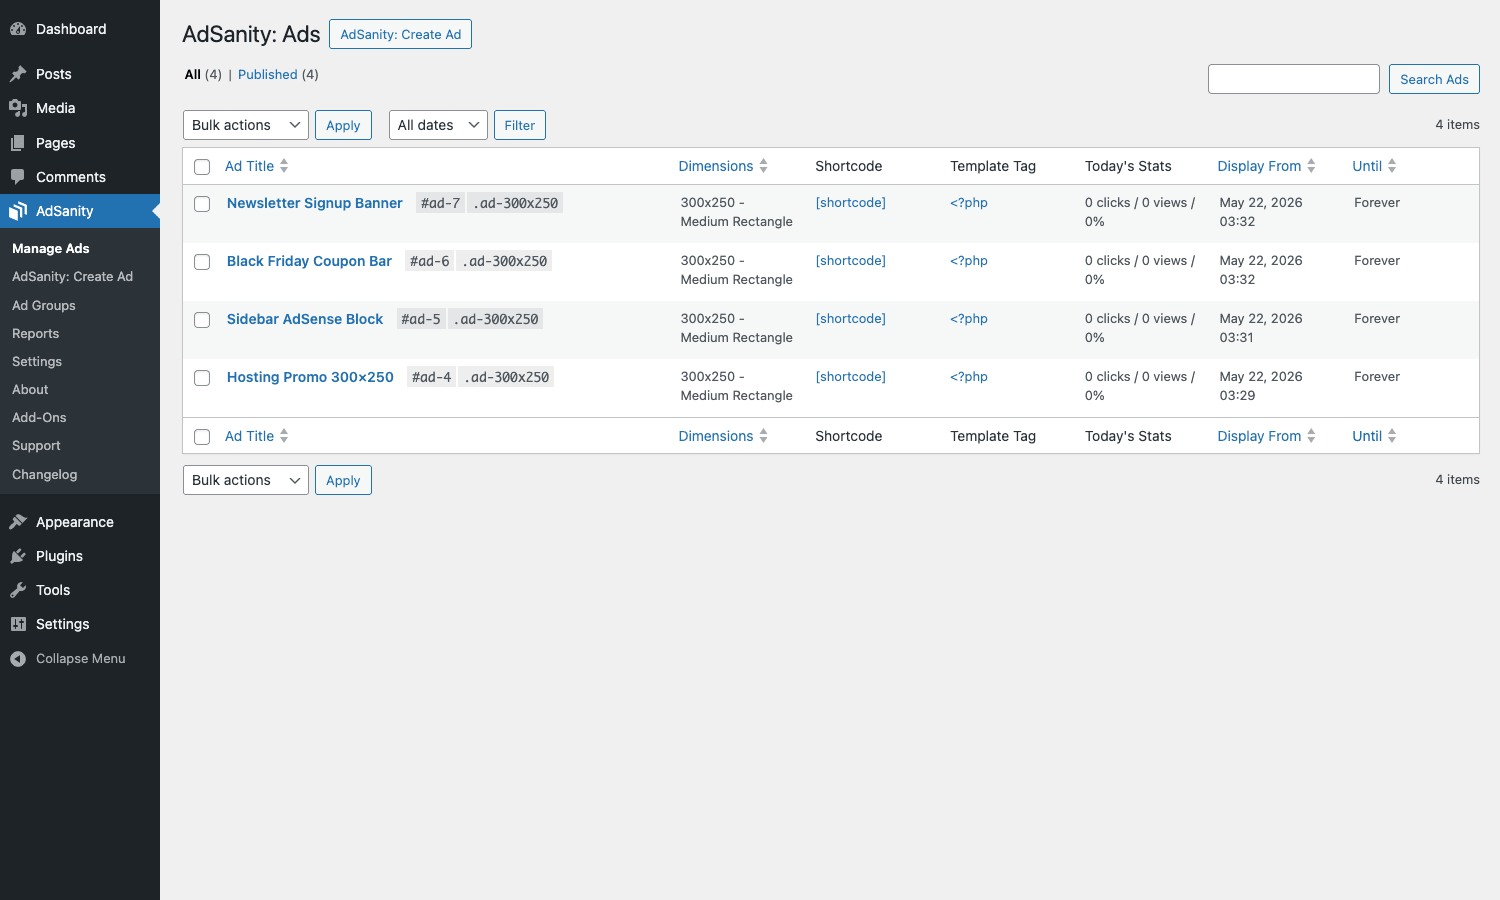
A few things make scheduling more useful than the equivalent feature in lighter plugins:
- If the start date is in the future, the ad doesn’t render even though it’s "published". You can prep next week’s banner and trust that nothing will leak on Monday.
- If the end date passes, the ad stops rendering and gets filtered out of REST queries automatically. The post stays in the All Ads list with a faded "Until" column so you can see what just expired.
- You can leave Until blank, in which case the ad runs forever (the All Ads table shows "Forever" in that column).
- If you install the Impressions pro add-on, you can replace the end-date with an impression cap. "Stop this ad after 50,000 views" is a configuration choice, not a guess about a calendar end date.
The impression cap is the one that really matters when you’re selling sponsorships. Advertisers who buy a CPM-style package (cost per thousand impressions) want a hard cap, not a date estimate, and AdSanity lets you give them one.
Tracking: views, clicks, and CTR
Every time AdSanity renders an ad, it increments the view counter. Every time someone clicks an ad, it increments the click counter (after firing the adsanity_before_track_click action so you can short-circuit it). Both counters are per ad, per day, and aggregated to an all-time total.
The Reports sub-page has two tabs:
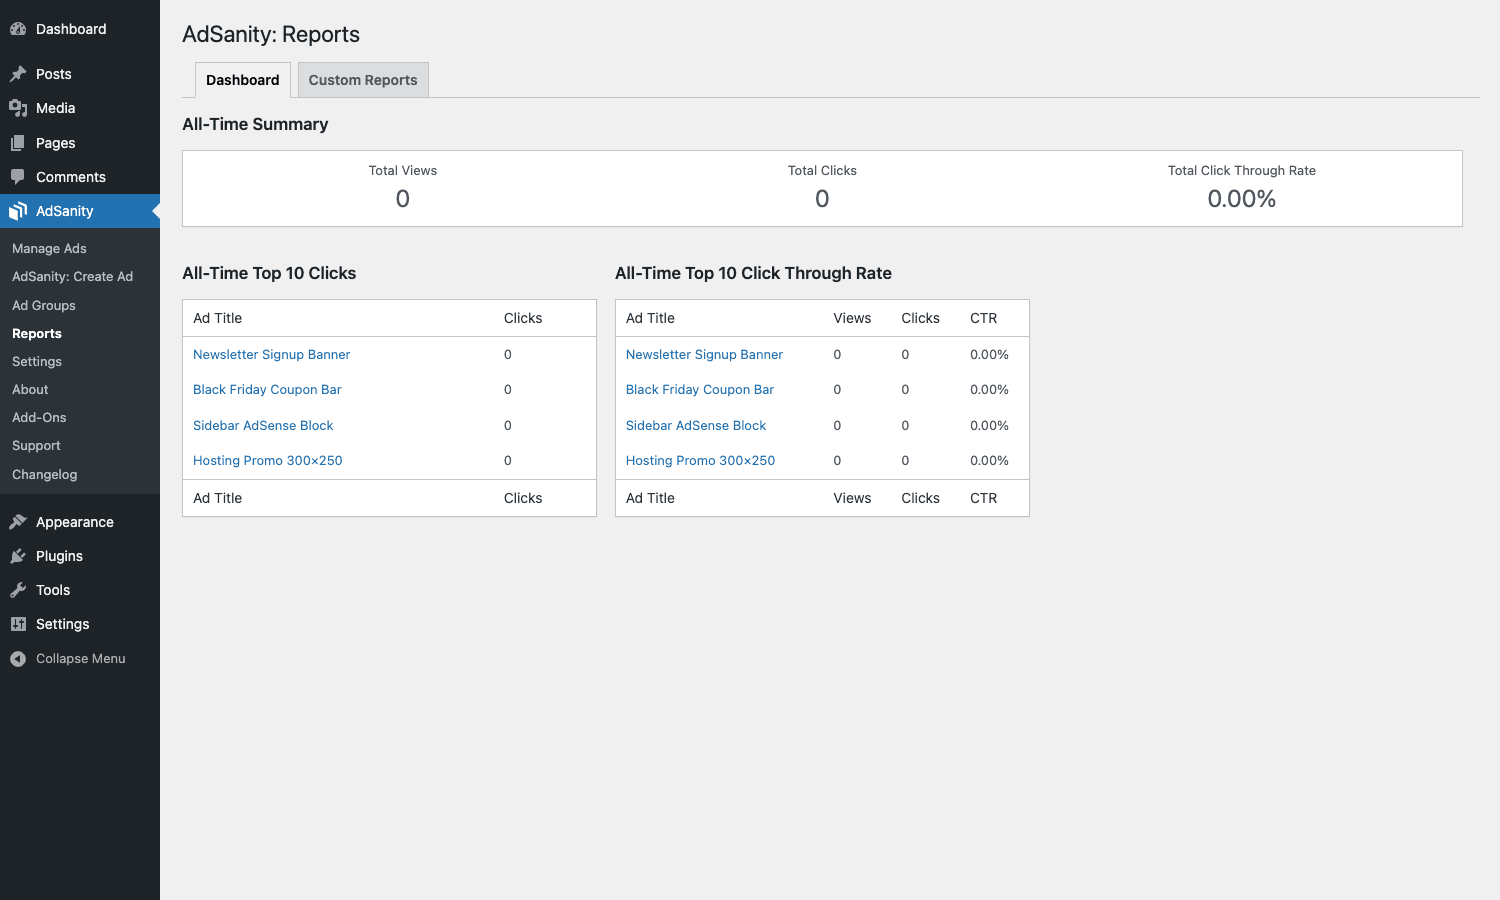
- Dashboard , all-time Total Views, Total Clicks, and Total CTR, plus a Top 10 Clicks list and a Top 10 CTR list. The CTR list is sneakily more useful than the clicks list: an ad with 12 clicks and 200 views (a 6% CTR) is doing more for its slot than an ad with 800 clicks and 200,000 views (0.4%).
- Custom Reports , pick a date range, pick an ad or group, and export the result as CSV. This is what most advertisers ask for when they want monthly numbers for their books.
Clicks are tracked through a redirect URL: AdSanity wraps the click destination in its own /?adsanity_click=N URL, records the click, and 302s the visitor through. That’s the cleanest way to track clicks without relying on JavaScript that might be blocked. If you’d rather skip the redirect (say, because you’re running ad-network code that already has its own tracking), the External Ad Network tab lets you do that.
If you’re also running MonsterInsights Pro for Google Analytics, the Google Analytics Tracking Integration pro add-on pushes view and click events to GA so your ad numbers line up with the rest of your site analytics. Two tracking systems telling the same story is a lot easier to defend in a reporting meeting than two systems disagreeing.
Settings page: tracking, ads.txt, and automatic inclusion
The Settings page splits into a General tab and a Licenses tab.
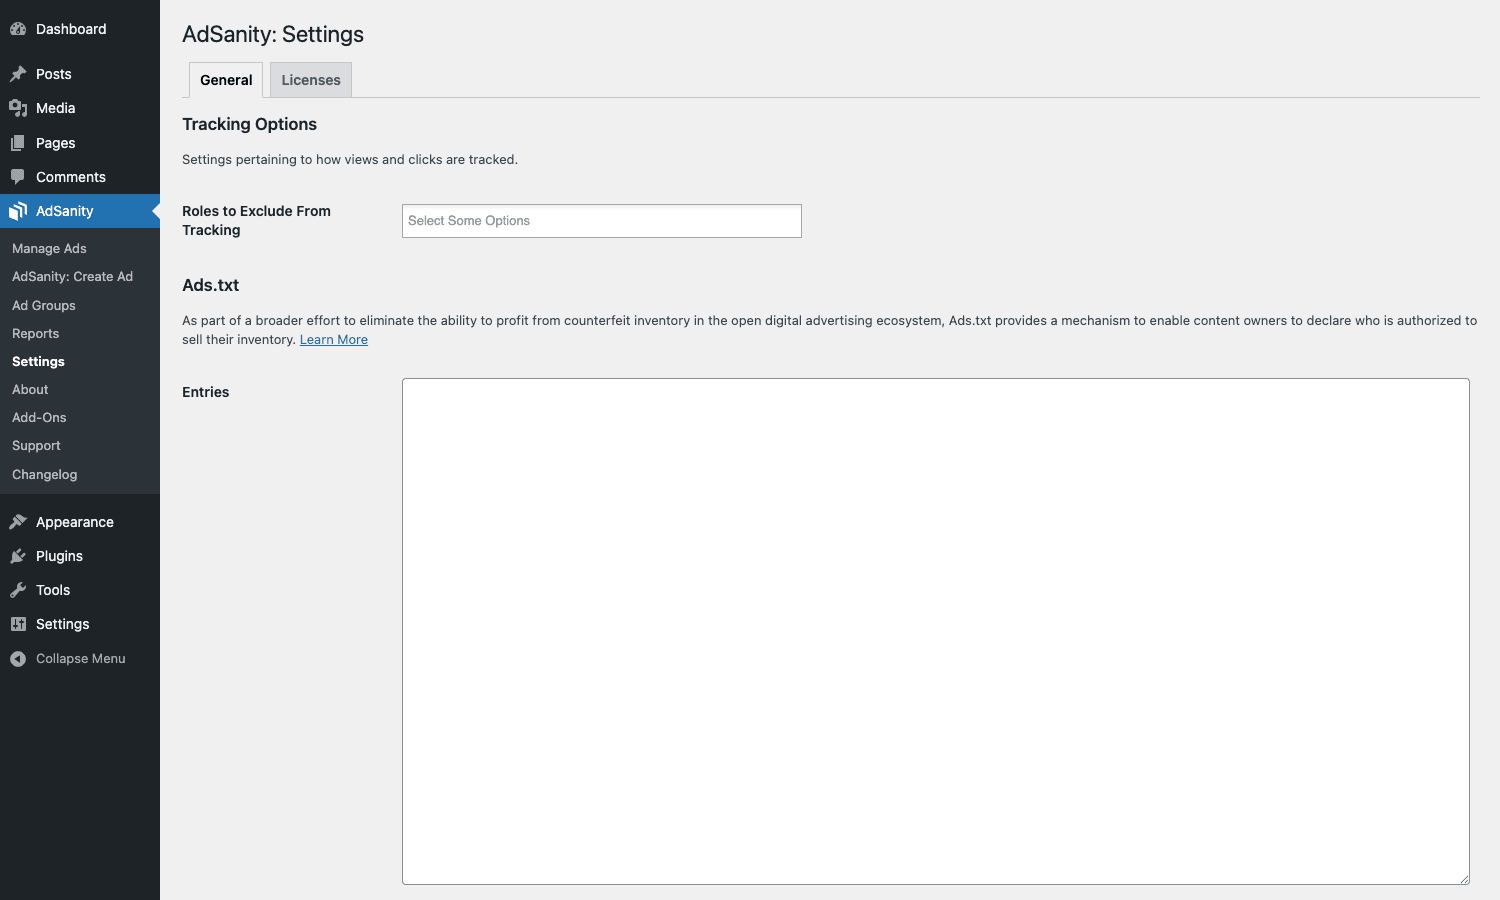
Tracking Options. Pick which user roles to exclude from click and view tracking. Almost everyone should exclude Administrator and Editor at minimum, otherwise your stats include every time you logged in to test the homepage. If your site has authors who frequently view their own posts, exclude Author too.
Ads.txt entries. This is the textarea where you paste your ads.txt lines. Each network publisher line goes on its own row. AdSanity writes those to the public-facing /ads.txt URL automatically, so you don’t have to FTP anything or fight with your web server’s static-file rules. Google publishes a guide to the ads.txt format if you’re new to the spec.
Automatic inclusion rules. If you flip the "Automatic Inclusion" feature on (it’s off by default and the workflow assumes you’d rather place ads manually), you can write rules like "insert ad ID 42 before paragraph 3 of every post in category ‘reviews’" without touching theme files. The matcher supports post type, taxonomy, page template, and word count. It’s less powerful than dedicated paragraph-targeting plugins, but it’s enough for "drop one ad after the first paragraph of every blog post" which is the most common request.
Licenses tab. One license key field per installed pro add-on, plus the parent AdSanity license. The Add-Ons screen lists every pro add-on and whether its license is active.
Pro add-ons explained
The bundled pro add-ons live as individual plugin zips in the AdSanity Add-Ons archive. You install only the ones you need. Here’s what each one does in practice.
Weighted Ads
Each ad in a group gets a numeric weight. Rotation uses weighted random sampling, not flat random. Use this when one advertiser buys 70% of the impressions and another buys 30%, and you don’t want to write a rotation cron yourself.
Impressions
Set a hard impression cap on an ad. Once the view count hits the cap, the ad stops rendering. Pair this with scheduling if you want "expire when one of these two conditions is true, whichever comes first" semantics.
Conditional Ad Appearance
A second meta box on the Create Ad screen that controls when an ad renders: by post type, taxonomy, page template, logged-in vs logged-out, archive vs single, etc. This is the closest thing AdSanity has to a full targeting system, and it covers most of the use cases you’d want a targeting plugin for. If you need geo-targeting (different ads to different countries), AdSanity doesn’t ship that by default; you’d combine the Conditional add-on with a separate geolocation plugin or fall back to a heavier ad manager.
User Role Ad Visibility
Hide ads from specific WordPress roles. The classic example: don’t show ads to paid members. Combine this with a membership plugin so paying users see a clean site.
Ad-block Detection
Detect when a visitor’s browser blocked your ad and (optionally) render a fallback. Useful when you want to know how big the ad-blocker hit on your audience is, or when you want to politely ask blocking users to whitelist you.
Advertiser Reporting
Per-advertiser CSV/PDF reports. If you sell direct sponsorships, this is the report your advertiser wants attached to their monthly invoice.
Google Analytics Tracking Integration
Pushes ad events to your existing GA property. The hook lets you fire event calls in step with AdSanity’s own counters.
Image Cache Buster
Force browsers and CDNs to fetch the new version of an ad image after you swap it. If you run WP Rocket or any other aggressive cache layer, this is the add-on that saves you from "my new banner won’t show on the live site" tickets.
Ordered Ad Group Widget
A widget that renders the ads in a group in a specified order instead of random. Useful when you want the top advertiser shown first, the second one shown next, etc.
Rotating Ad Widget
A widget that auto-rotates ads in a single sidebar slot every few seconds via JavaScript. The cousin of the random-ad widget, except the rotation happens on the visitor’s screen, not per page view. Good for high-traffic landing pages where you want every advertiser to get face time during a single visit.
Developer reference: post type, hooks, filters, REST
This section is the half you’ll skim if you’re a developer extending AdSanity. The plugin exposes a generous hook surface, sticks to standard WordPress patterns, and is friendly to WP-CLI and REST queries.
The custom post type and taxonomy
AdSanity registers ads as a public, REST-enabled post type:
register_post_type( 'ads', apply_filters( 'ads_setup', array(
 'public' => true,
 'show_in_rest' => true,
 'supports' => array( 'title', 'thumbnail' ),
 'rewrite' => array( 'with_front' => false, 'slug' => 'ads' ),
 'exclude_from_search'=> true,
 // ... full args
) ) );
And ad-group as a hierarchical taxonomy on ads:
register_taxonomy(
 'ad-group',
 array( 'ads' ),
 array(
 'hierarchical' => true,
 'show_in_rest' => true,
 'rewrite' => array( 'slug' => 'ad-group' ),
 )
);
Both are filterable, so you can change labels, slugs, REST visibility, or capability mapping. The ads_setup filter is the right place to do that.
Action: do something before AdSanity records a click
adsanity_before_track_click fires before the click counter is incremented. Combine it with the adsanity_track_this filter (return false) to skip click tracking for specific situations: bots, known headless browsers, your own staff IP, etc.
add_filter( 'adsanity_track_this', function( $should_track ) {
 if ( ! empty( $_SERVER['HTTP_USER_AGENT'] ) && preg_match( '/bot|crawler|spider/i', $_SERVER['HTTP_USER_AGENT'] ) ) {
 return false;
 }
 return $should_track;
} );
Filter: hide an ad on specific pages
adsanity_hide_ad is the easiest way to suppress an ad at render time without touching its publish status. Return true to hide.
add_filter( 'adsanity_hide_ad', function( $hide, $ad ) {
 // Don't show ads on the checkout page.
 if ( function_exists( 'is_checkout' ) && is_checkout() ) {
 return true;
 }
 return $hide;
}, 10, 2 );
Filter: add a custom ad size
adsanity_ad_sizes controls the size dropdown on the Create Ad screen. Use it to add a network-specific size your team uses a lot.
add_filter( 'adsanity_ad_sizes', function( $sizes ) {
 $sizes['970x250'] = array( 'name' => 'Billboard 970x250', 'width' => 970, 'height' => 250 );
 return $sizes;
} );
Action: extend the reports dashboard
adsanity_before_stats_dashboard and adsanity_after_stats_columns let you add custom widgets to the Reports tab. The first fires before the summary tiles, the second fires after the all-time CTR column. Use them to render a "last 30 days revenue" tile if you have a sponsorship table somewhere else in your database.
Action: hook into ad initialization
ads_init fires immediately after the ads post type is registered. It’s the right hook for registering your own custom taxonomies on the ads post type without racing AdSanity’s own taxonomy registration.
add_action( 'ads_init', function() {
 register_taxonomy( 'ad-advertiser', array( 'ads' ), array(
 'hierarchical' => false,
 'show_in_rest' => true,
 'labels' => array( 'name' => 'Advertisers', 'singular_name' => 'Advertiser' ),
 ) );
} );
REST API: the rendered_ad field
AdSanity adds a rendered_ad field to the ads REST endpoint, returning the rendered HTML so headless front ends can fetch and display ads without re-running the rendering logic in JS:
GET /wp-json/wp/v2/ads/42
{
 "id": 42,
 "title": { "rendered": "Hosting Promo 300x250" },
 "rendered_ad": "<a class=\"adsanity-ad ...\" ...><img ...></a>",
 ...
}
The plugin also runs a pre_get_posts action on REST requests to inject a meta query that excludes ads whose _end_date is in the past. Expired ads simply don’t appear in the API.
WP-CLI
Because ads are a normal post type, every standard wp post command works. Common shortcuts:
# List the 50 most recent ads with their click and view counts.
wp post list --post_type=ads --posts_per_page=50 --fields=ID,post_title,post_status

# Bulk expire every ad in a group on a specific date.
wp post list --post_type=ads --tax_query='[{"taxonomy":"ad-group","field":"slug","terms":"summer-sale"}]' --field=ID \
 | xargs -I{} wp post meta update {} _end_date 1735689600
Hooks and filters reference
The full surface, in compact form, so you can grep this article when you need a name:
Actions: ads_init, adsanity_before_ad, adsanity_after_ad, adsanity_before_ad_wrapper, adsanity_after_ad_wrapper, adsanity_before_track_click, adsanity_before_redirect, adsanity_before_stats_dashboard, adsanity_after_stats_columns, adsanity_after_reports_page_heading, adsanity_custom_reports_table_heading, adsanity_custom_reports_table_total, adsanity_custom_stats_before_ad_selection, adsanity_group_block_table_header, adsanity_register_settings, adsanity_about_screen, adsanity_support_screen, adsanity_changelog_screen, adsanity_pre_update_meta, adsanity_after_update_meta, adsanity_pre_delete_meta, adsanity_after_delete_meta, adsanity_automatic_inclusion_after_fields, adsanity_elementor_register_widgets.
Filters: ads_setup, pj_ad_labels, adsanity_ad_sizes, adsanity_ad_size_default, adsanity_ad_edit_tabs, adsanity_ad_edit_active_tab, adsanity_reports_tabs, adsanity_reports_active_tab, adsanity_reports_view, adsanity_ads_posts_columns, adsanity_ads_sortable_posts_columns, adsanity_get_ads_args, adsanity_get_all_ads_args, adsanity_hide_ad, adsanity_hide_ad_group, adsanity_hide_ad_in_group, adsanity_show_ad_group_block, adsanity_post_class, adsanity_post_id, adsanity_track_this, adsanity_attach_meta, adsanity_pre_get_meta, adsanity_after_get_meta, adsanity_disable_local_get_meta, adsanity_disable_local_update_meta, adsanity_disable_local_delete_meta, adsanity_custom_reports_max_results, adsanity_custom_report_table_cell, adsanity_export_stats_header_row_data, adsanity_export_stats_data_row_data, adsanity_export_stats_totals_row_data, adsanity_override_total_stats_transient, adsanity_get_ads_by_term_rows, adsanity_ignore_blocks_in_count, adsanity_automatic_inclusion_args, adsanity_save_admin_options.
That’s about three dozen actions and three dozen filters. For a plugin that prides itself on being small, the developer surface is honestly bigger than several "enterprise" ad managers.
Real-world use cases
Here are a handful of setups I’ve seen people build with AdSanity. Each takes a few minutes, not a day.
Niche blog with one AdSense slot per article
Set up a single AdSense ad on the External Ad Network tab. Use a Gutenberg block in your post template (or the Automatic Inclusion rule "before paragraph 3 of every post in category ‘reviews’") to place it. Done in fifteen minutes. The free WordPress.org build of AdSanity is enough for this case; you don’t need any pro add-ons.
Affiliate review site with rotating banners per category
For each affiliate program you partner with, create an Ad Hosted On-Site or External Ad Network ad pointing to your tracked link. Group ads by category ("hosting", "vpn", "email marketing") with the ad-group taxonomy. Place a [adsanity_group group_ids="..." num_ads="1"] shortcode in the sidebar template, so each page view picks a different banner.
If you use Pretty Links Pro to cloak your affiliate URLs, set the Pretty Links URL as the Tracking URL on the AdSanity ad and you get tracked clicks in both systems.
Local newspaper running monthly sponsorships
Sell sponsorship slots by the month. Schedule each ad from the first of one month to the last day of the same month. The All Ads table will show the current run alongside last month’s expired ads, so you can see your inventory at a glance. Use the Advertiser Reporting add-on to export per-sponsor CSVs at the end of the month.
Membership site that hides ads from paid users
Install the User Role Ad Visibility add-on. Tick "Subscriber" and "Free" on each ad as roles that see the ad; uncheck "Premium Member". Paying users see a clean site; free users see the ads that pay your hosting bill.
High-traffic landing page with a 70/30 advertiser split
Install Weighted Ads. Put both creatives in the same ad group, give advertiser A weight 70 and advertiser B weight 30. Place an [adsanity_group num_ads="1"] block in the hero area. AdSanity will weight-randomly serve them in the right ratio over the long run.
Headless WordPress front end
Use the REST API. Fetch /wp-json/wp/v2/ads/?per_page=10 for ten random ads, grab rendered_ad from each, and drop the HTML into your headless app. Expired ads are filtered out automatically. No plugin in your headless front end needed.
Performance, compatibility, and gotchas
Things to keep in mind before you commit to AdSanity in production.
Render performance
AdSanity does a get_posts call per ad placement, then renders the post meta into HTML. That’s a few extra database queries per page when you have multiple ads on one screen. On a page-cached site it’s invisible. On an uncached page with 6+ ad placements, you’ll see it in your query log.
Mitigations: use object caching, keep your page cache aggressive (WP Rocket or WP-Optimize Premium both work cleanly), and consider caching the rendered ad HTML with the adsanity_post_class filter if you really need to.
Caching and rotation
Page caching and ad rotation are awkward partners. If your page is cached, the same visitor sees the same "random" ad until the cache invalidates. There are three honest answers to this:
- Accept it. Cache the page; let rotation happen at cache-bust time. For most blogs this is fine.
- Use the Rotating Ad Widget add-on, which rotates client-side via JavaScript. The HTML the cache delivers contains every ad, and JS swaps them in.
- Bypass the cache for the ad placement specifically. WP Rocket and similar plugins can mark a fragment as uncacheable; AdSanity has no built-in hook for this but you can wire it up through a small custom function.
AdSense and Auto Ads
Google’s Auto Ads will try to inject ads of its own anywhere on your page. If you also place AdSense slots through AdSanity (with the External Ad Network tab), you can end up with double the ads in the same neighborhood. Either disable Auto Ads, or use the Conditional Ad Appearance add-on to make sure AdSanity-placed AdSense slots only appear on pages where Auto Ads aren’t running.
Image dimensions and CLS
Always set the ad size on the Create Ad screen, even for hosted images. AdSanity uses that size to render a reserved-space wrapper, which prevents the surrounding content from jumping when the image loads (Cumulative Layout Shift). If you skip the size, the rendered ad is unsized and your CLS score takes the hit.
REST exposure
Both ads and ad-group are show_in_rest = true. That means anyone hitting /wp-json/wp/v2/ads/ can see the list of active ads on your site. That’s almost always fine (the same ads are visible on the page anyway), but if you have private/scheduled ads you don’t want indexed, you can filter ads_setup to set show_in_rest = false. Note that this also disables Gutenberg block functionality, so do it deliberately.
Multilingual sites
AdSanity doesn’t ship a built-in multilingual layer. If you run WPML or Polylang, each ad post can be translated like any other CPT post, but the ad picker on the editor and block doesn’t filter by language. The workaround is to use ad groups as language buckets ("hosting-en", "hosting-fr") and use the Conditional Ad Appearance add-on or your multilingual plugin’s display logic to gate them by current locale.
AdSanity vs Advanced Ads Pro and other ad managers
AdSanity is one of three or four credible WordPress ad managers. It’s worth being honest about where it fits.
vs Advanced Ads Pro. This is the closest comparison, and we’ve covered Advanced Ads Pro in its own walkthrough on the blog. Advanced Ads Pro ships a much wider feature surface in the box: dozens of placement modes, advanced display conditions, geo-targeting via included add-ons, ad health checks, A/B testing, sticky and animated ads. If you want every targeting feature pre-installed and one settings panel to rule them all, Advanced Ads Pro wins. AdSanity wins on simplicity. The Create Ad screen has four tabs. The Settings page is two tabs. The reports page is two tabs. Adding pro features is a deliberate install of an add-on, not a hidden toggle in a long settings tree.
vs Ad Inserter. Ad Inserter is excellent for content-position injection (drop ads at paragraph N, after the Nth heading, etc.) and is largely free for that role. Its admin is less polished and its tracking is less developed. AdSanity covers the ad-management half (CPT, scheduling, tracking) more cleanly; Ad Inserter covers the placement-into-content half more cleanly. Some sites use both, AdSanity for the ads themselves and Ad Inserter for the placement rules.
vs AdRotate. AdRotate is an older plugin in the same niche. The core feature set overlaps. AdSanity’s admin is calmer, the developer documentation is better, and the WP-CLI / REST story is more reliable thanks to the standard CPT design. AdRotate’s geo-targeting and click-fraud features are pluses if you specifically need them.
vs Quick Adsense / AdSense Plugin WP. These are AdSense-only and free. If you only care about AdSense and you don’t need ad-group rotation, scheduling, or tracking beyond what AdSense gives you, you don’t need AdSanity. AdSanity becomes the right answer once you have direct advertisers, mixed networks, or scheduling needs.
Pricing and licensing
AdSanity is sold as an annual subscription on the official site, with single-site, multi-site, and developer-unlimited tiers. The developer tier includes every pro add-on; lower tiers include the core plus a curated subset. They also run lifetime tiers from time to time.
GPL Times sells the AdSanity + Pro Add-Ons bundle under the GPL, which means you get the core plugin plus every pro add-on covered above.
Either path is legitimate. The license is GPL, which means the redistribution rights exist regardless of who you bought from. If you’re a small site and you like the plugin, supporting Pixel Jar directly is the kind thing to do. If you’re a freelancer evaluating it for ten client sites before you commit, the GPL Times bundle is the cheaper testbed.
Frequently asked questions
Does AdSanity work with AdSense?
Yes. The External Ad Network ad type is designed exactly for AdSense, Amazon, Media.net, and similar networks. Paste the ad code into the Ad Code box, set the dimensions, and place the ad. AdSanity wraps it for tracking but doesn’t modify the ad code itself.
Will AdSanity slow down my site?
Per ad placement, it runs a couple of extra database queries. On a cached page, that cost is paid once per cache bust and is invisible to visitors. On an uncached page with six or more ads, the cost is measurable but small. Use object caching and a page cache and you’re fine.
Can I track clicks on AdSense ads?
Partially. AdSense itself reports clicks in your AdSense dashboard, and AdSanity records page views (impressions) but does not intercept clicks that happen inside Google’s own iframe (it can’t, that frame is sandboxed). For non-AdSense external networks where the ad code is your own HTML, AdSanity can wrap the click via the %link% placeholder.
Does AdSanity support GAM (Google Ad Manager) / DFP?
Yes, with the same pattern as AdSense: paste the GAM ad tags into an External Ad Network ad and place it. AdSanity treats it as opaque code and serves it.
Can I show different ads to different countries?
Not out of the box. The Conditional Ad Appearance add-on covers post type, taxonomy, page template, and login state, but not geolocation. For geo-targeting you’d combine AdSanity with a geolocation plugin (or a CDN-level geo header) and write a small adsanity_hide_ad filter that checks the visitor’s country.
Can I schedule a recurring weekly ad?
AdSanity’s per-ad schedule is one start date and one end date. If you need a weekly recurring ad (say, "show this only on weekends"), the cleanest approach is two ads with one-week schedules, or a custom adsanity_hide_ad filter that checks the current day of the week.
Is AdSanity compatible with the block editor?
Yes, fully. There are dedicated Gutenberg blocks for Single Ad, Random Ad, Ad Group, and the AdSanity ad-groups inserter. The blocks are server-rendered, so the front-end output is the same as the shortcode and the widget.
Can I import ads from another ad manager?
Because ads is a normal WordPress custom post type, you can import via standard WordPress XML export/import, WP All Import, or WP-CLI. The only catch is mapping post meta keys: AdSanity uses _start_date, _end_date, _tracking_url, _views, _clicks and a handful more. Map the equivalent fields from your previous plugin to those keys during import.
How does AdSanity handle ad-block detection?
The Ad-block Detection add-on uses a tiny client-side bait script that detects when the request for adsanity-display-ad.js (or a similar known-blocked path) was rejected by an ad-blocker extension. You can then choose to render a fallback or just count blocked visitors in your stats.
Final thoughts
There’s a real virtue in tools that decide to stay small. Every WordPress ad plugin starts with the same basic job (manage ads, schedule them, track them, place them) and most respond to feature pressure by piling on layers. AdSanity has held its line. The Create Ad screen still has four tabs after a decade of development. The reports page still has two tabs. The pro features still ship as separate, optional add-ons rather than getting bolted onto the core out of fear that someone might think the plugin "isn’t enterprise enough".
If that fits how you think about your site, AdSanity is a comfortable fit. You’ll have a clean ad-management workflow in an hour, scheduling and tracking will work the way you expect them to work, and when you eventually need weighted rotation, conditional appearance, or impression caps, you’ll install those add-ons one at a time as you actually need them rather than as a "just in case".
The AdSanity bundle from GPL Times is the easiest way to see the whole picture, including every pro add-on, in one install. If after a few hours of testing it feels too light for your needs (you wanted geo-targeting in the core, you wanted A/B testing in the core), drop in the Advanced Ads Pro walkthrough instead and compare. The two plugins solve overlapping problems with very different design philosophies, and the right call depends on whether you’d rather start small and add or start big and unconfigure.
Either way: monetised WordPress sites should be using a real ad manager, not pasting AdSense <script> blocks straight into the theme’s header.php. AdSanity is one of the most pleasant ways to make that switch.