

Try this with stock Elementor Pro on a WooCommerce store. Open the checkout in the editor and reorder the billing fields. Move the phone above the address. Add a small "How did you hear about us?" select right above the order notes. Now hide the shipping form when the cart contains only digital products.
You can’t, really. Elementor Pro’s checkout widget is a single black box. The form is rendered server-side by WooCommerce, dropped into the page, and the only thing you control from the editor are the typography, colors, and spacing wrapping the whole thing. The same goes for the single-product page (you get a "Product Title" widget and a "Product Image" widget but the layout is mostly fixed), the cart, and the my-account dashboard.
ShopLentor Pro (formerly WooLentor Pro) was built specifically to fill that gap. It ships about fifty WooCommerce-aware Elementor widgets and roughly thirty Gutenberg blocks, plus a Template Builder that lets you assign your custom layouts to the single-product page, the shop archive, the cart, the checkout, the my-account screens, and the thank-you page. If you’ve used Elementor Pro’s Theme Builder for headers and footers, this is the same idea, just scoped to WooCommerce.
This review walks the whole plugin. The novice-friendly half explains what it does and how to set it up. The developer half covers the template architecture, the woolentor_* hooks worth knowing, the checkout-field-manager class, and a few patterns that age badly when WooCommerce ships a new release. There’s also a section about when you should reach for the Gutenberg blocks instead of the Elementor widgets, because the two sides of the plugin don’t always do the same thing.
Table of Contents
- What ShopLentor Pro actually is
- Key features that matter
- Installation and the first hour
- Single Product builder: every box you can actually move
- Checkout builder: field order, conditional fields, multi-step
- Shop archive and product filtering
- My Account: dashboard, downloads, addresses
- Gutenberg blocks: when to use them instead
- The modules drawer: what’s a toggle, what’s a separate purchase
- Don’t override every WooCommerce template just because you can
- ShopLentor vs JetWooBuilder vs Elementor Pro WooCommerce
- Developer reference: hooks, filters, classes
- Compatibility and gotchas
- Pricing and licensing
- FAQ
- Final thoughts
What ShopLentor Pro actually is
ShopLentor Pro is a WooCommerce builder plugin by HasThemes, distributed under its old name WooLentor on CodeCanyon and as ShopLentor on the vendor’s own site at woolentor.com. Same plugin, same updates, two names. The text domain is still woolentor-pro, the hook prefix is still woolentor_, and most of the documentation and community threads online still call it WooLentor. If you grep the source for "WooLentor" you’ll find it everywhere. I’ll use ShopLentor as the product name throughout this article but you should expect to see WooLentor in the dashboard, in the option keys, and in the hook names. The rename was a marketing decision, not a refactor.
The plugin sits on top of WooCommerce and Elementor. It does not replace either of them. Think of it as a third layer: WooCommerce handles products, cart, checkout, and the user account; Elementor provides the editor; ShopLentor adds the widgets and the template-routing logic that connect the two. There’s also a Gutenberg side, built as a separate set of blocks that hook into the same WooCommerce data without going through Elementor at all. We’ll come back to that.
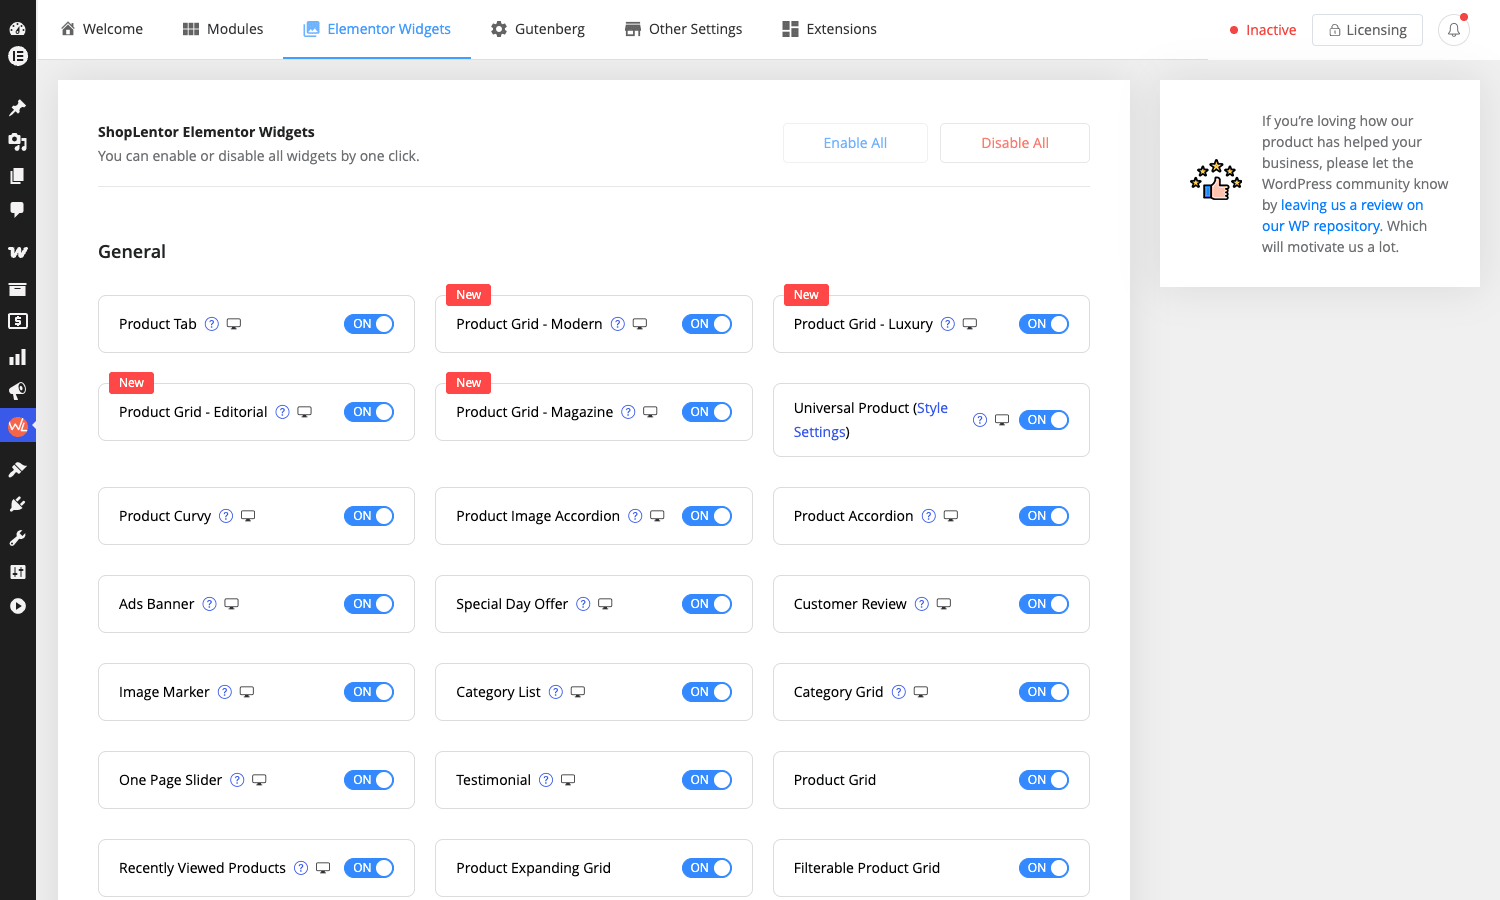
A free version (woolentor-addons on wordpress.org) ships about twenty Elementor widgets and the basic builder shell. The Pro plugin you’re reading about adds the rest of the widgets, all the Gutenberg blocks, the checkout-field manager, the multi-step checkout, the side mini-cart, the product-filter module, the email automation and email customizer modules, the size chart, the quick view, the pre-orders module, the partial-payment module, the order bump, the abandoned-cart tracker, the currency switcher, the cart-reserve timer, and a smart cross-sell popup. Roughly twenty toggleable add-ons in total, listed under WooLentor -> Add-ons in the admin. You can switch them on individually, so the plugin doesn’t load thirty subsystems if you only wanted a checkout builder.
Key features that matter
The marketing page lists everything. Here’s the short version of what you’ll actually use.
- Single Product template builder. Drop widgets for the title, price, gallery, short description, add-to-cart, variations, tabs, related products, upsells, and a sale-schedule countdown into any layout you can build in Elementor. Assign the template to all products, a specific category, or one product by ID.
- Checkout template builder. Separate widgets for the billing form, shipping form, additional fields, login, coupon, order review, and payment. Reorder them, drop them in columns, put the order summary on the right.
- Multi-step checkout as a separate widget. Splits billing, shipping, and payment into wizard steps with a progress bar. Two visual styles.
- Checkout field manager. A settings panel that lets you rename, hide, mark required/optional, add, and reorder the billing and shipping fields. Adds custom field types (heading, multiselect, checkbox group). All standard WooCommerce data, just easier to configure.
- My Account builder. Widgets for the dashboard tiles, orders table, downloads, addresses, payment methods, account details, and login/register/lost-password forms. Build your own logged-in experience without writing template overrides.
- Cart and Empty Cart templates. Two states, two layouts, both editable.
- Shop archive template. Pick a product-grid style (modern / editorial / luxury, plus a generic universal grid), wire up the archive page’s sidebar with the product filter widget, and you’ve replaced the WooCommerce shop loop.
- Product filter module with shortcodes and an Elementor widget. AJAX filtering by category, attribute, tag, price slider, stock, sale. Drop on shop and archive pages.
- Side mini-cart. A slide-in cart drawer that opens on click or on add-to-cart. Position left or right, custom heading text, custom empty-state copy.
- Quick view. A modal that loads a product’s gallery, price, and add-to-cart without leaving the shop page. Optional related-products row inside the modal.
- Order bump, smart cross-sell popup, pre-orders, partial payment. Conversion-side extras built as modules.
- Currency switcher. Multi-currency display with manual or API-driven rates.
- Email customizer. Drag-and-drop builder for the WooCommerce transactional emails (new order, completed, refunded, processing, etc).
- Gutenberg blocks for cart, checkout, my-account, product gallery, and customer review. About thirty in total. Same underlying data as the Elementor side, but rendered as native blocks so they work without Elementor installed.
Everything except the email customizer and a few of the conversion modules is on by default. The Add-ons screen is where you toggle the rest.
Installation and the first hour
The setup is short. Three things, in order.
- Install and activate WooCommerce. ShopLentor is a WC extension. If WooCommerce isn’t active, the plugin loads but most of the widgets are hidden.
- Install and activate Elementor. Elementor free is enough for ShopLentor Pro to work; you do not strictly need Elementor Pro. If you only want the Gutenberg blocks, you can skip Elementor entirely and the blocks will still register.
- Install ShopLentor Pro. Upload the zip via Plugins -> Add New -> Upload Plugin, activate, and visit WooLentor -> Settings in the WP admin sidebar.
Once activated, the plugin adds three things to your admin:
- A WooLentor menu in the sidebar with sub-items: Dashboard, Settings, Templates Builder, Add-ons, License (on the GPL Times copy the developer license is already wired in, so this screen is informational only).
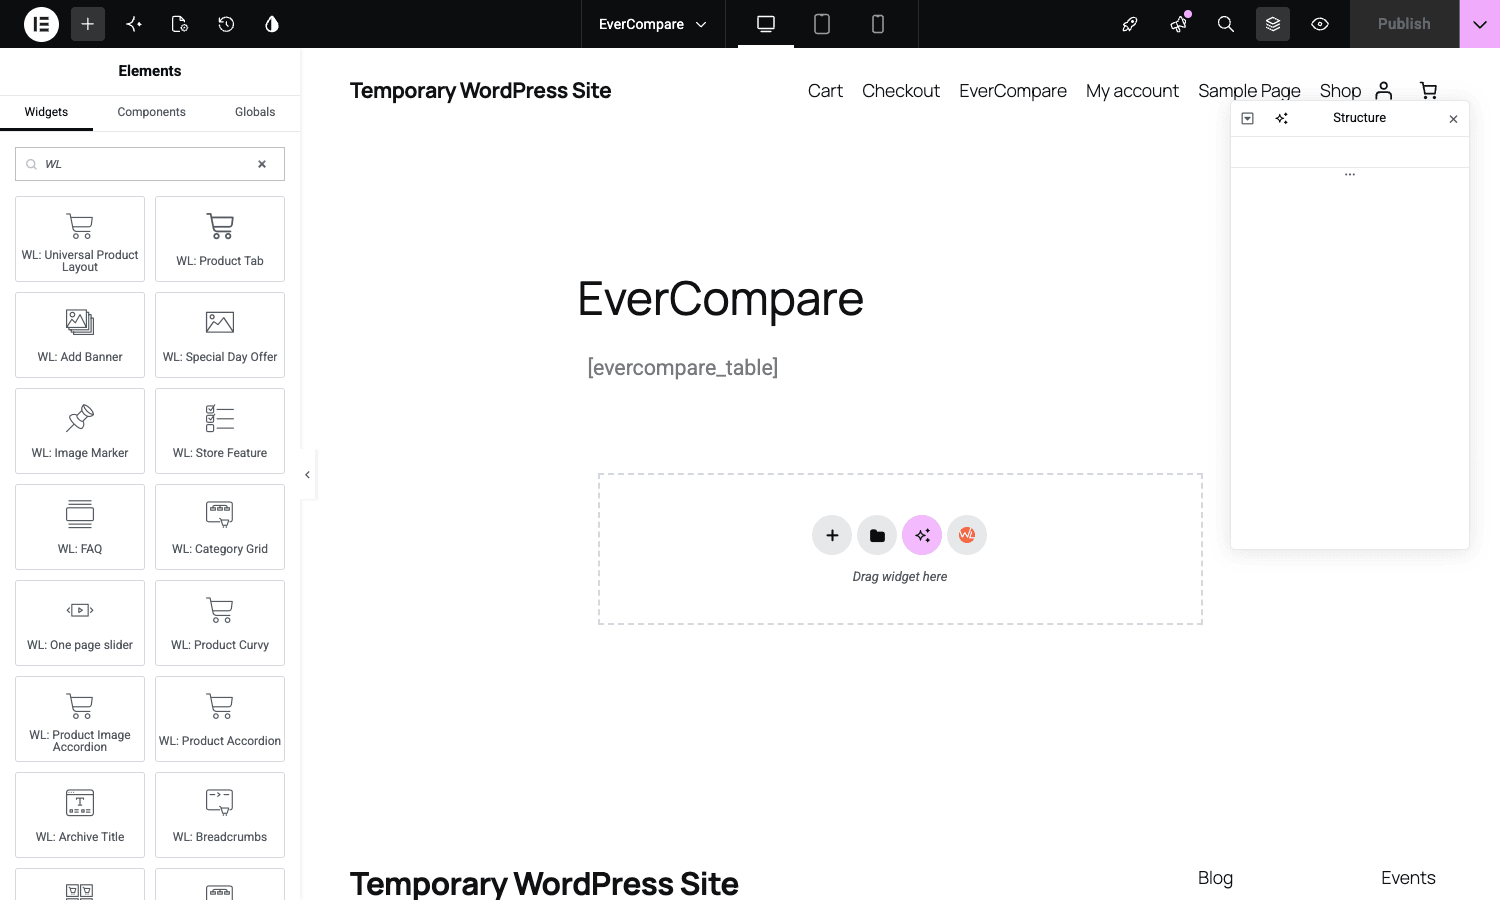
- A ShopLentor section in Elementor’s widget panel. Filter widgets by typing "WooLentor" in the search box.
- A WooLentor block category in the Gutenberg inserter.

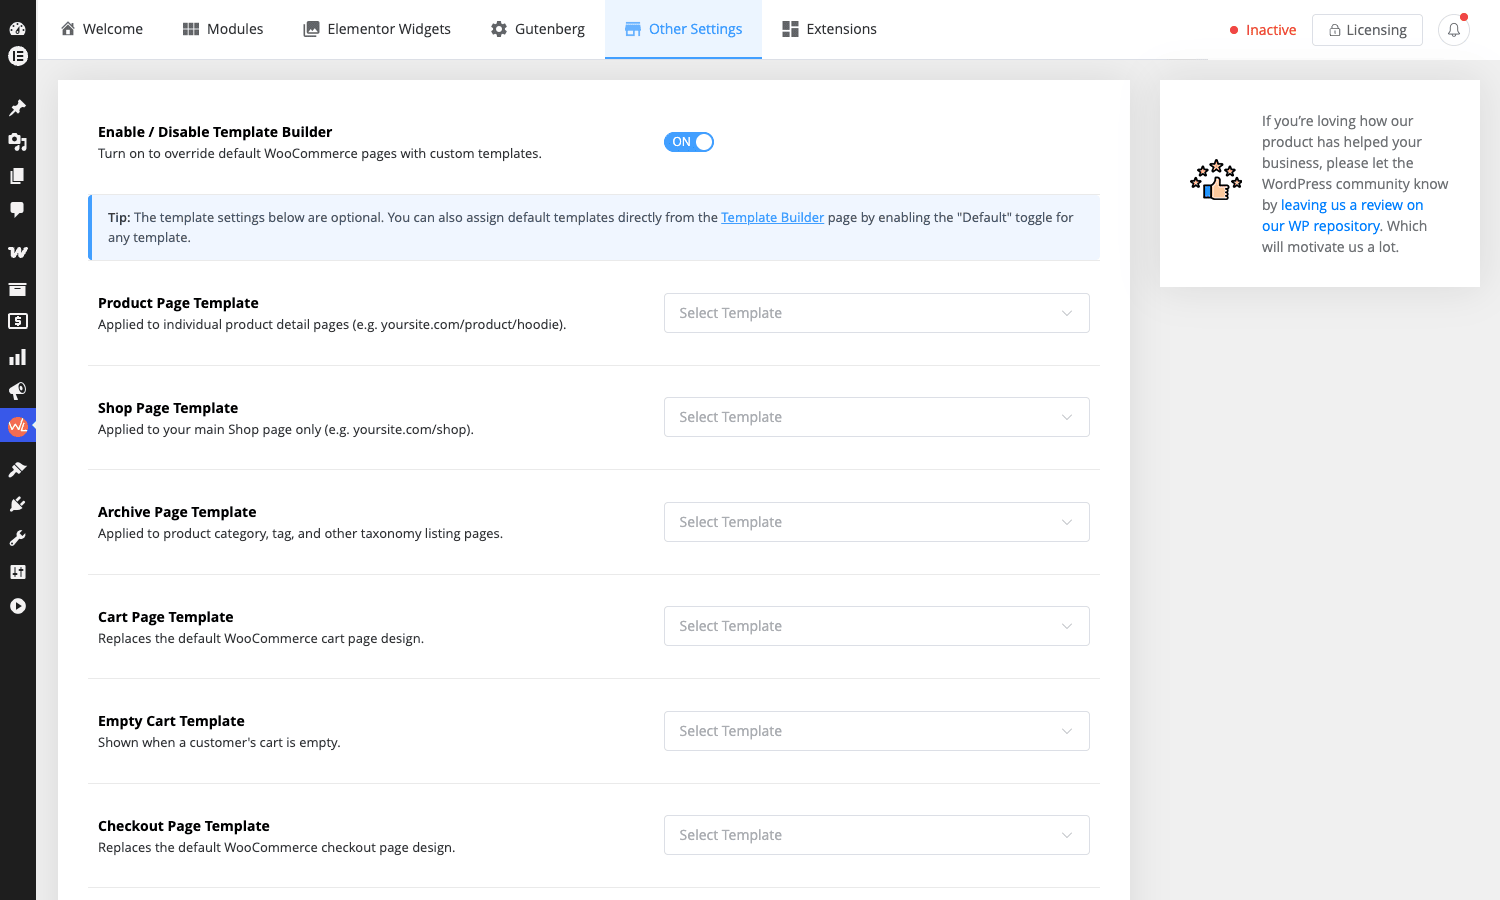
On the Templates Builder screen you pick which WooCommerce page you want to redesign (single product, shop archive, cart, checkout, my-account, thank you, empty cart, 404), give the template a name, and click Edit with Elementor. Inside the editor you’ll see the WooLentor widgets pre-categorized under sections like "Single Product Builder", "Cart Builder", "Checkout Builder", and so on. Drop them on the canvas, save, and the plugin replaces WooCommerce’s default rendering for that page type with yours.
There’s an assignment dropdown on each template (Set Condition) that lets you target it to all products, a specific category, a specific product ID, or a tag. That’s how you’d ship a different single-product layout for digital downloads than for physical goods, for example.
If you want to try every panel without installing locally, ShopLentor Pro on GPL Times boots into a one-shot WordPress sandbox with WooCommerce, Elementor, and the plugin already activated, so you can poke at the Templates Builder before deciding whether the workflow fits your store.
Single Product builder: every box you can actually move
The single-product page is where WooCommerce stores spend most of their CSS budget. It’s also the page Elementor Pro covers worst out of the box. ShopLentor’s single-product builder is the biggest reason most people install the plugin.
Inside the Templates Builder, create a Single Product template. The editor opens with a blank canvas and the WooLentor widget panel filtered to Single Product widgets. You’ll see, among others:
- WL: Title
- WL: Price
- WL: Image (the standard gallery)
- WL: Product Advance Thumbnails (a vertical or horizontal thumbnail strip layout)
- WL: Product Advance Thumbnails Zoom (with hover zoom)
- WL: Short Description
- WL: Add to Cart
- WL: Variation Swatches (color and image swatches for variable products)
- WL: Stock Progress Bar (a "Hurry, only X left" bar)
- WL: Sale Schedule Countdown (a timer based on the WC sale-end-date field)
- WL: Tabs (description, reviews, additional information)
- WL: Related Products
- WL: Upsells
- WL: Cross-sells
- WL: Social Share
- WL: Single Product Navigation (next / previous)
Drag these into any structure Elementor lets you build, save, and the plugin renders that template for every product matched by the assignment rule. You’re still using WooCommerce’s product data, so prices, variations, stock, and gallery images all come from the product edit screen as usual.
Two things to watch out for:
- The variation swatches widget needs the product to have variations enabled and a Color or Image attribute marked with the "Used for variations" checkbox. If you build a swatch UI on a product without variations, the widget renders nothing and Elementor doesn’t warn you.
- The Tabs widget replaces WooCommerce’s
woocommerce_output_product_data_tabs(). If a third-party plugin was adding a tab (Reviews from a Yotpo integration, a Specifications tab from a custom plugin), it will not show up unless it hookswoocommerce_product_tabscleanly. Most do.
If you want the front end to feel like a custom-coded product page (sticky add-to-cart on the right, big gallery on the left, tabs below, a recommendations carousel under the fold), this is a thirty-minute job in the Templates Builder. Doing the same thing by editing single-product.php in a child theme takes hours.
Checkout builder: field order, conditional fields, multi-step
The checkout builder is the second-most-cited reason teams install ShopLentor. Stock WooCommerce checkout is a single template. To change anything substantial you have to either drop a template override into your child theme or hook a dozen filters.
ShopLentor splits the checkout into widgets:
- WL: Checkout Login (the "Returning customer? Click here to login" form)
- WL: Checkout Coupon (the "Have a coupon?" toggle)
- WL: Checkout Billing
- WL: Checkout Shipping
- WL: Checkout Additional (order notes and any custom fields you added via the field manager)
- WL: Checkout Order Review (the products table)
- WL: Checkout Payment (the gateway list and the Place Order button)
- WL: Checkout Shipping Method (a standalone shipping-method selector if you want it separated)
- WL: Checkout Multi-step (and two style variants for the multi-step nav)
You drop these on the canvas in any layout. Two columns is the common pattern: billing and shipping on the left, order review and payment in a sticky sidebar on the right.
Field-level control comes from a separate screen: WooLentor -> Settings -> Checkout Fields. This is where the WooLentor_Checkout_Field_Manager class does its real work. Per field you can:
- Rename the label
- Hide the field
- Toggle required / optional
- Change the placeholder
- Switch the field type (text, email, tel, number, select, multiselect, checkbox, checkboxgroup, heading)
- Reorder by dragging
- Add new custom fields
- Apply translation strings (WPML and Polylang registration is built in, fires on
admin_init)
The manager hooks woocommerce_billing_fields, woocommerce_shipping_fields, woocommerce_checkout_fields, and woocommerce_default_address_fields at priority 9999. That’s intentionally last so it wins against most third-party tweaks, but if you’re stacking it with a checkout-specific plugin (CheckoutWC, FunnelKit), expect to debug field-order conflicts.
For multi-step, the WL: Checkout Multi-step widget reads the same field config and splits it across user-defined steps. You drag steps into the widget panel, drop the billing widget into Step 1, the shipping widget into Step 2, the payment widget into Step 3, save, and the front end renders a wizard with a progress bar. The woolentor_multistep_allsteps filter lets you alter the step list at runtime.
The honest gotcha here: the multi-step widget renders the same HTML as the single-step checkout, just chunked into divs with a JS pagination layer on top. If you have a payment gateway that does its own iframe-based UI (Stripe Payment Element, Square), test it on the multi-step layout before going live. The iframe sometimes initializes too early and you’ll see an empty gray box on Step 3 until the user clicks back and forward.
Shop archive and product filtering
The shop archive builder works the same way as the single-product one. Templates Builder -> new template -> Shop -> Edit with Elementor. The widget panel filters to archive widgets:
- WL: Product Grid (with the Modern / Editorial / Luxury preset variants)
- WL: Product Filterable Grid
- WL: Product Horizontal Filter
- WL: Advance Product Filter
- WL: Universal Product
- WL: Brand
- WL: Category
The product-grid widgets are configurable in the panel: columns, rows, order, sort, query by category or tag or featured, hide-when-empty rules. The three preset variants (Modern, Editorial, Luxury) are essentially different card layouts with different defaults. You can also build your own from the Universal Product widget if none of the presets fit.
The filter widgets are AJAX. Filter changes update the grid without a full page reload. The wlpf_filter shortcode and the wlpf_group shortcode let you drop the filter elsewhere on the page (a sidebar, a popup, a sticky bar) if you don’t want it inside the Elementor canvas.
One real annoyance: the product filter module has its own settings page under WooLentor -> Product Filter, and the filter config (which attributes to expose, the price slider’s step, the order of filter groups) lives there, not in the Elementor widget. If a client asks "where do I add a new filter", the answer is "not in Elementor", and that surprises people.
My Account: dashboard, downloads, addresses
Most WooCommerce themes leave the my-account page alone. It’s not a sales surface, so designers skip it. That’s a missed opportunity, because logged-in customers see it more than any other page on your store. ShopLentor lets you rebuild it.
Templates Builder -> new template -> My Account -> Edit with Elementor. Widgets:
- WL: My Account Dashboard
- WL: My Account Navigation
- WL: My Account Orders (the orders table)
- WL: My Account Downloads
- WL: My Account Address (billing and shipping cards)
- WL: My Account Edit Account
- WL: My Account Edit Address
- WL: My Account Login Form
- WL: My Account Register Form
- WL: My Account Lost Password
- WL: My Account Logout
- WL: My Account Reset Password
The navigation widget renders the tabs (Dashboard, Orders, Downloads, Addresses, Account details, Logout). The current view changes based on the URL’s endpoint query. You can build a dashboard with custom cards (e.g. "View Subscriptions" if you sell subscriptions, "Loyalty points: 450" if you wire it to a points plugin) and the tabs still work because the underlying URL endpoints are still WooCommerce’s.
The login form, register form, and lost-password form widgets all render the standard WooCommerce form HTML (same form action URLs, same nonces, same field names) so password reset emails, 2FA plugins, and BotGuard-style anti-spam keep working without surgery. Don’t confuse these with full custom login/register forms, which would bypass WC entirely.
If you want a single My Account page that doubles as a small dashboard with a featured product carousel, a "recently viewed" strip, and a help-center search, you can mix WooLentor account widgets with stock Elementor widgets on the same template. The plugin doesn’t lock you in.
Gutenberg blocks: when to use them instead
The Elementor side gets most of the marketing attention but the Gutenberg side is real. About thirty blocks, registered separately, working on any block-enabled page or template. The full list mirrors the Elementor widget set: cart, cart total, cart empty message, checkout billing form, checkout shipping form, checkout additional form, checkout coupon form, checkout login form, checkout payment, checkout order review, my-account, my-account dashboard, my-account address, my-account downloads, my-account edit, my-account login, my-account register, my-account lost password, my-account reset password, my-account navigation, my-account logout, my-account order, product advance image, product gallery, product navigation, product sale schedule, product social share, product stock progress bar, product thumbnails zoom image, cross-sell, customer review, return to shop, thankyou address details, thankyou order, thankyou order details.
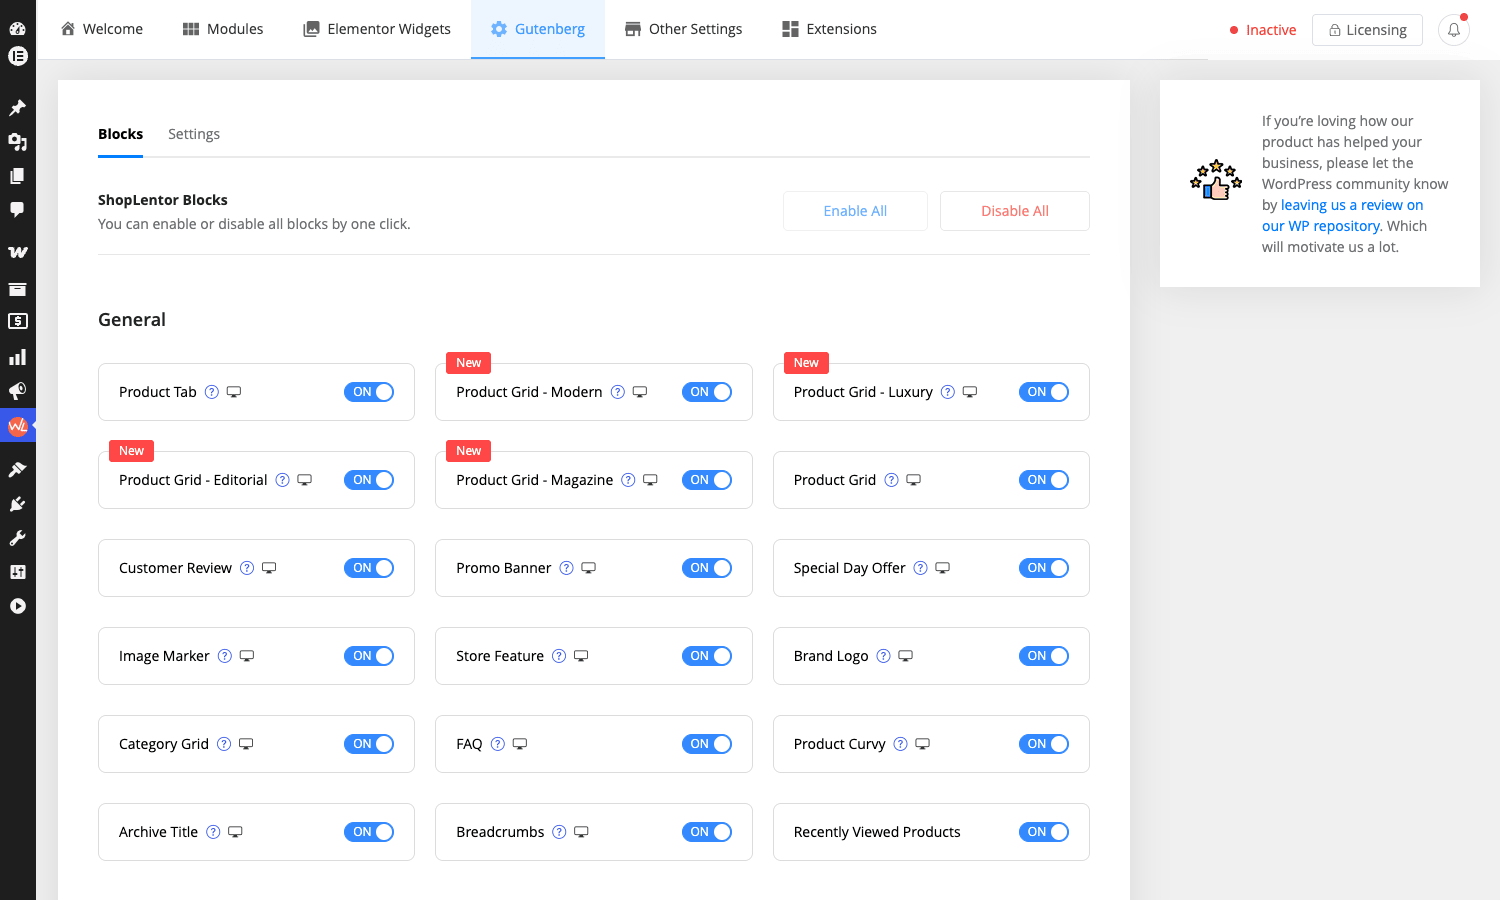
When does the Gutenberg side make sense?
- You’re using a block-based theme (Twenty Twenty-Four, Twenty Twenty-Five, Frost, Ollie). The full-site-editing experience expects blocks. Dropping an Elementor template into a block theme works but feels like welding two different frameworks together.
- You don’t want Elementor’s CSS and JS loading on the checkout. The Gutenberg blocks render server-side and add ~50 KB of styles total, compared to Elementor’s ~300 KB baseline plus widget-specific CSS. On a checkout page that’s measurable LCP time.
- You’re on a low-budget host. Elementor is heavy in the editor. Block-only setups feel snappier in WP admin.
- You want to ship a block pattern. The blocks can be saved as patterns and reused; the Elementor templates can’t.
When should you stick with Elementor?
- You already use Elementor for the rest of the site. Mixing frameworks is a maintenance tax.
- You need conditional logic that goes beyond what blocks offer (visibility per role, per geo, per cart contents).
- You want the multi-step checkout, the advanced product filter, the sale schedule countdown, the stock progress bar. Some of these only ship as Elementor widgets, not as blocks.
If you want a checkout page that’s pure blocks plus the ShopLentor field manager, that combination works today. Build the page in the Site Editor, drop the ShopLentor checkout-billing-form block in the left column and the checkout-order-review and checkout-payment blocks on the right, save. The field manager affects both block-based and widget-based checkouts because it hooks WooCommerce filters, not the rendering layer.
The modules drawer: what’s a toggle, what’s a separate purchase
WooLentor -> Add-ons is a grid of toggle switches for the optional modules. The grid is roughly twenty cards. The ones worth knowing about:
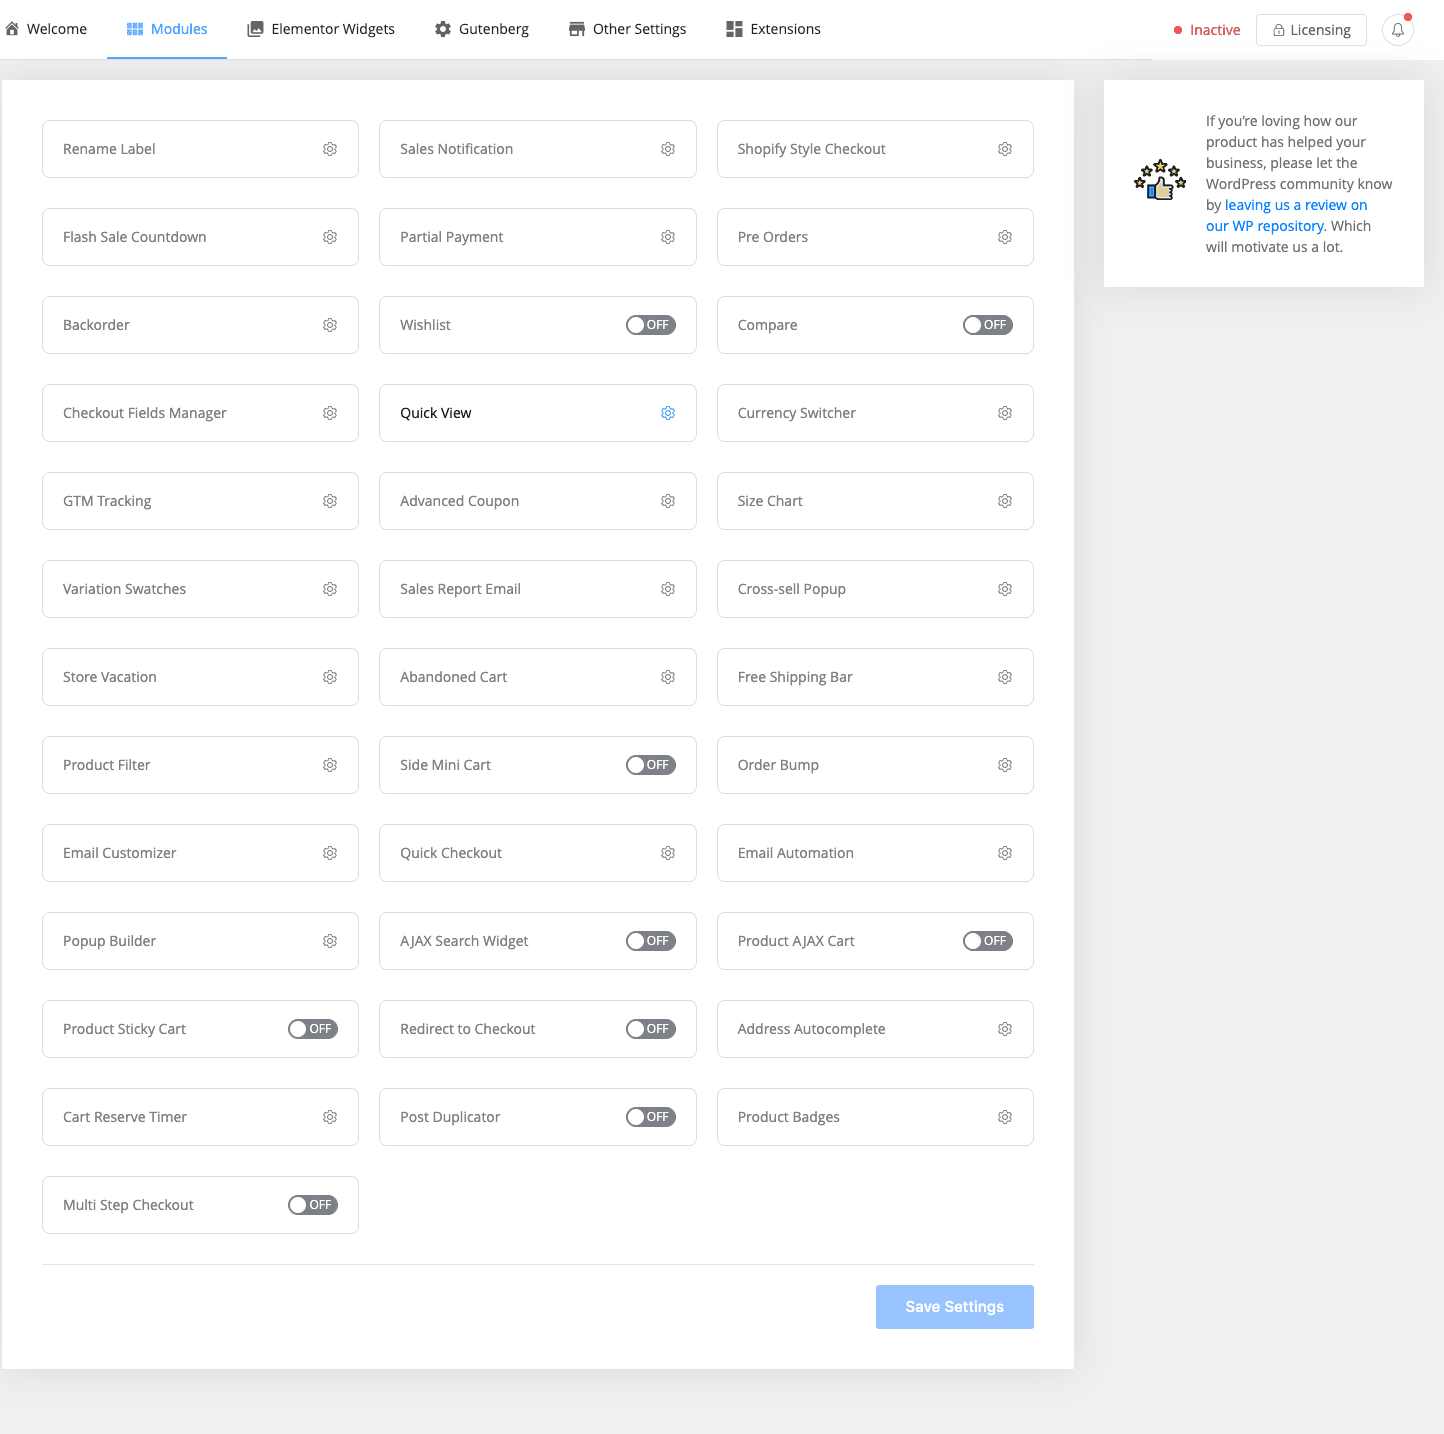
- Abandoned cart. Tracks logged-in and guest carts via a token cookie, fires a configurable email sequence to the address that started the cart (entered on the checkout page). Built-in dunning. Replaces a separate $50/year plugin for many stores.
- Email customizer. Drag-and-drop builder for the WooCommerce transactional emails. You design a master template and the plugin renders it for all order emails. Better than editing
woocommerce/emails/*.phpoverrides, which break every time WooCommerce changes the email markup. - Email automation. Trigger-based emails. E.g. "send a coupon to anyone who places a third order", "send a 7-day-after-delivery review request". Separate from abandoned-cart.
- Currency switcher. Multi-currency display. Manual rates or pulled from an exchange-rate API. Storage is in cookies so the switcher works for guests.
- Free shipping bar. A top bar that calculates "Add $X for free shipping". Reads from the WooCommerce free-shipping zone config.
- Pre-orders. Lets you sell out-of-stock products as pre-orders with a release date. Adds a "Pre-order" button instead of "Add to cart" and a small badge.
- Partial payment. Customer pays a deposit at checkout, the rest later. Wires into the order’s "balance due" status.
- Order bump. A one-click upsell shown on the checkout. Reads a product ID and a discount.
- Smart cross-sell popup. Shown after add-to-cart with a related-product suggestion.
- Quick view. Adds a magnifying-glass icon on product cards that opens the product in a modal.
- Quick checkout. Skips the cart page and goes straight from add-to-cart to checkout.
- Side mini cart. Slide-in cart drawer.
- Product filter. The standalone AJAX product filter discussed in the shop archive section.
- Size chart. A
[woolentor_size_chart]shortcode that renders a per-product size chart on the single-product page. - Store vacation. Disables checkout for a date range with a custom notice. Useful for solo shops on holiday.
- Cart reserve time. Holds stock in a customer’s cart for X minutes. Useful for limited-stock drops.
- Badges. Sale, new, bestseller, custom-text badges on product cards.
- Google address autocomplete. Wires the billing-address field into the Google Places API. Bring your own API key.
- GTM conversion tracking. Pushes WC events (add_to_cart, begin_checkout, purchase) into the
dataLayerfor Google Tag Manager. - Popup builder Pro. Modal popups (exit-intent, scroll-based, time-based) tied to WooCommerce events.
That’s a lot of surface area for one plugin. The modules each load their own classes on the init action and they’re cheap when toggled off (the module manager registers them but doesn’t instantiate them). Don’t enable everything at once just because you can. Each module adds a bit of admin UI and a bit of front-end CSS or JS even when there’s no configuration entered. If you don’t use the size chart, leave it off.
Don’t override every WooCommerce template just because you can
ShopLentor ships a wl-woo-templates/ folder with full template overrides for the cart, checkout, my-account, thank-you, empty-cart, and login forms. WooCommerce honors these because they sit at the right path and the plugin tells WC where to find them via the wc_locate_template filter. They are what makes the Elementor builder work: when you save a Cart template, the plugin sets a flag that tells the override to call do_action('woolentor/builder/content'), which renders your Elementor canvas in place of the WooCommerce default.
That’s fine for the plugin’s own templates. It’s not fine as a general pattern for your child theme. Here’s why I bring it up.
WooCommerce moves its templates. The cart template (woocommerce/templates/cart/cart.php) has been revised in several releases as the team migrates the checkout and cart toward block-based rendering. The classic cart template is still shipped, but new fields, new notices, and new hook positions appear in it over time. A child-theme override copied today and forgotten for a year will be silently stale: the cart page renders, the customer adds an item, but the new "Estimated shipping" notice that WooCommerce ships in a future release won’t appear because your stale override doesn’t include the markup that hooks it.
I’ve seen this go wrong on two consulting clients in the last year. Both had inherited a child theme with woocommerce/cart/cart.php overridden to add a custom "Apply gift card" row. Both upgraded WooCommerce. Both lost the new tax-display formatting that WC introduced because the override didn’t include the relevant apply_filters calls. Neither client noticed until a customer asked why the tax line looked different from the receipt.
The cost is real: a developer hour to diff your override against the new WC template, plus the loss of trust if the tax line was wrong on live orders for a week. The fix is to override partials, not whole files (e.g. override cart/cart-totals.php if you only care about the totals area) or, better, hook the WC actions and filters that already give you the same insertion points.
ShopLentor’s wl-woo-templates/ overrides are kept current because the plugin’s authors update them with each WooCommerce release. Your hand-edited child-theme overrides are not. So: install ShopLentor for the builder, but in your own child theme, never copy a WooCommerce template wholesale unless you accept the maintenance debt. Use woocommerce_before_cart, woocommerce_after_cart_contents, woocommerce_review_order_before_payment, the woocommerce_cart_item_name filter, and the dozens of other hooks WC exposes. Your changes survive the next upgrade. Your override won’t.
ShopLentor vs JetWooBuilder vs Elementor Pro WooCommerce
There are three real competitors in this space and they don’t price the same way.
ShopLentor Pro is a one-product plugin: $59 per year for one site on CodeCanyon, $39 from the vendor site at woolentor.com on sale (usually $79 regular). The CodeCanyon license includes six months of support; lifetime is around $199. About 50 Elementor widgets, 30 Gutenberg blocks, 20 modules. Bundle size with everything loaded: roughly 1.4 MB of widget CSS/JS combined on a single-product page.
JetWooBuilder for Elementor by Crocoblock is part of the Crocoblock suite. Standalone it’s $43 per year for one site, but the realistic comparison is the full Crocoblock subscription at $199 per year which also gives you JetEngine, JetSmartFilters, JetElements, and a dozen other Jet plugins. JetWooBuilder by itself ships about 18 widgets for single-product templates, plus archive, cart, checkout, my-account, and thank-you builders. Smaller widget count than ShopLentor, but each widget tends to be deeper (more style controls, more conditional options). No Gutenberg side. Bundle size: about 800 KB combined.
Elementor Pro WooCommerce widgets ship as part of Elementor Pro at $59 per year for one site. About 20 widgets total. Single-product template builder, archive builder, my-account builder, and basic checkout / cart widgets. The checkout widget is the limited one I described in the intro: it renders WooCommerce’s form as-is with styling controls only. No multi-step. No field manager. No modules.
The three plugins also differ in approach. JetWooBuilder treats every widget as a fully-controlled component (the gallery has fifty style controls, the add-to-cart has its own loader animation library). ShopLentor treats widgets as wrappers around WooCommerce’s own functions, which means fewer style controls but better compatibility with WC’s hook architecture. Elementor Pro Woo widgets sit in the middle.

If you already have Elementor Pro and you only need light WooCommerce theming, the built-in widgets are enough. If you want a multi-step checkout, field-level checkout control, and a my-account dashboard you can actually design, ShopLentor or JetWooBuilder are the choices. If you want the full Jet bundle (custom post types, smart filters, dynamic content) and don’t mind paying for the whole suite, Crocoblock is the long game.
Developer reference: hooks, filters, classes
Here are the bits a developer building on top of ShopLentor will reach for. The woolentor_* prefix is consistent; the WooLentor rename to ShopLentor did not touch the code.
Custom action hooks
woolentor_before_checkout_order and woolentor_after_checkout_order fire around the order-review block. Drop trust badges, a SSL notice, or a "100% money-back guarantee" line above the Place Order button.
add_action( 'woolentor_before_checkout_order', function() {
    echo '<div class="trust-row"><img src="' . esc_url( get_stylesheet_directory_uri() . '/img/secure-ssl.svg' ) . '" alt="Secure checkout"> All payments encrypted with TLS.</div>';
});
woolentor_cart_actions fires inside the cart-actions row (next to the Update Cart and Continue Shopping buttons). Use it to add a "Save cart for later" or "Email me my cart" button.
add_action( 'woolentor_cart_actions', function() {
    echo '<button type="button" class="button save-cart">Save cart</button>';
});
woolentor/builder/content is the master template-render action. It’s what the plugin’s own template overrides call to swap in your Elementor canvas. You can use it in your own template overrides if you write a custom page that needs ShopLentor’s builder content.
woolentor_checkout_top_content and woolentor_checkout_content are insertion points inside the checkout-form override (wl-woo-templates/form-checkout.php).
woolentor_thankyou_content fires at the top of the thank-you template. Drop a "Track your order" CTA, a social-share row, or a "Sign up for our newsletter" form for one-time customers.
Custom filters
woolentor_minicart_heading, woolentor_minicart_subtotal, woolentor_minicart_viewcart_btn, woolentor_minicart_checkout_btn let you change every label in the side mini-cart without translation files.
add_filter( 'woolentor_minicart_heading', function() {
    return is_user_logged_in() ? 'Your bag, ' . wp_get_current_user()->display_name : 'Your bag';
});
woolentor_empty_minicart_body_content lets you replace the "No products in the cart." line with a custom CTA.
add_filter( 'woolentor_empty_minicart_body_content', function() {
    return '<p>Your bag is empty.</p><a class="button" href="' . esc_url( wc_get_page_permalink( 'shop' ) ) . '">Browse the shop</a>';
});
woolentor_checkout_field_type adds custom field types to the checkout field manager. Default types are text, email, tel, number, select, multiselect, checkbox, checkboxgroup, heading. Hook in to add your own.
add_filter( 'woolentor_checkout_field_type', function( $types ) {
    $types['date'] = 'Date picker';
    return $types;
});
woolentor_multistep_allsteps lets you alter the multi-step checkout’s step list at runtime. Useful if a customer’s cart conditions should add or remove a step (e.g. drop the shipping step if the cart is digital-only).
add_filter( 'woolentor_multistep_allsteps', function( $steps ) {
    if ( WC()->cart && WC()->cart->needs_shipping() === false ) {
        unset( $steps['shipping'] );
    }
    return $steps;
});
woolentor_builder_template_width controls the wrapper width of templates rendered with the ShopLentor canvas templates. Default is 1200px.
add_filter( 'woolentor_builder_template_width', function() {
    return 1440;
});
woolentor_upsell_display_args filters the WP_Query args used by the upsells widget. Use it to override the order, limit, or query criteria.
add_filter( 'woolentor_upsell_display_args', function( $args ) {
    $args['orderby'] = 'rand';
    $args['posts_per_page'] = 4;
    return $args;
});
woolentor_price_filter_min_amount / woolentor_price_filter_max_amount adjust the price-slider range. Useful if your shop has one $10,000 product skewing the slider.
add_filter( 'woolentor_price_filter_max_amount', function( $max ) {
    return min( $max, 5000 );
});
woolentor_product_grid_modern_settings, woolentor_product_grid_editorial_settings, woolentor_product_grid_luxury_settings let you change the defaults of each grid preset programmatically. If your brand needs 3 columns instead of the default 4, hook this once and you don’t have to remember to set columns=3 on every grid widget.
Shortcodes (if you avoid Elementor)
[wlpf_filter id=":group_id"]and[wlpf_group id=":group_id"]render the AJAX product filter.[woolentor_size_chart id=":chart_id"]renders a size chart on a product page.[woolentor_order_bump id=":bump_id"]renders an order bump anywhere on the checkout (the bump editor lives under WooLentor -> Order Bump).[woolentor_quick_checkout_button product_id=":id"]renders a button that skips the cart and goes straight to the checkout with that product added.
The checkout field manager class
WooLentor_Checkout_Field_Manager is the singleton that wires the field-manager UI into WooCommerce. It hooks every WC field filter at priority 9999 (woocommerce_billing_fields, woocommerce_shipping_fields, woocommerce_checkout_fields, woocommerce_default_address_fields) and applies your saved configuration on top of WooCommerce’s defaults.
If you’re building a plugin that needs to add a field after ShopLentor has had its say, hook the same filters at priority 10000 or higher:
add_filter( 'woocommerce_checkout_fields', function( $fields ) {
    $fields['billing']['billing_company_vat'] = [
        'label'       => 'VAT number',
        'placeholder' => 'EU123456789',
        'required'    => false,
        'class'       => [ 'form-row-wide' ],
        'priority'    => 35,
    ];
    return $fields;
}, 10000 );
If you need the field manager to never touch a particular field, the cleanest path is to leave it untouched in the WooLentor settings (don’t enable the manager for that field) rather than try to unhook the class. Hooking at 9999 makes the manager difficult to deregister.
Template overrides if you need them
The plugin’s overrides live at woolentor-addons-pro/wl-woo-templates/. The file list mirrors WooCommerce’s structure: form-checkout.php, cart-elementor.php, cart-empty-elementor.php, form-login.php, my-account.php, thankyou.php, plus page/woolentor-default.php, page/woolentor_fullwidth.php, and page/woolentor_canvas.php for the three page layouts the builder offers.
If you really must override one of these, copy to your-theme/woolentor/wl-woo-templates/<file>.php and the plugin’s wc_locate_template filter will use yours. Same advice as before: only override what you absolutely need, and keep an eye on plugin updates.
REST endpoints
The plugin does not expose a public REST namespace for orders or products. It uses the standard WooCommerce REST API for everything that needs it. The admin pages talk to a private AJAX endpoint at admin-ajax.php with action names prefixed woolentor_*. These are not stable; treat them as internal.
Compatibility and gotchas
- WooCommerce HPOS (high-performance order storage) is supported. The main plugin file declares compatibility via
before_woocommerce_initandFeaturesUtil::declare_compatibility('custom_order_tables'). - Elementor version requirement. Elementor free is enough; Elementor Pro is optional. A few ShopLentor widgets compete with Elementor Pro’s own (single-product title, price, image, add-to-cart). If you have both active, decide which you’ll use per template to avoid double-rendering.
- Caching plugins. The cart, mini-cart, and checkout pages should already be excluded from page cache by your caching plugin (WP Rocket, LiteSpeed Cache, W3 Total Cache all do this by default). If you build a custom page that renders a ShopLentor cart widget, exclude that URL from cache too.
- Multi-step checkout + Stripe Payment Element. Test this before launch. The Payment Element loads via JS, and the multi-step layout sometimes initializes it on a hidden step. If that happens, switch to single-step or use Stripe’s Card Element instead.
- WPML / Polylang. Checkout field labels are registered for translation on
admin_init. Other UI strings use standard__()/_e()calls with thewoolentor-protext domain, so they’ll be picked up by string-translation plugins. - PHP version. The plugin runs on PHP 7.4 and up. It does not use PHP 8.x-only syntax, so 7.4 hosts are fine, but consider upgrading anyway because WooCommerce itself drops 7.4 support soon.
- Server requirements. Nothing exotic. The Elementor editor is the bottleneck on shared hosts; if your single-product template has 20+ widgets, the editor will feel slow on a $5/mo plan. The front end is fine because rendered output is cached HTML.
A real-world note from a build I shipped last month: combining the ShopLentor checkout with CartFlows Pro for one-page funnels works, but you have to pick one to own the order form. We had both plugins trying to render checkout HTML on the same URL and the page rendered twice. Fix was to use CartFlows for the funnel pages and ShopLentor for the regular WC checkout, with no overlap. Worth knowing if you’re stacking conversion tools.
Pricing and licensing
The plugin is sold three ways. CodeCanyon at $59 for the regular license (one site, six months of support, lifetime updates while you’re a customer). The vendor site (woolentor.com) sells it as ShopLentor Pro at around $39 on sale (regular $79) for a one-year-one-site plan, with Agency and Lifetime tiers higher up. Bundle deals occasionally appear during WordPress holiday seasons.
The GPL Times copy ships the same Pro zip with the developer license already wired in. You install it on as many sites as you want, you get updates with the rest of the GPL Times catalog, and there’s no per-site activation step. That’s the right buy if you build sites for clients or run more than one store of your own. Single-store hobby projects are usually better served buying the official license once and forgetting it.
ShopLentor Pro is GPL-licensed (GPL-2.0+ in the plugin header), which is what makes the redistribution legal in the first place.
FAQ
Is ShopLentor the same as WooLentor?
Yes. HasThemes rebranded WooLentor to ShopLentor a while back, but the plugin’s text domain, option keys, and hook names still use woolentor. The dashboard menu and the vendor site say ShopLentor; the source code says WooLentor. They are not different products and you don’t need to migrate anything when the name changes.
Do I need Elementor Pro for ShopLentor Pro to work?
No. Elementor free is enough. A handful of WC-specific Elementor Pro widgets overlap with ShopLentor’s own, but ShopLentor’s widgets stand on their own and don’t depend on Pro. If you only need the WooCommerce builder side and don’t care about Elementor’s Theme Builder for headers and footers, you can run ShopLentor on free Elementor and skip the Elementor Pro license.
Why is the single-product Elementor canvas slow to load?
Because Elementor renders every widget in the editor as a live preview, and ShopLentor templates often have 15-20 widgets per single-product page. On a shared host with PHP 7.4 and 256MB memory, the editor can take 8-12 seconds to open. Two real fixes: bump PHP memory to 512MB, and prune widgets you’re not actually using. The front end is unaffected because the rendered HTML is cached.
Will the multi-step checkout work with Stripe Payment Element?
Sometimes. The Payment Element initializes on page load, and the multi-step widget hides the payment step inside a div that’s not visible until the user navigates to it. Stripe’s element occasionally initializes against the hidden div and renders empty. The workaround is to either use Stripe’s older Card Element (which is more forgiving), or to use the single-step checkout for sites that depend on Payment Element. Test on a staging site with real cards before launching.
Does the Gutenberg side replace the Elementor side, or are they separate?
They’re separate. Same plugin, two rendering layers. The Elementor widgets render via Elementor’s pipeline. The Gutenberg blocks render via WordPress’s block pipeline. They share the underlying WC data and the field-manager configuration, but you can’t use an Elementor template inside a Gutenberg page or vice versa. Pick one per template and stay consistent.
Can I migrate a Single Product template from JetWooBuilder to ShopLentor?
Not automatically. Both plugins store their template as Elementor JSON in postmeta, but the widget IDs and the field schemas differ. You’d export the Elementor JSON from JetWooBuilder, rewrite each widget block by hand to the ShopLentor equivalent, and import. For a 15-widget template that’s a couple of hours. There’s no migration tool. If you’re switching from JetWooBuilder, build the new template from scratch using a screenshot of the old one as reference.
What happens to my custom templates if I deactivate ShopLentor?
The templates live in the database as posts of type woolentor-template. They survive deactivation. Reactivate the plugin and they’re back. But while the plugin is off, WooCommerce falls back to the default theme rendering for the cart, checkout, my-account, and product pages, so your customers will see a different layout until you reactivate.
Does ShopLentor support WooCommerce Subscriptions or other premium WC extensions?
The builder widgets render the standard WC product, cart, and checkout, so any WC extension that hooks the standard filters (Subscriptions, Bookings, Memberships, Advanced Coupons) works the same way on a ShopLentor-built page as on a theme-rendered one. If a third-party plugin overrides a WooCommerce template, that override fights with ShopLentor’s template. Resolution is usually first-loaded-wins via template path; debugging is by reading both plugins’ wc_locate_template filters.
Final thoughts
ShopLentor Pro is the kind of plugin that earns its place once you hit the limits of stock Elementor Pro on a WooCommerce store. The single-product builder is the headline feature. The checkout builder, with its field-manager and multi-step layouts, is a close second. The Gutenberg side is a real alternative for block-based themes that don’t want Elementor’s runtime cost.
There are sharp edges. The Templates Builder UX is unpolished. The Add-ons grid is a wall of toggles without much explanation per card. The multi-step checkout has the iframe-init bug with the newer Stripe Payment Element. The vendor docs are thin in spots and you’ll find more answers on the WordPress forums than on woolentor.com. None of this is a deal-breaker, but it’s worth knowing before you commit a client project to the plugin.
What I’d recommend: install it on a staging copy of your store, build a Single Product template and a Checkout template, run a real test order from cart to thank-you with your actual payment gateway, and decide based on that. If both render cleanly and your gateway works, you’re set. If not, JetWooBuilder is the next plugin to try.
ShopLentor Pro is available on GPL Times with the developer license already wired in, so you can spin up a sandbox, build a template, and move it to your store without a per-site activation step. That makes the staging-and-test cycle painless, which is exactly what this plugin needs to evaluate.